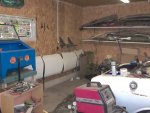
Wailing & gnashing of teeth...

I couldn't have without your guidance and firm belief in my abilities! There's no question about that--you've been an extraordinary help, Resto. :clap:
All I did was tell you that you could do it, and you've proven me right!
 
So, on to actual reconstruction...

For whatever reason, my camera work here was a little sketchy, meaning sometimes I forgot it in the house, and others I just forgot to use the thing. I'm a little irate about it, but I was "in the zone" and wasn't going to stop for pictures.

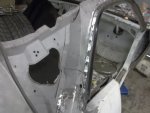
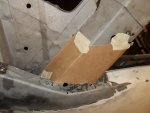
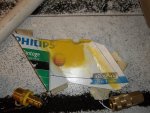
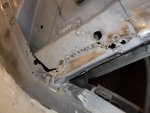
First, I started making templates for the large patches needed.

Driver's side:

100_0328.JPG

100_0330.JPG

100_0333.JPG


That was on the driver's side. The yellow paint was shot from the back to give me an idea of where I had a great excess of material in the template. I didn't document the process on the LH side, due to being in the groove. Next, I started fabricating the patches out of one of the damaged trunklids Summit shipped me that they didn't want back. :dance:

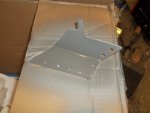
All the work in these next shots was done with my tin snips, standard claw hammer, bench grinder and a 4" vise. The metal was cut from the trunk lid using my 4½" angle grinder with a cutoff wheel. The only "special" tool I used was a $63 pneumatic hole punch. I wanted to point that out not because of my mad skills (yeah, right!) but because it's important to know that you don't need the shear, brake, and all those other fancy tools you see folks using on TV, in YouTube videos, etc. I have an air saw but I never even touched it during this phase.

That hole punch is the absolute bomb, though, so if you're going to be doing any serious sheetmetal work, I can't recommend it enough (Astro Onyx 605ST). Its backside is a panel flanger which I haven't needed yet, but I have tested. It rocks!

100_0381.JPG

100_0383.JPG

100_0385.JPG


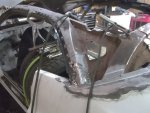
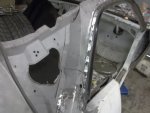
You probably noticed that the RH patch is much different looking than the template. I remember hearing at some point that there are some patches best left as a multi-piece repair. This turned out to be one of those patches. There's a slight contour at the window opening that's just too hard to attempt on a piece that wraps around the back of the structure. The little tab was welded to the structure to get me a little strength for the next part of the repair.

The driver's side was much more straightforward. Here's the test fit:

100_0387.JPG


And, welded in place with some of the grinding done:

100_0410.JPG


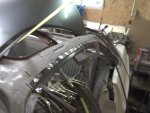
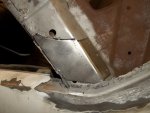
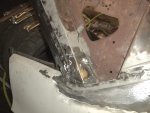
The passenger's side required a lot of futzing to patch it all back together, eventually becoming a 3-piece patch before I was happy with the results. I didn't take a lot of pictures, unfortunately.

100_0393.JPG

100_0406.JPG


You can see in that last picture that the RH driprail is in place. That was actually a later progress picture, but it shows some of the patch so I used it. :D
 
dont ever be too upset about multi unit patches..without a huge mold and press...sometimes its the ONLY way...mind you..you can get creative with a hammer and a board and just work away at it

dunno how much more you have to do..but ill toss this out there....
while the bench vice "can" be the KING of stuff like this..especialy "sharp" folds..i found one WAY better a small section of RR track..now down at the base you can tack weld on a strip of round stock for "rolled" bends..just hammer away at it with it clamped on one side..

its funny i HAVE the bender break sheer..and 99% of the time its angle grinder, vice, rr track and hammer..nothing else

the patches are lookin damn good...you should see the alfa i was/am/will be when i have time..working on with patches..some of those are down right UGLY in comparison due to the complexity...the more complex the item you need to make the uglier it gets..and i dont think there is any way around that
 
That's some extremely impressive repair work! We NEVER see cars like that out here. Your perseverance is very inspiring!
 
I'm not concerned about the multi-piece patches, 69.5... it was the only way it was going to get done, short of cutting a piece out of another car. Even with a metal brake, the bends were so close together and so tight it wouldn't have been easy, if possible.

JC, I don't doubt that this kind of damage would be nearly non-existent out your way. Desert climate for the most part, so even if moisture collected it would evaporate soon. Regardless, though it wasn't what I expected to find and it was a surprise, this car represents so much less work than would my other Challenger option at the time of purchase: a Hemi Orange '70 383HP non-R/T owned by a friend. That car is not only in far worse shape rust-wise, but it was also systematically stripped during the early part of the '90s during the first real boom when that friend was heavily into swap meets.

This is a learning experience, so I definitely appreciate all the kind words. I've never attempted any of this stuff previously, and it's going quite well for a first timer if I do say so myself. No regrets, that's for sure. I'm actually kind of happy to have the opportunity to do the things I've had to do... because now I know how to do them. :dance:
 
those "tight" bends again is where the RR track chunk is KING..you can litteraly make real nice u channels as narrow as a drip rail...with not a wholel lot of effort...just givin ya a trick should you need it...ive also in the past made my initial fold..and then dropped a 1/4 inch chunk of plate in the vice, clamped my steel to that and then folded over it..
 
those "tight" bends again is where the RR track chunk is KING..you can litteraly make real nice u channels as narrow as a drip rail...with not a wholel lot of effort...just givin ya a trick should you need it...ive also in the past made my initial fold..and then dropped a 1/4 inch chunk of plate in the vice, clamped my steel to that and then folded over it..
Spoken like a guy who knows how to do stuff. :)
I use a chunk of 8" I beam I got from a scrap yard for $10. It's had some serious metal-work done on it...
 
I almost bought an anvil at the Iola swap meet. It was approximately the length of an LA cylinder head and a little better than a foot tall... but the thought of carrying it back to the truck dissuaded me. That, and my ride looked at me and reminded me his Tahoe is only a half-ton. :D

I need to pick up some interesting scrap like that, though. I know it's very handy to have those things around.
 
there is a distinct reason i have various scraps..like THICK chunks of tube for bending steel over....but really one good chunk of plate in a vice is a must have...and ida laughed a year ago when someone told me to get a short chunk of RR track...now that i have one ...its WAY better than any anvil....roll it on a side and you have a broad hump or a broad valley or a tight lip

more often than not i still turn to my vice for small folds but then finish them over the RR track for a "smooth" 90 vs the hardass one you get in a vice
 
I've got a nice little 75lb NC farriers anvil with a beautifully flat surface, but the real handy parts of it are the hardy holes and the horn...
I've made up several tools to fit the hardy hole, for forming bowl shapes and rounding over edges.

The anvil cost me well over $200, though...

I still use the I beam more for most jobs.
Pipes of various diameters are indispensable, as are dead-blow hammers and wooden and rubber mallets.

One of my best tools is the old Peter Wright post vise I picked up for $20 at an auction. I made a stand for it and mounted it on a 7/16" chunk of boiler plate. I just wobble-walk it close to whatever I'm working on, beats the Hell out of back-and-forth trips to my bench vise.
 
lol..i "had" the vise mounted...it was a pain...it gets moved to the project as does the RR chunk(which is basicly i beam bottom and anvil top)...ill have to shoot a pic of its current configuration

another great one to have is a brass hammer saved JUST for body work..my other 2 faves are the brass "head" and the mini sledge head...for those things where you simply need weight but subtleness and more fine control
 
This is a learning experience, so I definitely appreciate all the kind words. I've never attempted any of this stuff previously, and it's going quite well for a first timer if I do say so myself. No regrets, that's for sure. I'm actually kind of happy to have the opportunity to do the things I've had to do... because now I know how to do them. :dance:

This is exactly why I decide to tackle most of my automotive rebuilding myself. ;) Looking good Doc, can't wait for more pics! :2thumbs:
 
Moving on...

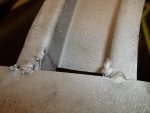
I had a roof support that was almost sure to cause an infuriating rattle. I say almost because it was well-glued to the original roof with deadening compound and probably didn't make much noise, if any, previously. It was held in place by one spot weld out of four attempted... UAW craftsmanship at its finest. :doh: It won't rattle now:

100_0391.JPG


While I wasn't quite done preparing the roof structure, I was ready for some forward progress and was far enough along that I could install the driprails. This is where the hole punch earned its rightful place in my life. I tried to replicate the pattern of the factory spot welds for my plug welds on the roof rails. This would've been an enormous pain in the ass with a drill!

100_0388.JPG


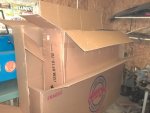
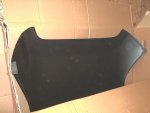
Installing the driprails means the roof comes into play. Even though there are "guides" stamped into the roof structure, it's virtually impossible to get the rails in place correctly without using the roof panel as a guide. So, it was finally time to unbox it after more than 14 months darkening a corner of my garage. Year One did not take any chances shipping the roof. The original box was inside another box, with a box stapled atop it, with boxes as spacers inside to keep the original box centered in the larger box made from two boxes. It was as confusing as it sounds. As shipped, the final container was literally 8'x6'x20". My guess is that their shipping costs are high due to enormous overhead cardboard costs. :D I probably don't need to explain the sheer joy of getting that much garage space back after a year, either.

100_0395.JPG


Ah, but it worked. What lay inside (among still more boxes) was undamaged, and a sight to behold. Hello, beautiful!:gaga:

100_0397.JPG

100_0398.JPG


Holy shit! I found my doors! :D

100_0401.JPG
 
Nothing fitted or welded yet, but this was the first shot taken of the roof sitting on the car. It was an inspiring moment, really... a real sign of progress that didn't involve cutting stuff off the car, sandblasting, or grinding (yet). This fueled my determination like almost nothing else.

100_0403.JPG


While it was in place, I fitted the roof "correctly" which is to say I centered it fore-and-aft and side-to-side (more on that later). I tack-welded the driprails in a couple of spots to keep them positioned correctly, then (of course) I had to lift the roof off again so I could access the driprail flanges and commence to plug-welding them in place. This represents 11% of the times I would repeat the "roof on/roof off" procedure. Yep, I did this eight more times, two of them just making sure I didn't botch the driprails--which I thought I did anyhow (more on that later, too). Check out my one-man roof-lifting apparatus. Two ratchet straps, one anchored to the light fixture hooks and looped through C-clamp pliers clamped to the upper rear window frame, and the other across the garage door rails. Laugh all you want--it worked!
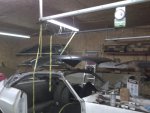
100_0404.JPG


The fitting and welding of the driprails was one of those fast 'n' furious deals where I didn't think to grab the camera. That's OK, because it's an ugly process. Quite simply put, they're perfect reproductions--which is a nice way of saying, "They don't fit worth a damn." :doh: They really don't contour correctly, due to the complexity of the shape. This is not a "made in China" problem, it's simply a metallurgical reality: sheetmetal of that gauge just doesn't draw into the die and hold its shape the way you'd hope. You're probably thinking, "How could Hugh possibly know these things, Jass?" Pretty simple, really: after beating the shit out of 'em to get them installed, they looked exactly like what was left of the originals prior to my cutting them off the car. Dodge had rigs and welding machines; I had Grandpa's hammer, a few C-clamp pliers, and a MIG welder and got identical results:
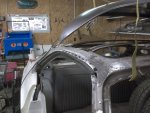
100_0405.JPG

100_0406.JPG

100_0407.JPG

100_0408.JPG


Yes! Real, visible, "I'm putting actual restoration parts on the car" progress! :dance:

Now back to our previously-scheduled patching. :doh: A little more welding, a little more grinding...
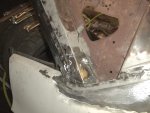
100_0410.JPG


A little more "damn it, I forgot to take pictures during the process" too. However, you can see the repaired areas are done under the black rattle-can primer and paint. I should note here that for how bad the driprails themselves were, and the obvious rot in the corners of the vinyl-top/roof seam area, overall the structure was really pretty good. Chrysler made no effort whatsoever at corrosion protection in those areas. It was raw steel from day one. Realistically, if it looked that good after 40 years, blasting all the powdery rust off and priming/painting the structure--even with Krylon--is/was total overkill. I just couldn't not do it, though.

No more C-pillar hole!
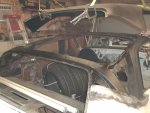
100_0416.JPG


And the hole and black-rust nastiness at the top of the A-pillar near the driprail is once again solid as new, if not moreso. :dance:
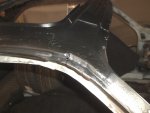
100_0417.JPG
 
Thank you, kind sir! I really did think I'd screwed up the driprails after tacking them in place, which is why I tried the roof again. Paranoia was the order of the day. Nope, they're just really that gnarly of pieces to install, but from what I could tell of the originals they weren't any better.

I've gotta be honest, though... even knowing what's involved and how to approach it, I'm loathe to repeat this repair on a future project. :dgt:
 
I don't blame you a bit, not sure I'd tackle that the first time. I do believe the next car I purchase will be done to damn-near done. I don't want any more big projects.

If I jump on this RC after the first of the year that will be big in the custom bumper/body protection sense, as far as the body, it's cherry. Mechanically, I believe it runs or will be easy to get running again.
 

SiteLock

SiteLock
Back
Top