69 Barracuda FB. The next evolution

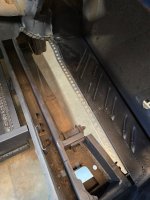
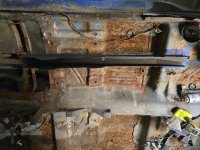
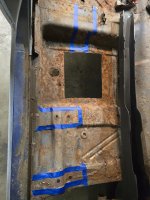
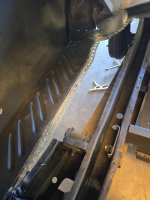
The driver side bent flange pieces are now welded together and attached to the car. After I'm done with the fuel lines, pump and filters, the floor will be drilled and spot welded to the top of those horizontal sections of those flanges.

Walking around the car, I hit the surface rust around the trunk opening and the rear valance area with some rust reformer. Those areas will get sanded back later when I'm ready to smooth out the drain channels.

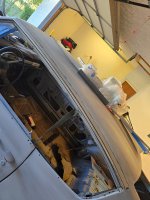
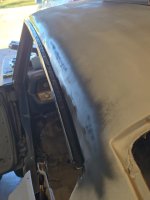
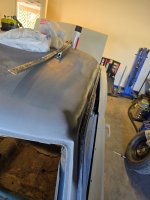
Over the driver door drip rail area, I chipped out the last of the old cracked sealant down to the rusty metal below. The rust on this side was way worse than the other side. Even after using a wire wheel and a RO sander, there was still lots of rust remnants in the bottom of the entire length of the top channel. So once again, it got hit with rust reformer to kill the rust.

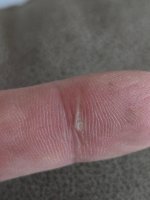
And a side note, I really need to watch where I put my hands when welding. I dropped the MIG torch while under the car, and without thinking I reached over my shoulder to pick it up. Instead of getting the handle, the still hot wire got pinched in the inside of one of my knuckles. Second degree burns suck...
 

Attachments
  • 20261005_161204.jpg
    20261005_161204.jpg
    1.5 MB · Views: 14
  • 20261005_164931.jpg
    20261005_164931.jpg
    1.8 MB · Views: 8
  • 20261005_165139.jpg
    20261005_165139.jpg
    962.8 KB · Views: 8
  • 20261005_165226.jpg
    20261005_165226.jpg
    1.5 MB · Views: 8
  • 20261005_173114.jpg
    20261005_173114.jpg
    1.1 MB · Views: 13
Last edited:
That floor area in the last pic doesn't look too healthy!
It's tons more solid now than how it was when I got it. Still have a ways to go before I'll be happy with it though.

I went back out for a bit and got the pass side flange fully welded in.

Next up will be welding in the flange along the back of the floor edge. I need to lift the sides of the body a bit, pass side more than the driver side, before I can align that rear flange for welding.
 

Attachments

  • 20261005_202446.jpg
    20261005_202446.jpg
    1.7 MB · Views: 4
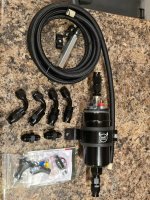
Today I ordered more fuel system parts and some materials to mount them to the car. Not much else going on at the moment.

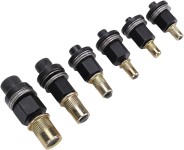
EDIT: I forgot to add pic of the parts that arrived today. Here it is.
 

Attachments

  • 20261006_215217.jpg
    20261006_215217.jpg
    2.4 MB · Views: 1
Last edited:
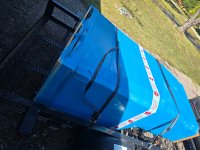
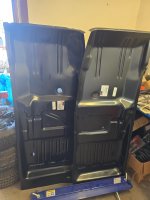
Santa arrived a few months early, driving a big yellow Central Freight truck instead of his usual sleigh. Probably because the package wouldn't fit down the chimney.
 

Attachments

  • 20261007_130854.jpg
    20261007_130854.jpg
    1.8 MB · Views: 3
  • 20261007_131812.jpg
    20261007_131812.jpg
    1.4 MB · Views: 3
I'm going to set the car on it's wheels and then cut a bunch of holes in the old floor pans to pass some straps through. The straps will hold up the subframe connectors so I can weld solid them at each end. After that, I'll cut the floor halves out, one side at a time and clean up the flanges and edges. I'm going to spot weld the flanges and tack the edges as much as possible while it's on the floor.
 
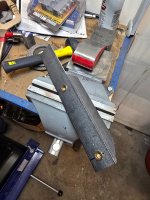
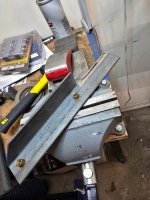
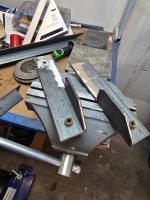
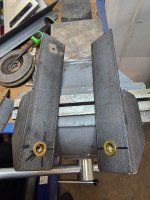
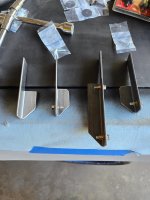
Tonight I started making some brackets for the fuel pump and fuel filters out of some 1/8" x 1.25" angle. These pieces will be welded to the front side of the forward fuel tank crossmember. I notched out one side of the top 3" of each piece so each piece will have a some stability front to back. Then I set the fuel pump mount on the angles to get the spacing for the mounting holes. I used a nutsert tool to install 1/4" nutserts in the holes. A couple of the upper ones were left out so they can be installed after the angle brackets are welded to the crossmember. The inserts need to pass through both the bracket and the crossmember at the same time on those top two holes.

I still need to make one more bracket for two 6AN bulkhead pass through. That bracket will run along the gap on the pass side between the tank and the frame rail.
 

Attachments

  • 20261007_200648.jpg
    20261007_200648.jpg
    1.9 MB · Views: 4
  • 20261007_200654.jpg
    20261007_200654.jpg
    1.7 MB · Views: 5
  • 20261007_200822.jpg
    20261007_200822.jpg
    610.5 KB · Views: 4
  • 20261007_203718.jpg
    20261007_203718.jpg
    2.1 MB · Views: 4
  • 20261007_203734.jpg
    20261007_203734.jpg
    1.7 MB · Views: 4
I'm going to spot weld the flanges and tack the edges as much as possible while it's on the floor.
That seems like a good way to demonstrate the meaning of manufacturing tolerance and the concept of tolerance stack-up.

Personally I wouldn't weld panels together unless they are on the car. Half the time they end up mis-aligned anyway.
 
Agreed. What I meant to say was "while the CAR is on the floor", not "while the parts are on the floor".

The car's body has obviously taken a hit along the driver side at some point in it's history. I'm pretty sure fitting the trunk and floors with the car sitting on it's wheels is going to be necessary.

The body around the trunk, for instance, is kind of floppy right now. The back of the body is barely attached to the ends of the frame rails and needs to be aligned before I can final weld the trunk floor in to re-secure the body to the frame rails. I'm not exactly sure how to measure alignment for the floor pans or subframe connectors yet. But I'll need to figure that out pretty quick.
 
Last edited:
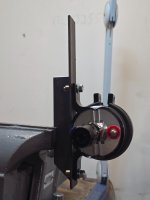
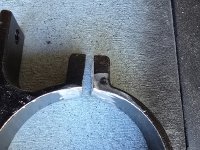
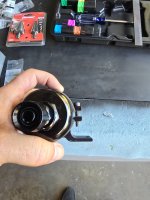
Today I addressed a small issue with the mounting bracket of the fuel pump. The bore is too tight to fit the pump body, and when it is spread apart enough to clear, the clamping flange gets out of alignment enough that the bolt wouldn't fit anymore. To get the flanges back into alignment, I ground away a little of the inside edge of the split area so I could slightly bend those flanges together without creating hard pinch points on the pump body.

The first pic is after the grinding and bending was done. The second pic shows how after spreading the opening apart to fit the pump, those flanges now fall into alignment enough that the bolt hole and the threaded hole were aligned with each other. The closure screw works like it should now.

I also made a bracket for the two 6AN fuel bulkhead connectors. The holes for those bulkhead connectors won't get drilled until I actually have the connectors in hand.
 

Attachments

  • 20261008_164122.jpg
    20261008_164122.jpg
    2.3 MB · Views: 5
  • 20261008_164756.jpg
    20261008_164756.jpg
    1.8 MB · Views: 5
  • 20261008_172311.jpg
    20261008_172311.jpg
    2.2 MB · Views: 5
Last edited:
I've thought about getting one of those Nutsert kits, but I don't do the fabricating that I used to.
 
I've used them before on other projects, with good results. You can get an adequate nutsert kit from your local Harbor Freight, but you'll only get 6 sizes of nutserts, and only 10 of each in those sizes. I have enough 1/4-20 nutserts for mounting the fuel pump and filters, but I'm going to need quite a few more before I'm done with this project. It's pretty easy to get replacement nutserts relatively cheaply in bulk from Amazon thankfully.
 
've used them before on other projects, with good results. You can get an adequate nutsert kit from your local Harbor Freight, but you'll only get 6 sizes of nutserts, and only 10 of each in those sizes. I have enough 1/4-20 nutserts for mounting the fuel pump and filters, but I'm going to need quite a few more before I'm done with this project. It's pretty easy to get replacement nutserts relatively cheaply in bulk from Amazon thankfully.
I bought one of the cheap kits that has a one-hand rivet gun and max size 1/4". It works so far.

They sell a two hand job that goes to 5/16 but that seems like it would be harder to use

I saw this and decided if I ever have a project where there's a lot of rivnuts used I'd get one of these.


But really, this is probably all I need
1791546970448.png
 
The HF tool was in stock, so that's the primary reason I got that one. If I were a patient man, which I'm not, I would have saved money and got one on Amazon or Ebay.

I was planning on just cutting out the rusty area on the bottom of the pass side firewall area and then welding in a patch. I wanted to get that area ready for when I install the floor pan. Project creep happened...

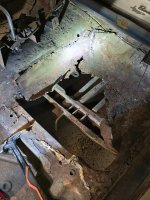
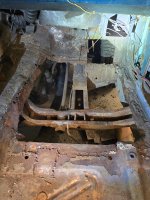
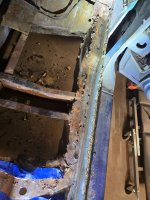
After cutting that firewall area out. There wasn't much strength left in the footwell on the floor. Sooo, I also cut out the really weak and thin floor metal that wasn't doing anything structural anymore. It turned out that that was basically the entire area ahead of the seat.

With all that cut out, I could now see exactly where the subframe connector would sit. I placed the subframe connector on top of the floor to get an idea where the rear of the connector would land. I then looked under the floor to spot where the flanges of the subframe rail were and used that info to decide where I wanted to cut the rear access in the floor. Blue tape was placed over the areas I need to keep the cutting disc away from. I left the center of the floor alone so there was still some solid metal keeping everything in line.

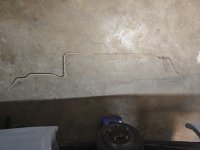
The fuel line crossed through the path of the subframe connector, so I cut it out with a pair of tin snips. No cutting wheel to grind through it in case there was still fuel in the line. My suspicion was confirmed as the line did indeed have fuel left in it.

More to come...
 

Attachments

  • 20261009_163756.jpg
    20261009_163756.jpg
    1.9 MB · Views: 8
  • 20261009_165949.jpg
    20261009_165949.jpg
    2.6 MB · Views: 7
  • 20261009_173000.jpg
    20261009_173000.jpg
    2.8 MB · Views: 8
  • 20261009_174822.jpg
    20261009_174822.jpg
    2.7 MB · Views: 8
  • 20261009_174215.jpg
    20261009_174215.jpg
    2.1 MB · Views: 10
From recent experience with frame connectors - don't cover up the holes in the TB xmember that brake lines, fuel lines, and the e-brake pass through.

I ended up finding a way to get the brake lines from inside the frame rails out the outer rocker like it should be, but I ended up having to run the fuel line down the inside of the frame connector, and cut a hole where the connector meets the frame to pass it through there.

When I got the car it had AN fuel hose from front to back so the passthrough wasn't strictly needed because you can just run that stuff anyway you need to because it's flexible. 3/8" fuel line, not so much.

Thanks to all that, I've got part of a brake line and a complete 3/8-5/16 fuel and return line kit that I can't use.

This is how the brake line was run to begin with and is now:
1791641711945.jpeg

You can see the hole it's supposed to come through at top but there's no way to get the line from there to the other side. You can also see the e-brake pass-through and for some reason they removed the inside of it. Right now I found a 1/2" washer fits just fine since I can get it in through the back side and it can't go anwhere so I don't think it really even needs welded to hold it in place.

The fuel line just runs inside the rail from front to back, so it's not protected so much from flying broken parts.

All I'm saying is, don't paint yourself into a corner if you don't have to (y)
 
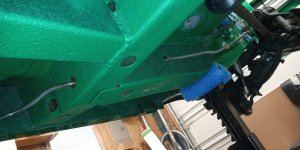
I'm planning on keeping the original fuel line's path through the TB crossmember. I'll also add another hole for the return line right next to it. I'll weld some pipe pieces in the crossmember to create pass-through channels for the fuel lines. I don't want anything passing under the frame rails and crossmembers. Since that means custom routing for all the lines, that's why I'm using raw tubing kits to roll my own.

Running the hard lines inside the frame rails sounds interesting, but I'm not sure I want to go through that much trouble. Running them along the inboard edge of the frame should give adequate protection for the lines IMHO. Anything that can reach that far to damage them up there will also give me a lot more to worry about.

I still want to move the exhaust routing to outboard of the frame rails as side pipes. Rerouting the exhaust will help keep the heat away from the fuel lines, brake lines and wiring.
 
Last edited:
I went out to garage to cut out more of the old floor metal, and ran into a little snag. When I bent the cut end of the old fuel line out of the way, I hadn't noticed it right away as it started to dribble out gas onto the floor. Luckily I smelled the gas fumes before making any more sparks with the angle grinder. Rather than pushing my luck and risking a car-b-q, I switched gears and started using a hammer and cold chisel to peel the outboard edge of the old floor patch. I also chipped out all the old seam sealer along that outside edge to get a clear picture of what I had left to work with. All that is left now is the rusty edge remnant of the factory floor metal. Thankfully those crappy repair welds are making it a lot easier to remove the rusty floor patch metal. I'll start grinding again tomorrow after the gas has had time to evaporate completely.
 

Attachments

  • 20261010_180155.jpg
    20261010_180155.jpg
    2.4 MB · Views: 3
Running the hard lines inside the frame rails sounds interesting
Not INside, on the inside side toward the center of the car. Same thing you're going to do. Believe me, I tried more than one way of doing that. I was blocked from passing through even just to go from the tank across to the rocker toward the front of the car. All that stuff welded into the car when it was a race car is in the way. I didn't want to break out the drill, so it is what it is.

Heat and damage from thrown parts were my concerns too. I ran it as high as I could, and have a loop installed. It didn't seem the mufflers would need to be that close to the fuel line. But now that you reminded me, I need to get some of that slip-on insulation on it before I install more parts and it becomes a hassle to add it. (y)
 

SiteLock

SiteLock
Back
Top