A12 - time to get busy

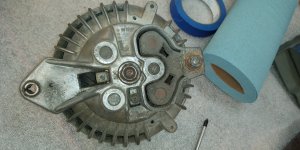
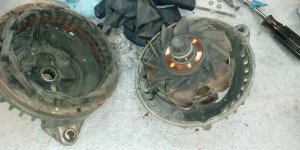
I only had time to get the alternator about half apart - I think it's going to turn out to be junk. I could only turn the rotor about 1/8 of a turn. OTOH it was also full of trash that I shook out of it. I'll get it fully split apart tomorrow and will know more.

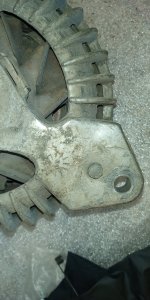
I found a 69 date stamp so chances are good it's the original part from the car. I don't know how to read the month on it. Doesn't really matter though, other than I'm trying to keep all the parts car parts that I can. Call me weird.
 
Too bad you couldn't hollow out the round back alt case and stuff the guts from a late model Nippon-Denso style alt inside it. :unsure:


...and you're weird. 🤣
 
The alternator is pretty much shot but I think it's rebuildable. The rotor won't even turn with the case split. I tried knocking it out (after releasing the bearing retainer) but no luck, and I couldn't find anything to rig it up in the press either. But that bearing is at least worn out, at worst locked up with damage to the rotor.

I kind of hesitate to go further with it out of worry that I will screw up the soldering or that I'll end up with $50-60 in a rebuild kit but the dumb thing still won't work. Maybe both!

I think before I make a decision I'll drive out to the parts store to see if they've actually got a single-field round back on the shelf or if they're all square backs with some kind of grounding adapter on the ground field. If they've got something I can deal with I may go ahead and fork over the $$ to get one while the getting is good.

$40 core - makes me consider giving the old one up as a trade in. Maybe I could get $50 for it to someone needing a date code, probably not. They made a million of them and they're all the same other than that tiny little date stamp.

20261006_175009.jpg20261006_175501.jpg20261007_174243.jpg20261006_175105.jpg
 
I've fixed many of those with all different maladies. It takes a special tool to remove the pulley and the outer bearing. It's in my garage. :giggle:
 
I've fixed many of those with all different maladies. It takes a special tool to remove the pulley and the outer bearing. It's in my garage. :giggle:
I've got the pulley puller and the case is already split. I'm waiting on the time to set up the press to remove the rotor, then the bearing comes off. I've seen that a small bearing puller is what you need to pull the bearing.
1791545888088.png

It takes a while to get there but eventually he does
 
My pulley removal tool is deeper and the bearing removal part is to flip the 2 internal parts that grab the pulley & bearing. It's an incomplete video, he never shows removing any internal parts or how to test & remove diodes. To test diodes you need a powered test light. the test light will light in one direction only, not both. If it lights in both directions, It's shorted, if it doesn't light in either direction, it's open circuited.
 
I've just got a HF pulley tool but it's worked on several PS pumps so far, and it worked on this alternator. I don't remember exactly how it works but you can juggle the parts and use it as an installer too,

I was planning on doing what the video did - new bearings, new brushes, look for shorts, see if it charges. If yes, done. If not, then evaluate the diodes. Which is why I'm considering just buying a reman and forgetting about it. I won't need it for months, and worse comes to worst I've got a good square back I can ground the field on and use. Or I can just drive about a mile to the parts store.

If more is bad in it, the parts would end up costing more than a reman. Bearings and brushes alone was 60-70 by the time I paid shipping but I looked at rebuild shops not ebay. I just checked ebay and the bearings and brushes are $20 but this seller doesn't have a full kit with diodes for the single field part. Apparently from a quick look-round, nobody else does either.


TBH I'm more concerned about screwing up the soldering than I am anything else about it.
 
I wonder if that rebuilt alternator in the video is going to work with the screw missing from that wire coming off the positive stud? Other than that, looks like a pretty comprehensive tutorial on the rebuild.

I'm kinda curious about how well that little add-on box thingy works though? I've never seen one of those before. What does it do exactly?
 
I wonder if that rebuilt alternator in the video is going to work with the screw missing from that wire coming off the positive stud? Other than that, looks like a pretty comprehensive tutorial on the rebuild.
I didn't notice the screw :D I could see me doing that, but also see me going back and editing the video. That's why I don't make videos.
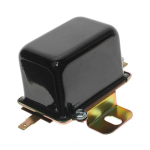
I'm kinda curious about how well that little add-on box thingy works though? I've never seen one of those before. What does it do exactly?
The add on box is just an stock replacement electronic voltage regulator with a pigtail, miniaturized so you can just screw it to the alternator.

I do not understand why anyone would do that instead of just using the one on the firewall and the wiring harness it came with. People gotta make money someway.

You need an electronic VR for electronic ignition so you can upgrade to the 70-up system, or buy one of these, which is what I did.

1791724223777.png
 
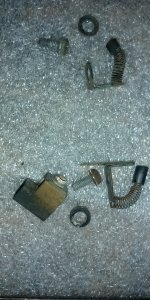
I was putting the alternator back together and toss it back on the shelf to think about later, when I realized I've got no idea how to hold the + brush out of the way so the rotor can go in the bearing. So I put it on the shelf in pieces.

The trunk seal is still stuck so I'm good to go on that account. I haven't fully latched the trunk yet but I set it down and could hear the latches hitting. It's expected that the seal will make it hard to close and possibly hold it up along the sides until it settles in.

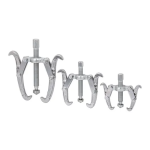
I had to use a two-jaw puller to get the slinger off the crank. It was either that or wreck it with a screwdriver.

I'm in the process of taking the T-bars out to have a good look at them. The stupid bodyshop used a stupid pair of vice grips and a stupid hammer to get them out so I have to check them. I think they're original A12 parts but I thought that about the rear brakes too. I've got nothing handy to compare them to so they might be /6 parts. I'll check that too.

FWIW the stupid bodyshop put the stupid boots on backwards so the t-bars had to come back out no matter what. If I run the big-tube Hooker SuperComps I'll have to take them back out one more time. It's either them or the Schumacher shorties I bought for the duster when it had a big block. Probably going to be the Hookers but that reminded me I need to check that you can bolt to the collector on them. Race parts.

Also, on turning the engine upside down with the top end in it, I decided I didn't want that kind of a mess on the floor. It seems to me like there's going to be a lot of oil in the heads, rocker arms, etc and that is all going to drain out when it's upside down.
 
Last edited:
I was putting the alternator back together and toss it back on the shelf to think about later, when I realized I've got no idea how to hold the + brush out of the way so the rotor can go in the bearing. So I put it on the shelf in pieces.
Assemble the alternator and save the brushes for last, then they slip right in.
 

SiteLock

SiteLock
Back
Top