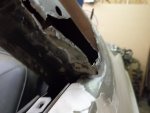
Wailing & gnashing of teeth...

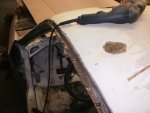
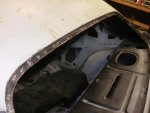
I've been working on the car, though not necessarily posting about it. I've got the roof structure all shored up now and am getting ready to weld the drip rails on the car later today. I'm hoping to set the roof by "close of business" tomorrow.

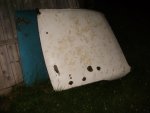
The roof patches were made from one of the mangled Goodmark trunklids for which Summit Racing refunded my money. It was heavier gauge than I expected and made for excellent patches! :D
 
I'm currently organizing some of the pictures I've been taking during the process of repairs. Lots of redundancies to sort through due to focus or flash issues, but I'll be posting some soon.
 
I finally got all of them into one folder, which was no mean feat. First pictures are various shots from the past year, mostly accumulating parts rather than actual progress, but it will give you an idea where I'm going with the project.

When last we left the Challenger, it looked like this:

P7080268.JPG


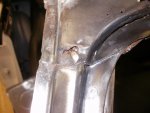
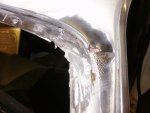
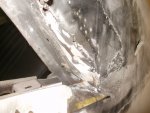
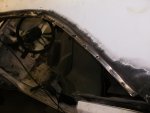
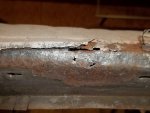
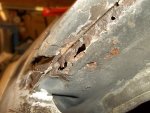
Accomplishing that much was really a lot of work. First up came stripping all the seams so that I could get to the spot welds. This meant fighting primer, original paint, lead, and plastic filler. Of course, more chinks in the armor were found along the way, including some previous repair work.

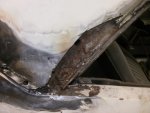
Passenger-side A-pillar (this would go from bad to worse):

P7040209.JPG


Driver's side A-pillar:

P7040212.JPG


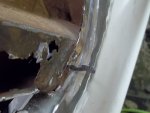
Passenger-side windshield frame at A-pillar (I told you it would get worse)

P7040213.JPG


More RH A-pillar, still on the downward spiral:

P7040214.JPG


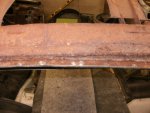
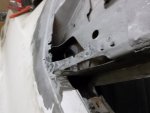
Skipping ahead a tad, this is what was left at the end. The areas with rust are the driprail and the structural windshield frame to which the roof welds:

P7050229.JPG


The final verdict on the driver's side wasn't much better, really:

P7060234.JPG

P7060243.JPG


Clearly there had been some previous attempts at repairing the vinyl-top damage, and though I'm not Leroy Gibbs I'm thinking it was quite a while in the past. As it would happen, the real party was still waiting in the C-pillars... :doh:
 
Last edited:
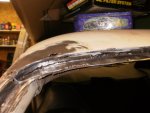
At the rear of the roof, it quickly became obvious that merely a spot weld cutter wasn't going to do the trick. There was a lot of damage back there that had been addressed in the past, much of it not optimally. Again, I think this was long ago, and I have good reason to believe that, which I'll address in a later post. This will just show what was revealed as I worked the sail panels.

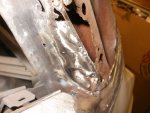
On the passenger's side, once I had the seam sealer removed I found this, which was foreboding for what was to come:

P7040215.JPG


Initial melting away of the lead did not bring any joy to the situation:

P7040217.JPG


Gotta keep going, regardless of how heartbreaking it gets:

P7040221.JPG


This made baby Jesus cry. I may have shed a tear as well:

P7040223.JPG


Well, hey, most of this has to get cut off anyhow, so it's not that bad, right? Plus, the driver's side can't possibly be that bad! :dance:
 
Sigh... :wall:

Of course it can be that bad. Worse, in fact:

P7060240.JPG

P7060241.JPG

P7060247.JPG

P7060248.JPG


Well, hey, it's all there in metal. Now you can see it all, and the worst is over. Onward and upward! Let's get this roof off!
 
Spot welds. More spot welds, and then some spot welds. I also had to cut some spot welds, but to change it up a little I had to use a cutoff wheel and body saw, neither of which would normally be required to remove the roof panel. Then I drilled more fucking spot welds for awhile. Not a lot of point in narration here. :D

P7060232.JPG

P7070256.JPG

P7070257.JPG

P7080258.JPG


On the passenger side, this part of the roof just fell off once the welds were gone. Notice that the first 6" or so of driprail is ready to fall off, too :doh: :

P7060251.JPG


Here's some of the butchery required at the C-pillars to do the final removal. Notice I said "required" there. Yes, I'd already tried to lift if off once before some strategic cuts were made.

P7060250.JPG

P7060253.JPG

P7070255.JPG

P7080259.JPG

P7080260.JPG


Ah, yes! Finally, I'm at the point where I can lift the roof off, which brings us full circle to the first picture posted here.
 
I would now like to plug the Rota-Broach spot weld cutter. There is none finer. Don't even bother with anything else. It's sold on various tool trucks under their brand but it's still called a Rota-Broach, the "I don't deal with tool trucks" crowd can find it online under the Blair brand (I got mine from Amazon). Low speed, light pressure, and let it do the work for you. Early on I made a bonehead mistake and had left the drill in the reverse position. I am neither exaggerating nor joking when I tell you it cut 13 spot welds completely with the bit running backward. It dulled the bit badly, but seriously... have you ever tried to drill a hole spinning the bit the wrong way? The next bit broke on an existing, unseen MIG weld but the one after that literally cut every other spot weld I had to remove. I also used it to make a couple of needed holes where my punch wouldn't fit... and it's still on the arbor, because it still cuts.

Also, I don't care how awesome you tell me your 50-volt lithium-cadmium-solar-flare DeWauKita cordless drill is, you're gonna want to tackle this job with something that plugs into the wall. Trust me on this one... your Dad's old $20 Black & Decker 110V drill will outperform the baddest cordless on the market.
 
This is an old picture (August of last year), but I found it and thought I'd post it for those of you who've not thought of this already. Get a cheap dry-erase board to keep track of your to-do lists. I have this one divided between the Challenger and the Hatchet Job 360 (yes, that's still going), with the top part being things that I need to accomplish, and the lower section being a shopping list. Where was I progress-wise when I left the garage? Look at the board! Also, I'll take a picture of the shopping list part with my phone when I'm heading out to the auto supply or hardware store. It's handier than you'd think!

100_0020.jpg
 
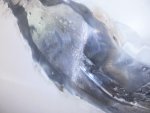
So, what did I find hiding under the hat, you ask? More ugliness. I have a theory as to what happened, and it's not all the vinyl top. I had the car put on a frame rack in November of last year, wanting to make sure it was 100% square before I welded on the roof panel. As it turns out, this car was crashed at one point, probably 35 years ago when the insurance wouldn't have paid for proper full repairs. My guess is that the C-pillar roof seams buckled a little, just enough to let a good amount of moisture into that area. With the vinyl holding moisture on the outside--explaining the ugly patchwork--and it collecting between the structure and outer panels, well, all one had to do was add time and Alabama heat, then simmer. These are the results.

But, first a fond farewell to the original roof:

P7080269.JPG


Here's what I found underneath it, before I started any further work. Again, the pics speak for themselves... though they do not begin to speak of the heartbreak I initially felt.

P7080261.JPG

P7080262.JPG

P7080263.JPG

P7080264.JPG

P7080265.JPG

P7080274.JPG

P7080276.JPG

100_0288.JPG

P7080280.JPG
 
The second-to-last picture above was taken with my new camera. Man, I never noticed that difference previously. :D

Anyhow, we're now to the point where serious disillusionment came into play. I knew what I was seeing, but again it would get worse. Everytime I touched something with a tool, it seemed to evaporate. What looked decent and salvageable started to fly off in chunks when touched with any kind of tool, and I readily admit I'm nobody's welder so this was getting really intimidating for me.

These are just some various pictures taken after cleaning, blasting, cutting, etc. that finish up the deconstruction phase of the roof project. After this, things start to get better, I promise! :dance:

100_0201.JPG

View attachment 17979

100_0205.JPG

100_0206.JPG

100_0207.JPG

100_0208.JPG

View attachment 17984

100_0210.JPG

100_0306.JPG

100_0312.JPG

100_0315.JPG

100_0316.JPG
 
damn,,,....i wonder if the car was "tarped" too..cause that WILL eat a car from the inside out

if i had found that much rot...i woulda turned it into a vert without even questioning it.....at that point its actualy just the easy and right thing to do

there is a reason i have a white board in both shops....and the shop here at home has a 4x8....they are IDEAL for mapping your plans
 
This is why I passed on the '68 Barracuda when you told me about the roof damage. Whomever cuts the roof off that car is probably going to find much worse rot than this. This car's roof didn't have holes around the outside edges, and when the removable drip rail trim was on the car it looked great except for the obvious holes more toward the center of the roof. Remember, this car came from a much drier climate than your area's. It is 100% original metal from the windows down, with no rot whatsoever barring a little bit of typical trunk-gutter damage. That gutter damage is far less than what's found in most E-bodies, and happens to all kinds of cars regardless of where they spent their lives, except possibly the Southwest deserts.

Making the car a convertible would've been neither right nor easy. I would've had to replace the entire windshield frame, weld in frame gussets and torque boxes, find a roof mechanism and all the pieces to make it fit (after I cut the roof structure back far enough), replace the rear window filler panel and both quarter panels, then run all the hydraulic lines and linkages. Once all that was done, I would then need to find a back seat, rear interior panels, outer roof trim and fastening strips for the top boot. No thanks. This is way, way easier.

Also keep in mind, these are all old photos. The newest one is from May. All this stuff is already fixed, and properly so. In fact, the I've been told I was "too worried" about the structural part that will never be seen--by guys that make their living doing this kind of work. It's as strong as the day it rolled out of Hamtramck if not stronger. And it's assembled better as well. I have about 20 photos of "missed" spot welds that were either half on the overlap or completely off it, nowhere near the joint.
 
I know that feeling Doc...my Coronet Convertible was bad, and only got worse as it came apart. I too spent many many hours piloting a spot weld cutter, I did 3 sets of inner fenders, and rad supports. I did not have the skills at the time to weld or fab metal, so I paid someone to fix it properly...and I paid dearly for that work. After it was all said and done I think we/he replaced almost 75% of the original metal with good replacement, or Repro material.

I'm looking forward to the "happier pics" to come. :)
 
They're already taken. I'm actually about ready to start filling the roof seams... and oh, yeah, the 4-speed floor tunnel's been added. That was kind of a disaster due to absolute piss-poor fit (surprising, since it was an AMD piece) but it's in and it's solid. Seam sealer and the carpet will make it all gooder. :dance:

I'm just taking a break from posting further to let folks scroll through all the ones I've already shared.
 
I have seen all of this. I was with on the trip to get it. I helped unload it at Jass's place. We loaded it on my trailer to take it to the frame shop. I loaded it up on my trailer again to bring it home from the frame shop. I had the opportunity to see the rust damage after the roof was removed and I have recently seen the repairs. The work Jass is doing is phenomenal! The roof is on and it took some work to fit properly. It is a top notch job. Thats not just coming from a friend. Thats coming from the picky son-of-a-bitch that I am!

Awesome work indeed!
 
The work Jass is doing is phenomenal! The roof is on and it took some work to fit properly. It is a top notch job. Thats not just coming from a friend. Thats coming from the picky son-of-a-bitch that I am!

Awesome work indeed!
Thanks, man. That means a lot. :) :bravo: <-- (mine has root beer in it :D )
 
The work Jass is doing is phenomenal! The roof is on and it took some work to fit properly. It is a top notch job. Thats not just coming from a friend. Thats coming from the picky son-of-a-bitch that I am!

Awesome work indeed!

High praise indeed!

... And you thought you couldn't do it.... pffffffff. :)
 

SiteLock

SiteLock
Back
Top