Project Fur-Kota!

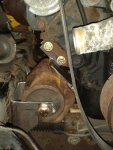
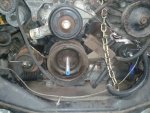
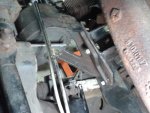
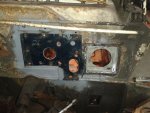
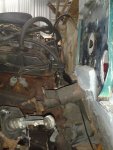
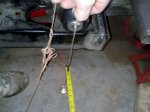
Well I scrapped the idea of using the jeep mounts and made plates to attach the Bigger Dakota Mounts to the LA bosses on the block. I had taken pictures of same to show everyone but have somehow futzed up ALL of the phone pictures by trying to get them into my computer. The long and the short is the mounts tuck nicely in ahead of the main crossmember and free of the suspension mounting points. When all is said and done I have moved the engine back 5 inches of a possible 8 which should leave me just enough room to get to the CPS on the back of the block. Pictures of the whole shebang when the digital image gods allow.
 
Shazam
 

Attachments

  • phone photos 130 (450x600).jpg
    phone photos 130 (450x600).jpg
    186 KB · Views: 44
  • phone photos 136 (600x450).jpg
    phone photos 136 (600x450).jpg
    179.5 KB · Views: 44
  • phone photos 132 (600x450).jpg
    phone photos 132 (600x450).jpg
    170.6 KB · Views: 44
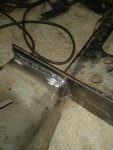
The pass side will probably break at some point I may go back and do it over with more overlap between plate and flanges but for now this is what I have. Time has been so short this summer, I just feel the need to push ahead, or I'll never gain any momentum.
 
Well, the passenger's side is mostly under compression so my guess is it'll hold up for a very long time. The driver's side is the worrisome one, and that looks plenty stout the way you've got it fabricated. Nice work!
 
Thanks Jass and TC for your support and continued interest in this project it really helps.
 
Can't wait to see the end result. :) I just scrolled through this thread to catch myself up again.
 
Well in July I got the mounts together but today I finally burned them in, slow progress better than no progress. Not much to show and my welds are not much to look at but she's now resting on the mounts and not the block of wood between the pan and x-member that has been in all previous pics. The crank is dead on the mark and back 5 inches and the engine is sitting about 1 1/2 - 2 inches lower (lost my original measurements in a heartbreaking laundry mishap). Next I have to tackle the Rear crossmember but now that the front is set that should go a little easier.
 
My little black book of car stuff. Always went in my shirt pocket at work so if I got an idea I could jot it down. It had contacts, phone numbers, part numbers and measurements. When it got washed it melted into a sad little ball of wood pulp, I almost cried, had to spend a little time behind the wheel of the car on a milk crate making vroom vroom noises and sipping a beer. Really the worst of it was losing the stock height measurements from when i set the subframe everything else can be recovered one way or another. That really took the wind out of my sails for a while. Life moves on. As I said i still have to do the rear crossmember and then hole the firewall for the main harness and do something with the wiper motor then I can put it all back together.

Thanks again to all who are interested an encouraging. It makes a difference.
 
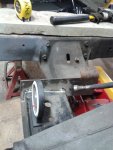
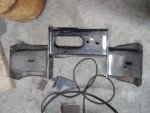
Here is my solution for the crossmember. My little welder was not cutting the mustard, I cranked it right up but out in the uninsulated garage in the subarcitc weather the welds weren't penetrating so I took it to the professionals.the plate has been trimmed up since this picture but it still hangs a little low as in the second photo. 20141128_153055.jpg20141128_153254.jpg
 
Last edited:
more progress...
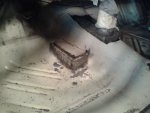
The firewall support plate is in, next to it is a little box with hole for the main harness which ended up going through two layers of steel. I was worried I had gone into the cowl drain area but much experimenting with water has shown no leakage. This is a good thing because I did a miserable job trying to weld in under the dash, this will be addressed with sealer. There is also a picture of the trans tunnel clearance hump I had to ad for a trans mounted sensor. There is also a picture of the firewall to engine clearance I have got enough clearance to access the CPS at the back of the block on the pass side, and I should also be able to get at the upstream O2 sensor fairly easily.
 

Attachments

  • firewall support plate.jpg
    firewall support plate.jpg
    79.8 KB · Views: 40
  • new firewall clearance.jpg
    new firewall clearance.jpg
    82.2 KB · Views: 40
  • trans sender tunnel mod.jpg
    trans sender tunnel mod.jpg
    60.7 KB · Views: 40
Last edited:
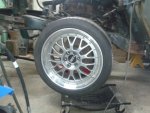
Here is a full shot of my "Trailer Hitch" looking trans x member mod. The nice welds the pro's put on there. My new measurement from the tailshaft, dead-center back 5 inches! and I got the new rubber put on my rims. I did grab a fender from the basement and set it on there to see what it looked like, but I didn't have my camera and I'm not lugging that fender in and out of the house any more than I have to. The top of the tire to the bottom of the fender is a titanic 5" gap there will have to be at least some coil cutting to get it down.
 

Attachments

  • trans xmember 5inch setback.jpg
    trans xmember 5inch setback.jpg
    74.6 KB · Views: 40
  • 20150311_211801 (600x445).jpg
    20150311_211801 (600x445).jpg
    62.9 KB · Views: 40
  • not my welds.jpg
    not my welds.jpg
    176.8 KB · Views: 40
  • old rim new rubber.jpg
    old rim new rubber.jpg
    76.9 KB · Views: 40
Does anybody have any experience with coil-over sleeves? My buddy was bringing home a set from his shop the other day for his mustang and they looked like they might be an economical way to ad some ride height adjust-ability to the project.
 
Nice to see you're still after it. I've been working on my car(s) slowly, with a short break to attempt to burn everything I love to the ground.

The firewall plate looks nice and tidy... almost factory! Looking at the hole, I assume you're using one of those large, round Delphi WeatherPack disconnects? They're of excellent quality and easy to use, but I balked at using one myself just because I didn't care for the look. I'm stupid like that, and went with an Ampseal setup for my bulkhead disconnect. That's going to be a ton more work, though, and I somewhat regret my decision. Oh well, I'm committed now. :D

I'll be curious to see what happens carpet-wise with the sensor hump. I don't think it'll cause an issue being so small, though.
 
Have you looked into drop spindles? I would think that's your best option for lowering the front of the car. I wouldn't recommend cutting your coils due to the potential alignment/angularity problems, nor would I recommend coil-over shocks since the shock mounts aren't designed to carry weight.
 
The 98 Dakotas seem to use LCA not spindles they have a different spindle/bearing arrangement. I can find 2" or 4" but not sure which will be needed (i also found a super sexy set of Airbag LCA that would let me lay frame! :cool: (too much $$$)). The coil cutting would be a temporary measure only, between moving the engine back and the loss of a whole coil I was thinking the ride might be pretty harsh too. The sleeves just looked like an easy way to experiment but your point is taken on the load bearing aspects.
 
ive been running cut coils in my 58 ford FOREVER

so heres what you do..get it all in and measure how much you NEED to lose..measure coil COMPRESSED pull everything and measure coil at uncompressed and note the measurement of the compressed vs uncompressed..that will get you a ROUGH idea of how much you need to take out

however..dont take out more than HALF of what you "think" you need to take out..you can take it out but you cant put it back!!!!

thankfully my ford uses the same coils(just longer) from 60s thru 80s ford trucks.....TORCHED springs will give a hard ride..cut coils do NOT

id still go with a dropped spindle/lca if possible...but your on the right track cutting till it sits how you want it so you know how much drop you want and can ACTUALY real world use
 

SiteLock

SiteLock
Back
Top