Rusty's not very quiet cuda progress

Couldn't find the old pics, seems the whole folder with the other rebuild has gone a wall, not even sure I had one of that but I'd swear the flex plate had the starter teeth on it?

Any way the marriage went well, after a stupid start, I laid out all the bolts & thought I was missing one from the top center, dig through a bunch & did find one only to then look at the tranny & there's no bolt hole in the bellhousing at the top!!!!!!!!!20230818_140820.jpgThe torque converter seemed to go all the way in on the first roll, I even pulled it out again & did it over, never felt 2 separate moves, but it was way in so I decided to see if it mated up ok & it did.
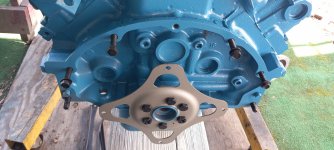
snugged down a few bolts & then checked for specs, tranny to motor was 28ft. lbs. I think, set those & then went to the converter bolts, started one & found the next one didn't line up, removed it, spun to the next hole & tried that, now all 4 line up, put on the thread locker & torqued those down, 21 is hard to read on the old wrench but I hope there all close to that! 20230818_145920.jpg
With the tranny on she's got a natural lean down at the back, tilt adjustment is near center so I can get more if I need it. 20230818_152444.jpgnow I have to extend the jack & see if & how much I will have to lower the front of the car? 20230818_152504.jpg
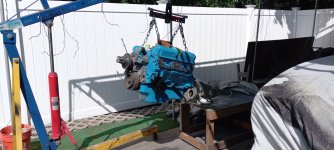
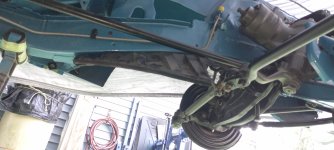
The braces gave me a baby fit, I finally realized they go to 2 different spots on the tranny! 20230818_152836.jpgHave to locate the 3 small bolts for the bottom cover plate, now my homemade tranny table is the safety net, I trust it less than the bench!20230818_152855 - Copy.jpgThere were no specs for the braces so I went with the same 28' lbs?
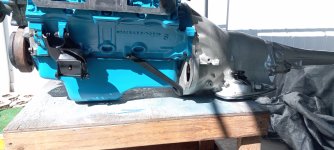
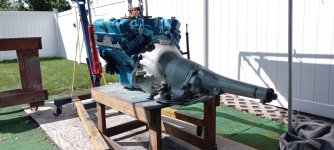
 
Things are coming together at a good clip now, I'll wait on the exhaust system to get here before I try to drop the motor in.
Dash is ready to go in, I will call the glass guy this week & order the windshield, once I get a date I'll drop the dash in the day before.
Then it's off to the parts store to get the water pump, fuel pump & alternator.
And probably a few more things I'm not thinking of at the moment!
Cool weather is coming so I can be out there more hours, maybe it will be sealed up before winter!
 
You definitely got lucky with the pump engagement. I've fought way too long with that in the distant past.

Couldn't find the old pics, seems the whole folder with the other rebuild has gone a wall, not even sure I had one of that but I'd swear the flex plate had the starter teeth on it?
I've never seen a linkage-shifted RWD Mopar transmission so configured. The ring gear is always on the torque converter.

Don't forget to find and install the stud that goes into the upper starter mounting hole on the transmission. Believe me, that's a huge time- and effort-saver... probably why the factory did it. Although it's a different beast, installing the starter in my Valiant is a nightmare--there's no provision for that stud. Working in the tight confines of an A-body with 1¾" header tubes and a blowproof bellhousing makes installing the starter more than a little bit challenging.
 
Hmmm, there was no stud there, that I will have to dig into?

My memory may be off, but that car was worked to race, the tranny was pumping out shifts at 6200 RPM's
in full auto (kicking down from a roll)
I'm no auto mechanic & don't know if there was such a thing even made, I do remember not being able to get it off while it was on the engine stand & never retightened those bolts, managed to back out the tranny just enough to get them tight with an open end wrench, that was right on start up) the other bolts(I mentioned before) came loose near the end of my ownership, those the mechanic tightened through the access plate?
 
Hmmm, there was no stud there, that I will have to dig into?
It was probably removed somewhere along the line when the case was cleaned or the transmission pulled. It was there originally.

My memory may be off, but that car was worked to race, the tranny was pumping out shifts at 6200 RPM's
in full auto (kicking down from a roll)
I'm no auto mechanic & don't know if there was such a thing even made, I do remember not being able to get it off while it was on the engine stand & never retightened those bolts, managed to back out the tranny just enough to get them tight with an open end wrench, that was right on start up) the other bolts(I mentioned before) came loose near the end of my ownership, those the mechanic tightened through the access plate?
Very high-stall race converters have small diameters (7"-9") and as such, the factory-style ring gear is too large to weld to them. Those converters have a plate welded to them that acts solely as a ring-gear adapter to which the ring gear is welded. The plate/ring gear assembly cannot be removed from those converters since it's one big welded assembly. However, the same flexplate arrangement is still required. It still uses a flexplate like the one in your current car.


tct-8-mopar-converter.png


If the car had an external-balance engine like a 360 or cast-crank 340 and the converter was not counterweighted for it, they may have used a B&M weighted flexplate. B&M makes several that allow zero-balance converters to be used with various externally-balanced engines. They're round more like a GM flexplate, but still do not have a ring gear. There's a large section removed for balancing.

10236.jpg


It looks very different, but it bolts together exactly the same way as what you just did. On a vintage Mopar V8, mounting the ring gear anywhere but on the torque converter itself would require a starter that simply does not exist.

If you helped your Jeep buddy with an engine installation, you might be remembering that. AMC and Jeep flexplates have the ring gear welded to the flexplate.
 
Crapo, I forgot to hit reply last night, I did find a pic of what was in there, don't know if it helps but it looks nothing like the little one in this car?
 
OK I'm not completely nuts, I found a pic of what was on there, it's definitely bigger than what's on this car?View attachment 26002

That's virtually the same setup as what you just installed. The flexplate is some kind of bodge part, probably an old SFI-rated unit with a 360 converter weight welded to it. It could be a 50-year-old B&M unit. That arrangement bolted together exactly the same way as the one you just installed, it just happened to be a round flexplate rather than the factory "X" shape. Far from "totally different", it's virtually exactly the same.

If you look at the picture of the B&M flexplate that I posted above, the cutout in it would be 180° from the added weight on your old one. To balance something, you can either add weight to one side or remove it from the other. Removal's the preferred option of course, since it's lighter and more importantly, nothing can fly off. ;)
 
OK, but all I said was it was different & that it was!
Like I said before I'm a parts changer, never dove into the internals on any major component,
what you guys do is way beyond my skill sets!
 
OK, looks like a new pos setup will be bought, this was the pos cable on it, not sure where the other wire is? 20230819_132555.jpg
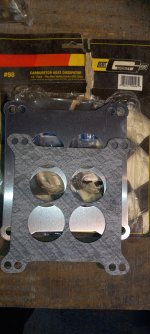
The stud was gone on this car, 2 bolts came out & the longer one was in that top hole. 20230819_132817.jpgFound some left overs, that had the short bolt & a nut, tried the nut on the long bolt but it has finer threads, the idea was to cut the head off a bolt & make my own stud, just have to find a little longer bolt & a nut that fits it? 20230819_134403.jpgAn few more left over goodies, some new throttle springs. 20230819_134342.jpg& yet another carb plate & gasket, is this useable or should I just order that adaptor? 20230819_134332.jpg
& now I have 2 of those adaptors, found another bag of leftovers! 20230819_134803.jpg
 
Got a couple of splash shields on, pretty sure about this one20230819_150349.jpg
This one I searched to find 2 holes that lined up?
20230819_150306.jpg
Wondering if I'm missing one rear of passenger wheel, there's 3 more holes under there?
20230819_150330.jpg
 
Was going through old pics & neg battery wire is the same blue 1 guage wire.
That got me looking around, I forgot how bad the wiring was in the bay, I'm gonna have my work cut out for me to clean up this mess!
DSC07225.JPGCoil just laying in there, no bracket!DSC07245.JPGDSC07226.JPGDSC07243.JPGDSC07244.JPGOH fun fun fun.
Jass want to come over for a weekend to rewire, I know you love that stuff!
 
The negative battery cable you have isn't original. Hooray for the oversize cable, but you need the small wire that grounds the core support. The ground wire to the core support is critical to proper operation of the forward lighting--I discovered this the hard way on the '69 Valiant. You can save a few bucks and use a parts-store cable on the negative side; 2 or 4 gauge is fine. Most of those have the small wire coming out of the battery terminal with a big yellow butt connector on the other end. That's exactly what I used on the Valiant, but I lopped off the butt connector and added a length of wire and an eyelet to it using solder and heat-shrink tubing (to at least somewhat appear stock). If you don't care, just crimp a piece of 10-gauge wire into the butt connector and run it to the core support. Mine went right to the ground for all the forward lamps.

There should be a plastic splash shield on either side of the K-member between its front and rear mounting points. There's another on the a driver's side behind the K-member, which was only used on automatic-transmission cars. It looks like you've at least got two of the three. If the you've got the driver's side match to the passenger-side one you show mounted, that's all that mount to the frame.

Jass want to come over for a weekend to rewire, I know you love that stuff!
Ah, no. Just because one is good at something like wiring doesn't mean they love it. I'm really good with math, too, but I hate that too. 😂 Messing around trying to make do with 50-year-old wiring usually isn't worth the effort. I'd be on the phone with Year One so fast the keypad might catch fire for a new engine harness. In fact, that's exactly what I did do: Every harness for my '74 is new, as is the engine/forward lamp harness in the Valiant.

I hope that Mallory distributor found its way into the trash can or onto a race car. Anything without vacuum advance is worthless for street use.
 
"I hope that Mallory distributor found its way into the trash can or onto a race car. Anything without vacuum advance is worthless for street use."

I will have to buy one, what should I look for?

I think I have a new neg with the second wire, I will order the pos cable you recommended!

Not sure how to attack the "Stud" problem, do they sell those?
 
I will have to buy one, what should I look for?
Just about anything with a vacuum advance canister and a two-wire pigtail (one orange wire, one black) will work assuming you're using the factory electronic ignition. They're everywhere and they very rarely fail so they're not worth a lot of money. They were used from 1971 until at least 1983 on trucks. Don't pay a lot for a used one unless it's a "numbers" distributor for your engine. Installing faster advance springs would help but it's kind of a pain in the buttocks. If mr340 is still hangin' around ask him--he probably knows someone that's got one on the shelf. If nothing else, I'm sure I can dig something out.

Not sure how to attack the "Stud" problem, do they sell those?
Pardon the pun, but I screwed up here. It's actually the lower bolt where you want to put the stud.

The stud itself literally a local auto-supply/hardware-store part, not some high-dollar Mopar-only thing. It's the same thread as the short bolt on both ends (3/8" coarse, I believe). One end should be approximately the same length as the short bolt; it needs to fully engage the threads in the bellhousing. A little weak threadlocker here can't hurt--you want it to stay in the bellhousing!
Studs usually have a "margin" between the two threaded ends. That margin can be no longer than the thickness of the starter. You want the free end to protrude about an inch past the starter. OE was fine thread on the nut end, but that's not necessary.

Here's a picture of the factory 1974 starter stud with a tape measure alongside:

100_5566.JPG

The margin between threads is about 3/8" and the exposed threaded part is approximately 1-1/4". The end in this bellhousing is about 1". If the bell isn't drilled/tapped all the way through (I think it is; the manual ones are), just make sure it doesn't bottom out before the margin is flush with the flange.
 
Mr 340 gave me 2 parts distributors, I'll have to dig those out & see what I have there?
I'll give him a call this week & see what ideas he has, been trying to get him over & hang a while & WORK a while, see if his schedule lightened up any?

Looks like factory igi on those pics I just posted? Right?
 
Looks like factory igi on those pics I just posted? Right?
Yes. If that ECU has five pins, make sure the ballast resistor has four. I'm sure it does if the car ran when you bought it.

Mr 340 gave me 2 parts distributors, I'll have to dig those out & see what I have there?
There's probably enough to make one good one, honestly, other than maybe a cap and rotor.

As an aside, when you get a starter stud don't forget to pick up a nut for it! Yes, there's one lying around the garage somewhere and no, you'll never find it when you need it. At least, that's been my experience. :LOL: The factory used a "star" washer behind it, which can't hurt. Again, it's all hardware-store stuff... there's no reason to pay shipping on less than $2 worth of parts.
 
Now I can't find them, I'm going to do a search later for some parts I'll see if one of the distributors pops up?

I'll check on the five pins.

Yes the one on the right is 4 pin, there's another 2 pin to the left what is that for?

Gonna compare rock auto & auto zone for some basic parts, see if either has the stud & the distributor?
 
Now I can't find them, I'm going to do a search later for some parts I'll see if one of the distributors pops up?
Keep looking. There's really no good reason to spring for a reman or new unit.

Yes the one on the right is 4 pin, there's another 2 pin to the left what is that for?
It looks to me like someone rigged the thing just to run. The 2-pin is for either an earlier (points) setup, or the later 4-pin ECU. The car should be wired for a 5-pin ECU (it was originally) but it will run on a 4-pin ECU just fine. Keeping the 4-pin ballast resistor allows it to work either way.

Gonna compare rock auto & auto zone for some basic parts, see if either has the stud & the distributor?
Nobody can look that stud up by application except Chrysler. It's not considered a service part by the aftermarket. As such it's never been listed in aftermarket catalogs to my knowledge. I'm sure Dorman makes it, only because they make studs. They definitely don't list it by application.

The factory number was 2095875, which superseded to 6035606. The latter number is still available new, but dealer list is $20.00. The cheapest one on eBay is $17. That's insane for a sub-$2 hardware-store part and absolutely not worth it. I don't know if chain stores like AutoZone or O'Reilly carry random studs, but hardware stores do. You have the dimensions, just go buy one locally.

The aftermarket only offers cheap new distributors of questionable origin and quality. Autoline does a reman, but their quality is similarly suspect, which is true of anything labeled A-1 Cardone. I'd trust a 50-year-old original more than either option. You pays your money and makes your choice.
 

SiteLock

SiteLock
Back
Top