
You are using an out of date browser. It may not display this or other websites correctly.
You should upgrade or use an alternative browser.
You should upgrade or use an alternative browser.
Project Fur-Kota!
- Thread starter 340EH
- Start date



340EH
Well-known member
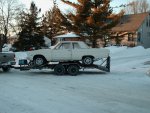
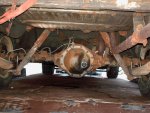
The rest of the pics; The rear end looks good but I need new shocks and the lower Rad support sits down below the front bumper more than I'd like but maybe a subtle chin spoiler might help disguise it.
Attachments

340EH
Well-known member
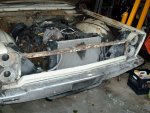
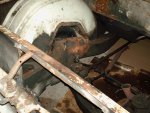
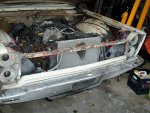
Picture of Crossmember that came out to accomodate Dakota rad position. Beau tied the tops of the fenders to the Dak rad cradle as seen in the second picture. I'm wondering if it wouldn't still be a good Idea to tie the fender tops to the remaining crossmember. things seem pretty solid right now but it seems to me it'd be stronger/safer to maybe tie the circled points together with a few strut type pieces from the fenders in or better yet a single piece that reaches all four points. anybody know how much of the front end strength came from the removed member?
Attachments

69.5CUDA
Blah Blah Blah
the ONLY section of that area of the body that should be tied into the frame is the front crossmember under the rad....and if it isnt..tieing in at the fenders is a waste..hell tieing in anywhere is a waste..im sure theres something down there to tie in to or spacer up off the frame to do it..the bumper got mounted...the fronts going to flex some..and tieing it in up high like that is likely to do more harm than good

gomopar440
Livin' my life...one gas station at a time.
Shouldn't there be an air dam on either side of that rad to force the incoming air to go through the rad rather than around it? The air dam sides would also reinforce the rad top support like it looks like you're trying to do in those pics.
I'm not to sure just how strong those arched pieces will be. The stregnth is compromised since they're already bent to allow some compression if you were to lean on the top of the rad support. FWIW: I would remove them and either make them straight (diagonal) ones or better yet, just put in the air dam wings. If you put in wings, make sure to also put 90deg creases in the edges first to make it more rigid.
I'm not to sure just how strong those arched pieces will be. The stregnth is compromised since they're already bent to allow some compression if you were to lean on the top of the rad support. FWIW: I would remove them and either make them straight (diagonal) ones or better yet, just put in the air dam wings. If you put in wings, make sure to also put 90deg creases in the edges first to make it more rigid.
Last edited:

Dr.Jass
Pastor of Muppets
Personally, I'd run the diagonals you mentioned in the cirled areas. C-bodies are flexible flyers up front due to the "Nova" subframe arrangement, and extra triangulation can only be good. Besides, the tie points you show (or something similar to them) will only help deflect inline lateral loading on passengers in the event of a frontal crash, dispersing energy outward rather than directly back.
340EH
Well-known member
Just a quick snap of the front with the sexy rim on it. The rubber is way to big, it's grabbing the fender wheel opening on the front corner, 265/60/18 is a little too much even for a C body wheelwell. 255/45/18 looks like it might be a pretty popular size and will shrink the diameter down 3 inches. Next I'm going to have to go to the junkyard to scout Jeep Grand Cherokee gas tanks, the size looks decent though the tank will still be 4 inches taller than the stock one.
Attachments

69.5CUDA
Blah Blah Blah
have you thought about in import tank? or should i actualy say "euro" tank..think BMW, benz volvo, saab etc....one that sit ABOVE the rear axle behind the back seat?...might be a "cleaner" solution...something else to consider if your determined to keep it under the car..would be possibly a 80s minivan tank a lil modding and it should fit right where the car one used to
i do hope your going to put a droped spindle on that thing to bring it down to a somewhat more "normal" height for the car
i do hope your going to put a droped spindle on that thing to bring it down to a somewhat more "normal" height for the car
340EH
Well-known member
The big question I had about the caravan tank was weather the fuel pump module would feed the 5.2. I have found through a source at the dealership that it should do the job. So thanks for that suggestion the tank should be a good fit. The Fury Tank was 40.5 x 27.5 x 8 and the Caravan tank I looked at in the yard was 35 x 27 x 10. So hopefully that's the tank sorted.
340EH
Well-known member
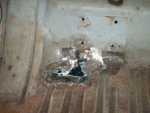
Next item is dealing with the sheetmetal repair, mostly in the trunk and welding up the trim holes down the sides of the car.
Here's a pic of my first patch it's probably about 50% patch panel and 50% mig wire! lol but you have to start somewhere.
Here's a pic of my first patch it's probably about 50% patch panel and 50% mig wire! lol but you have to start somewhere.
Attachments
340EH
Well-known member
Here is my next challenge, Trunk extensions!
Before:
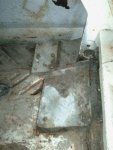
The holes were covered in some tar soaked canvas cloth and then sandwiched with some galvanized sheet and screwed down.
Here's what lies beneath:

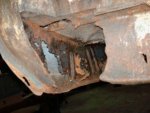
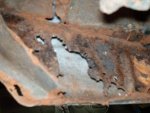
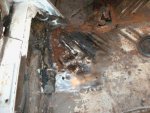
That's all I have for now. I'll try to take some pictures as I get into these but I do tend to get into it and then take pictures after.
Before:
The holes were covered in some tar soaked canvas cloth and then sandwiched with some galvanized sheet and screwed down.
Here's what lies beneath:
That's all I have for now. I'll try to take some pictures as I get into these but I do tend to get into it and then take pictures after.
340EH
Well-known member
So I ordered some Cbody Trunk extensions.
(see thread here)
http://www.moparnuts.com/forums/showthread.php?32264-Classic-2-current-in-Canada
I decided to cut the offending parts into pieces and put it together one plane at a time. I'll weld in the upright panel first then put the floor on it. it has made shaping the panel easier and should make welding a little easier too.
the hole
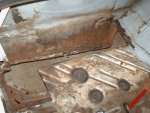
fitting up the side

fitting up the side 2
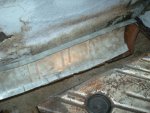
panel formed with 5 dollar princess auto hammer on wokbench, "shopvice" break and some snips and a cutoff wheel.
I need more tools.
(see thread here)
http://www.moparnuts.com/forums/showthread.php?32264-Classic-2-current-in-Canada
I decided to cut the offending parts into pieces and put it together one plane at a time. I'll weld in the upright panel first then put the floor on it. it has made shaping the panel easier and should make welding a little easier too.
the hole
fitting up the side
fitting up the side 2
panel formed with 5 dollar princess auto hammer on wokbench, "shopvice" break and some snips and a cutoff wheel.
I need more tools.