Rusty's not very quiet cuda progress

Guess I have to bolt the bottoms in?
I didn't notice an answer in a skim, but yes, they hang on the top and bolt at the bottom.

Also, I believe we covered this a long time ago, but due to the age of, and God-knows-what's been done to, these engine parts, the intake-manifold front & rear end seals seem to create more problems than they solve and should always be left out. Silicone only, with the intake installed after the silicone has "skinned over" but not fully cured.
I have successfully drilled an Edelbrock manifold to accommodate the roll pin for the cork gaskets, but I don't see any way you'd be successful putting the cork gaskets on without the roll pin. I also recently read of tight intake bolts caused by the cork being too thick or too thin.
If you notice I'm doing everything & anything to postpone the electric & tuning hunts!
Step back, look at that car. It's a freaking beauty. Think of all the pleasure it will give you to drive it around. Thinks of days with ice cream cones and grandkids.


You can drive it around with the interior wonky (or mostly missing FWIW) and with paint scars. But you can't drive it around until you get the electrical fixed and the engine running right. So, that is my priority recommendation. You be you. (y)
 
I know, I will get to it eventually, I procrastinate twice as long as the job takes, so at this rate I should have it fixed in a month or two!

once that's done I still have to pull apart the front of the engine to put in the A/C kit, that's gonna be another great adventure, I did A/C work all my life but never touched a car!

At least now I have some instructions, can't believe they sent it without them, but then again the compressor & brackets were missing the first delivery & I'm still waiting on one final hose end that will need to be crimped once I size them out.
 
I'm confused on the silicone deal, you said it won't last, then you say silicone front & rear instead of the cork gasket?
That's not what I said at all. I said:

Silicone is not fuel-resistant, so it's not even suitable as a temporary repair. It should never be used on the intake-to-head junction or carb gaskets. It will not last even a little while, regardless of color.
Then, on a completely unrelated part of the intake manifold, I said:

...due to the age of, and God-knows-what's been done to, these engine parts, the intake-manifold front & rear end seals seem to create more problems than they solve and should always be left out. Silicone only, with the intake installed after the silicone has "skinned over" but not fully cured.
Since there is no fuel at the end seals, I fail to see how this could create any confusion.

Regardless, the end seals are the cause of probably 90% of vacuum leaks on LA engines. They hold the manifold up off the block, causing an inefficient seal at the manifold to cylinder head junction. This is true of even the ultra-soft spongy grey ones. When the intake gets torqued, the manifold can flex under the stress, causing the top half of that joint to come together, and the lower half open to the cam valley. When this is the case, removing the intake shows oil tracking from the bottom of the intake gaskets to the intake port openings.

I have successfully drilled an Edelbrock manifold to accommodate the roll pin for the cork gaskets, but I don't see any way you'd be successful putting the cork gaskets on without the roll pin. I also recently read of tight intake bolts caused by the cork being too thick or too thin.
None of my blocks have any roll pins on either end, including the two that were factory-assembled when I took them apart. But I have seen them on other blocks. They should be removed and discarded since they serve no purpose outside of the engine assembly plant.

Going back to "the age of, and God-knows-what's been done to, these engine parts", things warp, heads or intakes could've been milled, aftermarket parts may not have the same tolerances as factory, etc. We have no idea what's been done when we start an engine project. That's why the roll pins should be removed/discarded if present and the end seals can take their place next to 'em in the trash can.

In addition to myself, Stretch, diplomat_wagon, and several offline friends have had this exact vacuum issue on LA engines (and Chevy small-blocks) when the end seals were used. Removing them solved the problem.

2 -I will recheck the interlock plugs.

3-also will double check the plug for the signals at the column, it was in pretty clean shape.
If the dash lights are the only issue, then don't bother with either.

Turn signals did not work with key in run, but not running, start the car & they work, have no idea why maybe something to do with the other problem.
This makes zero sense. It's literally not possible, since they're switched by the key, not the engine, and the engine has absolutely no input on lighting. Are you sure the key was in RUN or was it in the first stop position that unlocks the column? That position has no electrical function, it literally just unlocks the column. The RUN position is where the key rests just prior to, and after, starting the engine--literally the last stop before it tries to start.

All the lights you mentioned radio, shifter dash are the ones that are out, headlights, markers, parking lights, & now even the back up lights work.
If you have taillights and side markers, then the problem has to be dimmer-related. It's either a faulty switch, the switch is not connected, it's not being fed by the headlamp switch, or you have a broken wire somewhere along its run.

Here's a simple test: With the key in RUN position, run a jumper wire from the red triple tap to the orange triple tap. Regardless of whether the lights are on, the dash lights should illuminate. If they don't, either you've got a ground issue (which I doubt, especially if the gauges work) or you don't have the key all the way in the RUN position.
 
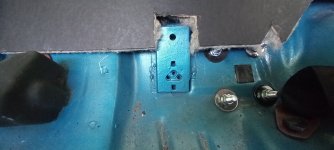
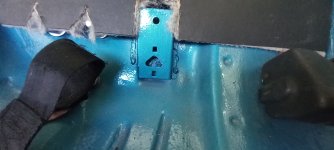
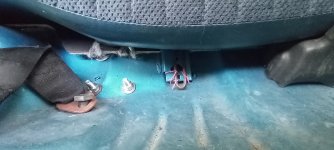
Not much accomplished, took the back seat out, went n to see what screws I needed to fasten the bottom of the back & already hit a problem, the piece to screw to on one side is gone! 20240416_131753.jpg20240416_131745.jpgSo I dug out 1 screw & a couple of washers & got the good side done, the other side I tied in with wire, hopefully no one will be sitting there in a major crash!

I thought I might bend the hook on the seat, but that would not be easy, so she sticks up a little extra on that side (as in the pics earlier) 20240416_132735.jpgPulled out the drivers seat & crawled in, connectors looked good, did a test on the ignition switch & with key on I get a beep from red to black (black feeds right side of the fuse box)

Jumped the red to black on the car side & I get power to the lower 3 or 4 fuses but NOT to the top 1 cavity 5 (for all those lights)

left has power all the time, now even on that side I have no power to the top fuse, so both sides top fuses are dead,

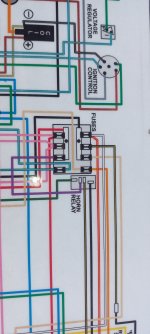
In the diagram I bought there's a dot between the top sockets & the rest, does that not mean they are NOT connected? 20240416_155227.jpg20240416_155413.jpg
tried to follow the diagram to see where the heck it gets power from but those wires run all around in friggen circles!

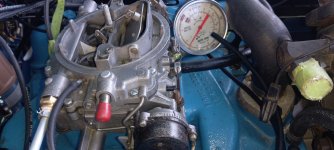
Having had enough of that for one day I started the motor & let it get hot, timing holding around that 10 mark, vac also still around 10, lowered the idle a bit more messed with those screws no success on increasing vacuum.

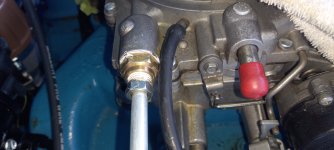
replaced a funky looking hose on the choke side, no help there , is that choke adjustable, this is about how far it opened, car running quite a while & hot! 20240416_152128.jpgSo that carb fitting was still moist on the bottom, last ditch effort I pulled it, wrapped the metal gasket in teflon & the threads & put it back in, so far it seems to be holding but I only ran it a few minuets.20240416_154607.jpg

Can't reach the back of the dimmer switch or light switch, would love to find the power wire to all this stuff before I start pulling the dash apart again!


As for those signals, same deal will not work till car is running, key was in run, cause I use the started button from outside to start it most of the time>

Still have not found the 4 way flasher unit?
 
Last edited:
Oh yea, tripple red had power with key on, orange power all the time.

Dome test failed, now should there not be a click at one end of the dimmer, turn allthe way in both directions, no dome & no click?

I do have power to the radio, there's a tiny red light that come on in the middle of the radio, I dialed it around a bit, got nothing, I have to screw in the ariel & hope it works with that in!
 
K I get the silicone now DOH!

I did again snug down the carb bolts again, there are pretty darn tight, I'm afraid to break something!

I think I will then try a bead of silicone on the front & rear manifold areas & see if anything changes, that DID work on the other car!
 
So that carb fitting was still moist on the bottom, last ditch effort I pulled it, wrapped the metal gasket in teflon & the threads & put it back in, so far it seems to be holding but I only ran it a few minuets.View attachment 27587
Use teflon tape very cautiously. Gas will break it down and flow into the carb causing a real nightmare. NEVER have it anywhere near the open end.
 
In the diagram I bought there's a dot between the top sockets & the rest, does that not mean they are NOT connected?
I do believe all the fuses have to be connected to the power bus, which is what I'd interpret that rectangle to be. It is curious that one is connected a red wire and the other to a black wire though.
Dome test failed, now should there not be a click at one end of the dimmer, turn allthe way in both directions, no dome & no click?
This is a thumbwheel dimmer? That "click" part of the switch is pretty simple on the b-body thumbwheels but you'd probably need to take it out to figure anything out about it.
screw in the ariel
1713361926041.png

I think all the people I ever knew who called an antenna an ariel have died off. Well that's depressing.
 
Well if I'm correct in my tracing the red is hot all the time, the black comes from the ignition harness & is hot with key on.
I checked both sides of those top fuses, no reading there, before I pull the fuse box I'm gonna get a headache trying to trace where they get power if not from the buss?
If power comes from the light switch to the dimmer switch I'm gonna have to pull the switch panel to test those, can't get to them from the back, I will look again, but had no luck getting a prob up there yesterday.

Well I'm one of the elders now, I just hope there's still a few left that will appreciate a muscle car when I have to (or my kids) sell the car.

My youngest (29 in 2 weeks) just told me he wants to drive it to work, I said if I ever get it to be a reliable driver, if it's stolen I will probably do better with the insurance than trying to sell it!

Rain on the way see how far I get!
 
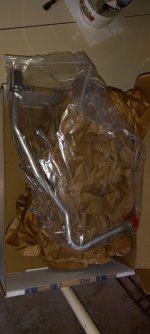
I hope I just got the last missing piece of the A/C kit & they emailed me the instructions, twice, first time they missed the compressor instructions, now if this old guiser can follow them that's another question!20240417_122055.jpg
 
Didn't accomplish much & created another problem, but at least I learned a little about the circuit.

I was looking at that diagram of the fuse box upside down, if you look close the buss stops at 3.
So I saw the light one was actually fed from the dimmer switch , so apart came the dash.
if I jump power to center post I get power to that fuse, yea, I also discovered it only gets power when the light are on. Still nothing lit up. 20240417_133707.jpg
I went across the outside 2 & nothing lit but my damn jumper wire got real hot???
So while I was messing with the connector one of the wires broke, weather it was well connected before that is unknown. (one of the black/yellow T) 20240417_133938.jpgfixed that pretty easy but went to put the spade back in & it won't lock in that little spade in the back broke off, now I have to rube a way to lock it in!!! 20240417_151052.jpg
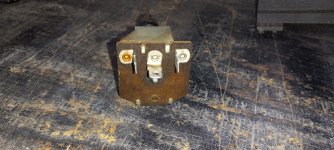
So I hit the spare dash parts, I bought a switch panel when doing the other car, well guess what's missing, yep the dimmer switch! 20240417_160336.jpg
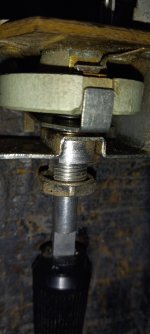
I did have partial progress on my dimmer, there is a click at the end, a spray of wd40 loosened it up enough to work, then I cleaned all the contacts in the back & dowsed it in contact cleaner, the ? rheostat ? now works, continuity power in to center lug & it varies as you roll the knob.
20240417_160351.jpgbut I cannot get continuity from either post to the outside post. I got the copper contact under the point clean & can read continuity on the copper further up, but nothing on the other side, there's a copper thing that gets pushed down to hit the inside point for that lug, have continuity betweeen the post& the copper spring thing?
Can't figure how the power goes from one side to the other if it's supposed to? 20240417_160413.jpg
 
On the good news side I have radio, on the bad, it won't tune to my station, I'll fight that later.
It actually takes a few minuets to warm up.

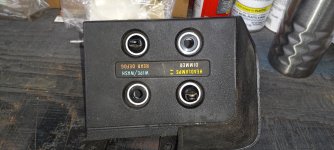
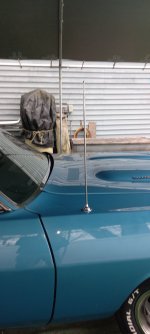
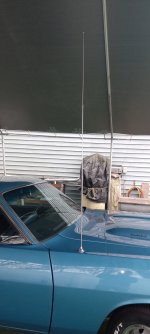
The ariel is defiantly NOT stock, at least not for what I had, a one piece mast even shorter by a little than this one down! 20240417_160217.jpg
Raise it up I could trim the trees! 20240417_160145.jpg
 
I got it off before melt point, stung my fingers a bit!

No it's one of those old face new guts 800 friggen dollar thingies.
It lit, hmmm cant say lit, light still not there.
It went on tiny light in the middle of the dial.
but for a minute or 3 the dials would not do anything, I was getting nervous, then all of a sudden it almost blew out my ear drums, lowered that real quick then tried to tune my station, classic rock 104.3 got a few stations around 104, but mine did not come in, that will just ruin the car for me.
 
So I tried charger mans power probe today, there's a feature where it will provide battery power to the tip, gonna try going backwards & see if I can get some lights on in there with direct power like to the light bar & see what happens.
Another dumb thought, if that switch at the end of the dimmer is only to light the dome light I don't need that, if the dimmer part will light the dash I can just put that back in.
I will test it before I rebuild that corner!
 
Not a good day, tried that provide power test, at least I know I have a good bulb in the shifter, only single wire I could get to with the probe.
Now when I power up the 3rd prong hole in the connector for the dimmer it triggers a circuit breaker in the probe (same one that got my jumper wire hot the other day) I think that means I have a short somewhere in that circuit, which is the one when the switch on the dimmer is on, which feeds the dome light to, but the dome light works on the door switch, this is making me nuts.
So the 2 accessory plugs I found, one red, one by the steering column yellow. I found 2 more way up in the top of the dash, one has some radio wires connected to it & the other I can't see it's above one of the hold down brackets.
Still no sign of the 4way flasher unit or the plug it goes into???
So I give up on that for now & start the car, can't even get it to idle again, at that point I figured I better take my numb fingers in the house & bitch & moan a bit before I take a sledge to it!

Gonna search my old pics & see what the wiring looks like while I was building it?
 
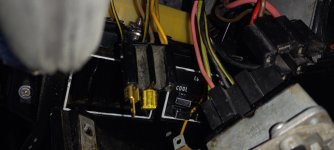
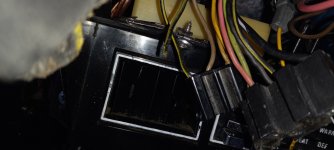
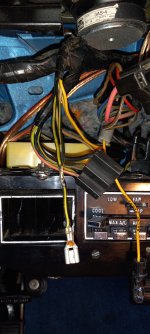
Went through the dash rebuild pics, not helping much, & there's no sign of a 4 way flasher unit or even a plug for it that I can find?
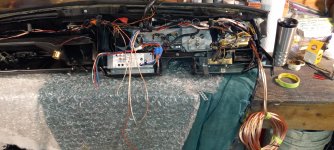
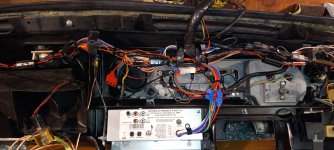
Best pics of the wiring mess, I'm pretty sure the radio is not the problem as far as the main wires go, it's one of the few things that work. the light wire for the radio I guess could be? 20230813_155438.jpg20230815_153804.jpg
 

SiteLock

SiteLock
Back
Top