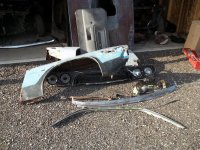
You can't save 'em all

Dr.Jass

Pastor of Muppets
Well, I've decided the time has come. Unfortunately, that means a Challenger is going to suffer The Fate.

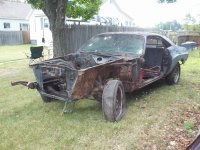
After some careful evaluation of what's there, serious consideration, and conversations with a few friends, I've decided that Flying Jerry's old '74 Challenger has reached the end. While Kev and I agree that yes, it's an E-body and technically probably shouldn't be scrapped, it's just too far gone. Though I haven't bothered to document any of it, I've spent some quality time with it in several visits to the storage. Between rust and the roof, the damage is just too severe. There's literally nothing to which a guy could start welding new panels, and the tree took out both the side and roof structures. The worthwhile parts don't warrant paying storage on the entire car any longer.

The plan? Take anything worth taking, however trivial. This includes most of the interior plastics and trim, the seats, every piece of original hardware I can bag and tag, switchgear, some cluster parts, the taillamps, and any decent exterior trim. I can do that stuff where it sits. Once I've done much if not all of that, I'll borrow a trailer so I can bring it here and do what I did with my Imperial parts car several years ago: lift it and remove the disc brakes, swaybar (if it's even there--I honestly don't remember at the moment), complete rear axle, lower control arms, etc. I'll leave the hulk sitting on the trailer and have a scrapper friend haul it to the nearby yard. They'll lift it to its doom with The Claw.

The storage fees aren't a problem, mind you, and there's a bunch of other stuff (including five engines) in that spot that needs to stay. However, I believe my friend is close to finally giving me a hard number on his Dart. He hasn't given me a price but we seem to be nearing one, partially because of his desire to get it out of its borrowed storage spot. As soon as he spits out a figure, I'm at the bank. When I buy that car it needs to go somewhere. I've already got a spot; I just need that '74 gone.
 
Sometimes you've just gotta let it go.
The difficulty mostly lies in the cars I once owned that I parted or beat to death, and now see similar vehicles selling for tens of thousands of dollars. "Man, I had one of those. I got it cheap. I alternately raced it and drove it like a woods truck." It never occurred to me that a '79 Trans Am would one day fetch over $85K, but I watched a 403/auto do exactly that. Mine was a prettier '78, a 400/4-speed, and one of less than 20 built with that color combination (silver with red/grey stripes and a blue velour interior) and a factory 8-track. My first Challenger had every single Rallye goodie plus light group, 4-speaker AM/FM radio, 3-speed wipers and the 340/4-speed. However, it was not an A57 (Rallye package) car, so no ghastly fender scoops. It also lacked the floor-mounted noisemaker (console). It was unusual if not outright rare. I had a '72 Road Runner 400/stick, '70 Super Bee 383/auto, '73 Charger Rallye, '67 GTX... they all got parted/crushed except the Trans Am, which was wrecked by the subsequent owner (and eventually crushed, I suppose). However, I can't imagine a '74 318/auto Challenger will ever rise to the price where this car would be worth the effort and expense, at least not in my lifetime.

Having accepted its unworkable state means parting it will be physically easier. Make no mistake, I'm not fighting rusty bolts to get this thing apart. If the impact won't do it, it'll the angle grinder or Sawzall. The penetrating oil can stay in the garage. If the lower control arms have swaybar tabs, I'll get 'em by cutting the torsion bars, maybe even the K-member. The uppers will probably get cut to remove the spindles. I'll saw the floor before I'll break a seat stud, and I'll get the axle and spring plates by zinging through U-bolts and shocks if necessary. Butchery of the highest order, or demolition therapy if you prefer.

Don't worry, I'll get pictures. 😁
 
Round 1 was a draw. I got stopped by prior hackery and not bringing an adequate selection of tools.

The interior windshield trim, upper side-glass trim, sunvisors (surprisingly good ones), kick panels and rear-view mirror are out. I got the driver's chrome remote "racing" mirror off and that door panel pulled. The latter is rougher than I thought, but no surprise considering the car. It's still serviceable for a driver, I suppose. The forward lamp harness is almost out, save one bolt holding the ground wires to the core support, as is what's left of the engine harness. Despite all the cutting on the engine harness in an attempt to bypass the seat-belt interlock, I'll keep it just to have the connectors. Other than what's part of the wiper motor, and one wire used in an attempt to make it work, the firewall is devoid of wiring.

100_6177.JPG

I had to laugh at one attempt to override the interlock system: No doubt thinking "that wire goes hot during crank" they'd tied the starter relay's positive wire from the ignition switch into the trigger wire for the starter. They were not smart enough to realize that the starter wire won't go hot without the relay activated. 😆 Whomever did that clearly had no idea what that box on the inner fender--the relay--actually does.

The driver's door is junk, so that's one less thing I have to remove. I will, however, gut it completely except for the broken outer door handle. I didn't really look closely at the passenger door yet but I don't expect it to be any better. I couldn't get panel off that side because some heathen used an oversize-head bolt to install the door-lock lever. Unlike the driver's door which had none, the passenger side at least had three of the correct shouldered door-panel screws. This car is not turning out to be the fastener cornucopia I'd hoped: 3 out of 10 door-panel screws, 4 out of six sunvisor, 3 of 4 upper windshield trim, etc. The A-pillar trim was apparently held in place by prayer.

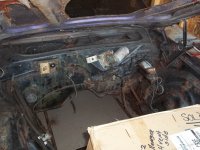
Both rear-quarter "rollover" stiffener plates are still in place, but I didn't have a large enough screwdriver to remove them. However, with the benefit of flash photography I can now say without question this car was originally painted E7 Burnished Red, the same color as the '74 'Cuda Rusty bought new. If you enjoy those "find the hidden whatever" photos, you'll enjoy this. Find all the rust holes:

100_6173.JPG

HINT: Look over by the carburetor and among the broken glass.

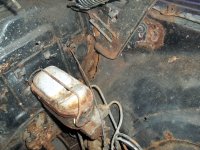
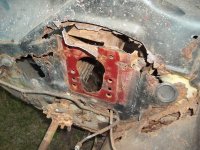
Since I was there and working in the engine bay, I took better stock of what's left of this thing. It's official: The only salvageable structural part of the car is the core support--and that's bent. I'm sure that comes as a surprise to no one, self included. In this photo, you can see the area around that body plug is ripe to be pushed through, with a hole starting at about its 10 o'clock and extending to the "interlock override" wire. There's another above the master cylinder (near the firewall clip) and a shadow to illustrate where the inner fender just plain ceases to be. Everything seen from that shadow to the firewall is firewall.

100_6180.jpg

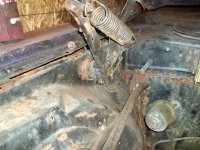
The passenger's side will vaporize upon removal of the hood hinge. The photo doesn't do it justice; the metal is like a flaky pastry here--delaminated layers--and it bulges out considerably. Obviously this end of the firewall's not much better than the other.

100_6181.jpg


On the next trip over I'll get the passenger's door panel off and probably drop the heater box and blower motor. I'll do my best to get the 1-year seatbelts out as well, plus remove the front fenders. I forgot my roll of masking tape, so I left all the side-window trim in place, which thankfully is retained by screws on this car. I want to tape all the fasteners into their correct locations so I know what I have and what I need. I also need to yank the windshield trim, which appears good but was caulked into place--quite professionally, I might add.

I was over there for about two hours. The building is dark grey with an even-darker grey roof and I have south-facing units, so it was getting plenty warm inside by the time I bailed. Also, this car is disgusting just to be around, never mind spending time in the interior. You feel like you need a shower just from standing near it in the stall, no joke. It was owned/neglected by icky people and infested by icky critters in its years of outdoor storage. It's a bit like a haunted house--cobwebs, broken glass, evidence of mice, etc.--and I prefer to limit my exposure to small doses.

I made tentative plans with Pete last night to borrow his trailer for final disassembly. After today, there's no longer any doubt in my mind. I want this thing gone, the sooner the better.
 
Despite all the cutting on the engine harness in an attempt to bypass the seat-belt interlock, I'll keep it just to have the connectors
I always keep those, scrap wire and terminals are always handy.
I made tentative plans with Pete last night to borrow his trailer for final disassembly
When I get started on my Belvedere I'm going to cut it up into pieces I can load on the back of the Dakota.

The last one I did I hauled off on a D-50 :D
 
I spent another few hours at the storage area today. I didn't pick the worst day for it, I picked the second-worst. Yesterday was sunny, hot, and muggy. Today was less sunny and there was a little bit of a breeze--it made no difference in the stall, of course--but I think the humidity was higher. It was miserable, but the car isn't quite to the point of disassembling itself yet. It's close.

I remembered the tape and a Sharpie this time, so I could label parts and in some cases, put the hardware back where it belongs. Most of what I did was forward of the windshield, though I did get the passenger's door panel removed. It's not great, but like the driver's there are no speaker holes and no cracks. Also like the other side, the woodgrain insert is in fantastic condition. With that, all of the interior plastics are out.

I started in the easiest spot, right up front, taking the hood latch supports (horizontal and vertical), the header-panel brace that ties into the vertical support, and the hood latch itself. Luckily, on these parts all the hardware could be reinstalled once everything was off the car. For as butchered as some parts of the car were (like the wiring) I was surprised by how much original hardware is still in place. After a couple more bolts, the wrecked header panel came out. To my surprise, all of the headlamp hardware is present--which is good, because it's the same as '71 and I need all of it for that car. The grille is junk, as is its outer moulding so it can all go in the trash can. I also took the (original) ground-wire bolt out for the forward lamp harness, so all the exterior wires forward of the firewall are gone. I took the hardware off the bulkhead disconnect and pushed it through the firewall into the interior.

Next off were the fenders. Oh dear.

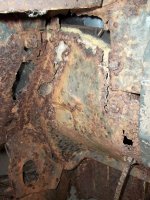
The visible damage to the firewall in previous pictures was just a warm-up. It's completely smote outboard of the inner fenders, particularly on the driver's side:

100_6187.jpg

100_6189.JPG

Sharp eyes will see the plate someone riveted in to give the rear splash shield a place to mount.

The passenger's side is better, but still not good:

100_6183.JPG
Yes, that is fiberglass firewall insulation showing from inside of the car.

Both rear splash shields appear to be in good shape. Serendipity!

I removed the LH inner-fender splash shield (the tar-paper one) and saved the clips, one of which still has a chunk of rail on it. That pile of rust beneath wasn't there when I started. The brake-line bracket is held in place by nothing but the brake line itself.

100_6186.jpg


Just one more carnage photo for this post, I promise. The voltage regulator was still held in place by the "correct" bolts, so I attempted to retrieve them. The first one came out just fine, but the second one was much harder to turn for some reason. Eventually, the weld-nut in the firewall broke free, ending that endeavor. Of course, the regulator then rotated itself to its lowest gravitational point, which exposed something new. I can honestly say I'd never seen a voltage regulator rust out until today.

100_6191.JPG

Yep, the potting compound can be touched from its back side.

I also removed the original ECU and bracket, plus the ballast resistor. All were held in place by the factory bolts. I'd guess that more than half the Mopars I've owned had the wrong ballast bolt, so that was nice to find.

Next to go was the 3-speed wiper motor and linkage, but I had to get the hood out of the way. One correct bolt, three hardware-store parts. I managed to get the hood off without annihilating my back or any parts including the hood itself, which in fairness was pre-annihilated anyhow. The wiper motor and linkage were in good shape, including the key-slot clips which I was sure would break. Everything came apart easily, amazingly enough. The motor mounting nuts got taped to the motor, the clips went back into their grooves, and the wiper-pivot bolts got reinstalled in the pivots. I left the linkage assembled but didn't reconnect it to the motor.

That left me free to remove the lower windshield mouldings, all of which are in good shape. I also made note of how the lower moulding sat on the windshield. Unlike Rusty's moulding, this one sits flush... but it's on original-thickness glass, which may make the difference. I'm not sure. The upper/side mouldings were left in place for the moment since I didn't have a knife with me to cut the beautifully-done (seriously) caulking. The clips still appear to be in place and doing their thing, so the caulk is a puzzle.

Next to go was the heater box, which I just allowed to fall into the interior. I had to laugh again at my high-school chum Freddy, who somehow managed to change a heater core with the box still installed in the car in 1988. He bitched profusely about how difficult it was. Three nuts and the whole shebang just falls onto the passenger floor (on s non-AC car, anyhow) making for very easy servicing.

The last thing I removed was the passenger's-side upper weatherstrip channel and drip-rail moulding. E-bodies are brilliantly designed here. These parts install/uninstall with nothing more than a Philips-head screwdriver--no clips, no f__king around with old-school bottle openers, no fuss. Remove the screws and off they come. The weatherstrip actually "snaps" into the channel, meaning no glue and no clips, and the channel mostly holds the drip-rail moulding in place (there are only four screws in the moulding). I could have done both sides of the car in half the time spent doing one moulding on the Valiant, probably 1/4 the time had I brought power tools. All the screws are taped back into their holes and the parts are marked "RH". I thought about doing the driver's side, but I was drenched in sweat and getting hungry, so I left it for next time.

The last order of business was generous application of penetrating oil to parts I'd rather not destroy trying to remove: brake-line nuts, the prop valve/bracket assembly, the master-cylinder reinforcing plate, and various other bits. After that, I came home.

Good news/bad news? I won't have a problem removing the swaybar and lower control arms, because the car never had a swaybar. Yay, but damn it.

The parts I removed today, minus the wiring and the heater box. Anywhere you see bright green is where fasteners have been taped in place (or to their component) and marked.

100_6196.JPG

100_6195.JPG


Anyone need a Challenger hood with a massive hole cut in it? They missed the underbracing for the most part (skimmed it in one place). Based on the bolt holes, I'm guessing it had a cowl scoop on it. 😖
 
I forgot one photo.

Feast your peepers on this bodywork on the driver's fender, as seen from the inside. A little 'glass, a bunch of plastic... It's enough to make Baby Earl Scheib cry.

100_6198.JPG


This fender wasn't born on this car, which makes me ponder how bad the original one was.
 
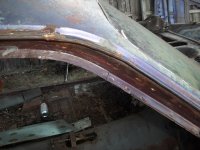
I made some progress yesterday, including removing the fender splash shields, the doors and their lower hinges, and the hood hinges. I got the heater box the rest of the way out which was as simple as removing the cables, and cut the sealant so I could remove the front and rear reveal moulding. One section of the rear reveal is damaged from the tree hit but it's not nearly as bad as expected. I think it's repairable--again, it's worth trying v. the crappy aluminum reproductions.

100_6202.JPG

100_6200.JPG

Look at how the rear bumper sits in relation to the body. I didn't notice it until yesterday--or I forgot--but the car's got '70-'72 rear bumper mounts. I now kind of wish I hadn't bought new ones for my car.

The immediate to-do list includes the dash structure and pad, rear glass and regulators and the '74-only seat belts. The master cylinder, reinforcement plate, and prop valve need to come out as well. I also have to figure out what column is in the car. It's definitely not E-body but it is a floor-shift column, my guess being '73 or '74 B-body. If nothing else, the upper housings and key-release mechanism are worth something.

The biggest job is the suspension, but with nothing spectacular about it I'll likely cut most of it out rather than mess with rusty bolts. I will try to save the original upper shock hardware; nobody ever changed the front shocks on this pig. I'll try remove the rest of the suspension the right way, but I'm not hopeful... and I won't waste much time on it. Have Sawzall, will travel. 😁
 
Wow, something that was much worse than my 73!!!

E7 you say, that would be a fairly rare pic, in all my "Cuda hunting I think maybe 3 came up.

I will take pics of my left over hardware, I have quite a bit see if any can be of use to you!
 
Wow, something that was much worse than my 73!!!
And yet not as bad as Kevin's '68 Charger which is well on its way to being restored. Of course, that's his actual first car, so emotions play heavily into the amount of effort he's willing to expend.

E7 you say, that would be a fairly rare pic, in all my "Cuda hunting I think maybe 3 came up.
Other than yours and this one, the only other E7 E-body I recall is one that was a '74 318/auto Challenger bought new by Bruce Hudson. He was a crewman on the ill-fated Edmund Fitzgerald. The car was sitting at the dock awaiting his return, filled with luggage packed for a planned trip to California, when he died in the sinking in November of '75. The car's still around, with the owner claiming it's "all original, just like Bruce left it" despite a full repaint, a 340, aftermarket wheels, and a ton of other non-original bits.

I will take pics of my left over hardware, I have quite a bit see if any can be of use to you!
I would much appreciate that. This car hasn't turned out to be the fastener extravaganza I'd hoped. A lot of the interior screws were replaced with "this'll work" parts or missing entirely. I have at least one of the right parts for all of 'em, so I know what I need, but I'm not keen on paying reproduction prices for relatively-common production parts. Door-panel and door-lock-lever screws are a sore spot, and to my knowledge both are E-body only.
 
There's more involved to this nonsense than one expects when beginning such a task.

For no specific reason, I decided to tackle the dash first. I didn't have to remove everything I did to get it out, but some of the stuff is trashed anyhow so there's no use in hanging onto it. I stripped the dash harness out first, and in doing so realized this was an A01 car--light group. The map light and switch were still on the lower edge of the dash, and the glove-box light (with a perfect lens!) were still in place. All good stuff, all pulled and tagged. Anyhow, the dash wiring is suprisingly good, as in "it wasn't hacked to death over the years" which is suprising on this car (did I mention the shifter was a PTO cable?). Even the seatbelt interlock module was still in place and connected. Based on the electrical nonsense that was happening underhood, I'll bet it still works.

Here's a shocker for you: Not only is the ammeter wiring not burned, the connectors are not even discolored.

I did not expect the dash structure to be that easily removed. I couldn't find the procedure in the service manual, but looked online and found instructions. They'd have you remove every bloody fastener in the general dash zip code to remove it. In reality there's only eight fasteners holding it in place, and half of 'em also partially retain the dash pad. It was a much bigger fight to single-handedly get the structure out of the car than it was to unbolt it. I'd removed the glove-box door for no reason (the site I read said it had to come out, along with the cluster and all the trim--LIES!) but since the hinge was rusted solid--thankfully open--I took the opportunity to try and free it with Seafoam Deep Creep. It worked; it's not floppy like a factory one but it moved through its travel. Anyhow, the dash is out and in good condition (surface rust only). Don't ask about the silver paint; it puzzle me too.

100_6208.JPG


Ever wonder what that little protruding cube thingy on the top of an old plastic 552 flasher was all about? It's an installation aid. It snaps into side of the ashtray on this car. @RUSTY Cuda, now you know why yours was hangin' in space. New/metal flashers don't have it.

100_6226.JPG


The ignition switch was connected but lying on the floor, which made removing it as easy as unplugging it and tossing it over my shoulder. 😁 There were still two wires in a small connector hanging from the column which turned out were for the key-in buzzer switch. It's a tiny little thing with permanently-attached wires. I removed and marked it. I don't even know if it fits an E-body, but it's probably no longer available.
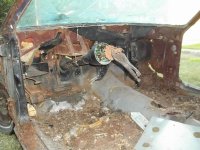
With the dash and all its attending parts out of the way, it was time to go after the master cylinder. Being a manual-brake car, the master has pressed-in studs and the nuts are in the interior. I gave the pedal a firm upward yank to free the pushrod, then unthreaded the brake lines without damaging them--a minor miracle up this way. I removed the nuts but it took a lot of fighting to get the master free. Once out, the firewall reinforcement needed to come out too. Other than the master-cylinder fasteners, there are two nuts more at the top which have wire-harness clips under them. Those nuts are on normal bolts, so when you attempt to loosen them, the bolts spin in the interior. 😖 However, when you don't care about the actual firewall, call Captain Recipro! This was the only time I resorted to any power tool today. I cut out around the plate (the area above it just evaporated) and forced the plate out a bit with a prybar. That gave me just enough access to slip a wrench between the plate and the firewall to hold the bolts. Ugly but effective:

100_6209.JPG

Aaaand there's a little more E7 red with which our man Rusty can reminisce.

With the master cylinder and reinforcement out, I went after the proportioning valve. Like dentists that recommend Dentyne, "4 out of 5" of the line nuts came backed out nicely without damaging the lines. The nut for Ol' Number Five, the line going to the rear of the car, rounded off almost instantly. I just cut the line. I was sure the prop-valve mounting stud was going to break due to rust, but I'd put penetrant on it a few weeks ago and it came off without much fight. With nothing to hold the brake pedal in place removing the pushrod was a pain in the arse. This is a mistake I make every damned time. While I was at it, I removed the accelerator pedal. I didn't destroy the cable retainer for once.
The only things left in the dash area are the parking-brake pedal, the accelerator cable, and the defroster and LH vent ducts. I may not bother with the ducts since they're virtually never bad. I also need to remove the upper door hinges, but otherwise I'm essentially done here.

100_6211.JPG

Thanks for the steering wheel, Rusty! 😂

Moving to the rear of the car, my first order of business was the inside reveal moulding, also damaged by the tree. Only one piece is bad and I'm pretty sure I can fix it, so I pulled and marked it, taping the screws into their respective holes. There was a lot of black window sealant stuck to the lower parts--not butyl rope, something else--that I had to remove to even get the parts out of the car. I'd noticed a few things previously, but this task demonstrated what I'd begun to suspect: Whomever painted this car purple did a very thorough job of it. Like, they went so far as to remove the rear window along with the side-glass weatherstripping/channels/reveal mouldings, and hood hinges. It was not a fly-by-night Earl Scheib mask-and-slash by any means.

100_6216.JPG

(At this point I'm so sick of broken glass I could vomit)

100_6215.JPG

I think the same person that did the purple did the engine bay, trunk, and door jambs in black, again very thoroughly. The only thing I pulled off the firewall or out of the engine bay with factory paint behind it was the master-cylinder reinforcement plate. A lot of effort went into making it a Camaro.

Next out was the rear lamp harness, which is amazingly unscathed barring the wire for the trunk lamp, which Pete may have broken removing the decklid. It's actually an easy repair and other than the sheathing/sleeving, all the other wires are in excellent condition. I even got the license-lamp and fuel-sender grommets out without damage. The taillamp sockets are a bit beat, but a little time with needle-nose pliers will remedy that.

The only wiring left in the car is that for the dome lamp, and I'll just snip off the connector in the trunk for that. Why? Because someone apparently wanted a custom dome lamp at some point and cut the wiring above the headliner. What was installed is beyond me; there was nothing approaching a dome lamp in the car.

100_6207.jpg


The other stuff I removed today:

100_6203.JPG

100_6204.JPG


It may not look like much overall, but when you're being careful to not destroy fasteners, along with documenting and/or maintaining their locations, its more time-consuming. Including about an hour of very-lazy, slow cleanup and putting tools away, I was out there for about seven hours, but subtract the hour and a half that Pete and his brother John ate up when they stopped for a visit. It was good to see John; I've known him longer than I've known Pete but hadn't talked to him in a couple of years. John's an excellent body man who will most likely be painting the '70 Swinger if the time ever comes.
 
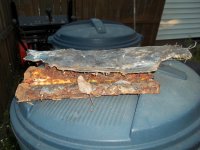
Speaking of body work, this is my absolute favorite part of this car. It represents the treatment this car got late in life by Flying Jerry and potentially those after him. I found it in the trunk, and as far as I can tell at one point it was the lower driver's quarter panel behind the wheel. Check out the craftsmanship:

100_6222.JPG

100_6221.JPG

100_6220.JPG

100_6219.JPG

100_6217.JPG


There are at least two, possibly as many as four layers of metal in there, not including the hardware cloth (mesh). The garbage can lid gives a good idea of scale. It's a couple of inches thick and has to weigh a couple of pounds. If I could, I'd encase this sucker in a solid block of acrylic. You just don't find this kind of proud artisan anymore.

I really wish I'd have shown it to John when he was here. Instead, I'll post it here to terrorize @restoman. :ROFLMAO:
 
I still have no 4way flashers & have not found the unit or the wires that should go to it!
I didn't notice anything on the side of the ash tray mount, but wasn't really looking,
But I think it was just flat when I painted it?
 
The flasher shown in my picture is the one for the turn signals. That's the factory location per the service manual.

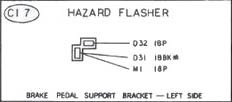
The hazard (4-way) flasher was originally mounted to the left side of the brake-pedal bracket. It's a right-angle 2-terminal connector with three wires: One terminal has an 18-gauge pink wire, the other terminal has both an 18-gauge pink wire and an 18-gauge black with a tracer crimped into it.

CI-7.jpg
 
Well I have one mounted there I will check the wire colors, maybe I just have a bad unit, is there another for the turn signals or is that in the column, maybe I had it all along?
 
There are two separate flashers. The turn-signal unit was originally on the passenger's side of the ashtray (same connector, two wires: 1 red, 1 black if memory serves) and the hazard flasher to the left of the pedal bracket. If memory serves, the wires for the turn-signal flasher are pretty long so that one could be stashed just about anywhere.

With the ignition switch in "run", hit the turn signal then get under the dash and listen. If you're lookin' at one and it ain't the one ticking, then you've probably got a bad one.

If I had to guess, I'd say the hazard flasher connector got stashed somewhere up behind your cluster while you were assembling the car.
 
You have good taste!
The E7 PPG mixed for me was nowhere near the original I would say way more pearls & such in it, the orig did not change colors in the sunlight.
 

SiteLock

SiteLock
Back
Top