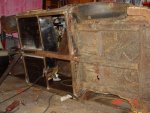
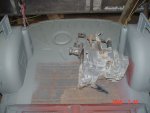
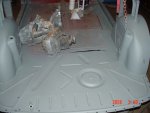
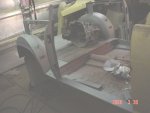
tiny...aka 1958 lloyd

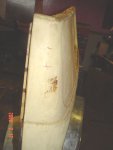
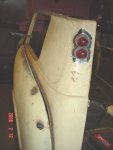
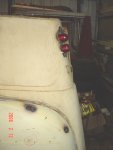
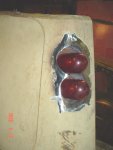
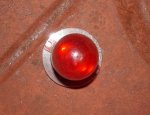
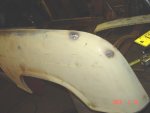
well im out of cutting wheels till monday so ive been tinking with the body work..and FINALY bit the bullet[smilie=f: and cut my tail light frenching holes on one of the uper quarters..definatly past the point of no return on that idea....was smart enuf to measure 5 or 6 times befor drilling and markered and drilled the other fender with pilot marks in the exact same spot

fist a shot of right side and a shot of where the "stock"(missing) tailights were and now the "new" look.....mind you the lenses are not secured to anything and were simply wedged in there location to give me a better idea of the look.....whatcha think...my very first frenching job

pic's dont do it justice.....
 

Attachments

  • 1-Picture 107.jpg
    1-Picture 107.jpg
    36.9 KB · Views: 24
  • 1-Picture 108.jpg
    1-Picture 108.jpg
    36.9 KB · Views: 24
  • 1-Picture 111.jpg
    1-Picture 111.jpg
    46.6 KB · Views: 31
  • 1-Picture 112.jpg
    1-Picture 112.jpg
    40.9 KB · Views: 30
  • 1-Picture 113.jpg
    1-Picture 113.jpg
    47.8 KB · Views: 35
That looks cool!

Just a thought though. Will they trap water with the sockets tilted back inside like that? I doubt It would be a problem if they were kept level on the same horizontal plane as the rest of the car. To keep the top one from poking out further from the bottom one you could stagger the top one back a bit so they both protruded out an equal amount. Whadda ya think? If I could photoshop I could try to scetch what I'm trying to describe but I aint real smert at that stuff...
 
Just my opinion but I think it would look better if not so much of the light showed from the side... sticks out a bit and doesn't look quite right in my opinion. Other than that I like the idea you got there:) Maybe if you could get just the tips of the lights to be visible??:hmmm: Just a thought.
 
i was trying to get em stagered but it changed the apearance in such a way that it looked funny....not shure as of why...as for the water tap ima put a small hole with a tube off of it at the bottom and drain it much the same way a sunroof does so it wont be a problem

fishy im working on gettting more of those lenses and will be reshapeing a set so likely less lense will be seen....actualy fishy the pics dont show it very well...angle has everything to do with it and they dont stick out as far as it seems...mind you those holes are only 2.5 inches winde and the lenses are 1.75 wide.....
 
Last edited:
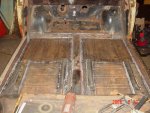
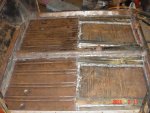
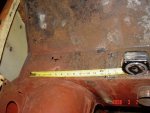
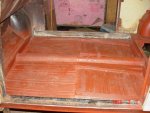
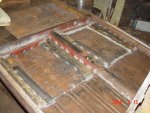
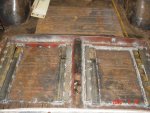
well now ALL of the front floor is FULL welded ..ive 1 patch to do in the rear section of the floor but im putting it off untill i verify if im putting in a 2.5 turbo back there..cause if i am i wont need to patch it as it will be cut out..soo i cut it out anyway and am just leaving it open for the time being

all patchwork has been done except 2 spots that are 2x5 flat sections(drivers side and passenger side behind the fenders)...and 2 sectons 3 inch x 2 foot(floor to sill plate connection) there waiting a day or 2 so i can shoot some rust proofer behind it all and then weld those final ones in

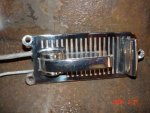
anyway heres some pics....IMO all of the actual hard work is done everything else is a walk in the park in comparison..atleast untill i go ya or na on the 2.5 rear engine

first 2 shots are of most of the panels in and "stitched" into place..second 2 are all patches in place and full welded and cleaned up and smoothed out..
final pic is what i have settled on for interior door handle/lock setup...talk about a cool unit the right side "bar" is the lock..there out of an 80s jag smooth chrome and very cool looking imo
 

Attachments

  • 1-Picture 114.jpg
    1-Picture 114.jpg
    92.2 KB · Views: 24
  • 1-Picture 115.jpg
    1-Picture 115.jpg
    92.4 KB · Views: 20
  • 1-Picture 117.jpg
    1-Picture 117.jpg
    92.3 KB · Views: 19
  • 1-Picture 118.jpg
    1-Picture 118.jpg
    80.8 KB · Views: 24
  • 1-Picture 119.jpg
    1-Picture 119.jpg
    78.7 KB · Views: 29
it got put on hold for some steady fundage...at the point i was at i needed alot of materials that i simply dont have atm so its sidelined....this lloyd's cost to date is still under 50$ and should be under well under 150$ to finish..add 300-400 when i get a 2.5 turbo to put in it...come summer i "should" have steady fundage to start back on other things...the shrunken truck is sitting and gathering parts slowly
 
Beautiful work! Never thunk it and it won't happen anyway but dig this


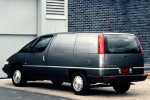
LLumina taillights for the LLoyd
 
BootHead said:
Beautiful work! Never thunk it and it won't happen anyway but dig this


LLumina taillights for the LLoyd
Hmm I had an idea for Ford Focus hatchback tail lights but figured I'd get alot of harsh backlash about it:D Lumina mini van lights would work too though. Then again they might also look too modern for what he's going for?:confused: :hmmm:
 
These are the best pic of the vehicles in question I could find.
Wish they were just a bit bigger but hopefully you get the idea.


*Edit* Now that I see both pics side by side, I'm gonna go with Boot on the Lumina minivan lights.....they would look alot better than the Focus lights.
That mini is a 90-96 APV according to the site I pulled it from.
 

Attachments

  • 1990-96-Chevrolet-Lumina-APV-Minivan-90123351990712.jpe
    1990-96-Chevrolet-Lumina-APV-Minivan-90123351990712.jpe
    38.7 KB · Views: 22
  • i.ford.focus.st170.rear.jpe
    i.ford.focus.st170.rear.jpe
    66.7 KB · Views: 22
Are you going to start on it now or wait untill you finish the little dodge pickup or the '50 somthing ford or the cudas?
 
im planing to finish this one befor going back to the others...since moneys tight and this project is cheeeeper than anyone could ever hope for when moneys tight.....my list of expesis will be tires brake lines and the posibility of a 2.5 turbo and tranny..everything else i either have on hand or what not..the choped channeled sectioned dodge CS will likely be next or the 58 ford...still trying to track parts for the ford and there far and few between and expensive

i work on this lil "toy" a bit everyday its lite work LOL..currently its tie downed to the rafters in my shop so i could re-clean the floor of the shop after rust proofing more of the floors.....its high enuf i can walk under it and im over 6ft
 
well ALL of the floor pan work is done as well as all but 1 final spot of rust work..wich im going to replace i think...but holding off cause im not shure how the area is going to look since ive not picked out a MC and clutch cyl so the firewall area is the only area left in need of some R&R..need to pick up a bit of seam sealer but everythings full welded...

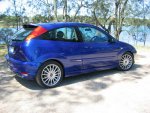
ive got a freind working on an idea for me...with my frenched tail lights i had an idea to do a ring of led's around them set into a ring of plexiglass..and to have them cycle and look like there rotating

ive got a lead on a 89/90 2.5 turbo caravan...so this thing may be becomeing more mopar soon enuf lol
 

Attachments

  • 1-Picture 123.jpg
    1-Picture 123.jpg
    79.2 KB · Views: 21
  • 1PastedImage1.jpg
    1PastedImage1.jpg
    67.3 KB · Views: 24
  • 1-Picture 121.jpg
    1-Picture 121.jpg
    76 KB · Views: 20
Any more thoughts on frenching in the headlights?

making some good progress, looks like.
 
nope i keep comeing to ideas and rethinking them...as it stands im somewhat avoiding the headlights atm LOL...i think ive found some chrome inner rings i like..i would love to score some old 40s/50s headlight rings to chop and section down to size...or someone who can roll me a steel ring to go from the small headlight ring to a "normal" size ring
 
well thanx to a whole bunch of you guys ive got some new steam to work off of...and a hell of a pick me up from this stress filled life..as well as the bancrupcy stuff looming over head

been sanding like mad in prep for some decent weather...ive picked up an 89 voyager 2.5 turbo, a 5spd trans that will bolt up to it thanks to the guys here at the nut house..ive also picked up some free rust proofer primer

due to an error in my digi cam i will have to go back out and RE-shoot pics of progress...it descided to eat all 6 shots ...pic's later when the paint dust clears

meanwhile some tech spec details...ive been doing quite a bit of research on the power ability of mopar 2.2 and 2.5 turbo motors as well as what a trans CAN and cant handle...engine internals are capable of handleing a bit over 400hp befor weak points start rearing there heads..but some ppl can get 500hp without any problems ..trannys can handle about 400...mind you the 2.2/2.5 common blocks USE STOCK /6 bearings as well as a few other bits..no wonder there sooo strong there over built...mopar sold several 225hp 2.2/2.5's and lotus even used there engine with a modified 16v head and made a STOCK 300+hp
now for the kicker with nothing more than 3inch exhaust a grainger valve(basicly the unit controling the air flow on your paint gun) wich will alow me to crank up the boost up to 21psi SAFELY and an intercooler i will be at or above 250hp...now if i intercooler it(have one) and dump in larger injectors(have em) and a STOCK t2 garret turbo your looking at OVER 300hp...now i realize that this lil lloyd is currently only 1200lbs and the engine and trans swap will add about 400+lbs...your still looking at a HANDFULL of overpowerment..should literaly be untouchable on the street asumeing i can keep from frying the tires..i hate to say it but i dont think even a mild V8 could keep up
 
Last edited:
ok wiped the camera clean and started over ..i am sorry for the grainy quality...damn thing pissed me off lol
thats the 100$ turbo minivan thats donating its front brakes lower cont arms struts k member and engine...yes i have to FULLY re-design the rear suspension to even make the 2.5 work(for that matter ANY 4cyl..even the geo 3cyl would be hell)...

now someones going to ask...if its that hard why not put it up front.....well cause up front its simply NOT posible..the car is sooooo narrow that i would have either no steering or be forced to widen the car a MINIMUM of 12 inches ..in the rear however i can FORCE fit it ..but the engine/trans will be dictateing the wheel size

primer went on like silk..ive never had paint flow sooooo well..will see how it drys and what not in the mornin
 

Attachments

  • 1 Picture 125.jpg
    1 Picture 125.jpg
    91.2 KB · Views: 19
  • 1-Picture 163.jpg
    1-Picture 163.jpg
    56.2 KB · Views: 21
  • 1-Picture 164.jpg
    1-Picture 164.jpg
    47.1 KB · Views: 19
  • 1-Picture 166.jpg
    1-Picture 166.jpg
    59.8 KB · Views: 16
  • 1-Picture 169.jpg
    1-Picture 169.jpg
    48 KB · Views: 24
Last edited:

SiteLock

SiteLock
Back
Top