

You are using an out of date browser. It may not display this or other websites correctly.
You should upgrade or use an alternative browser.
You should upgrade or use an alternative browser.
tiny...aka 1958 lloyd
- Thread starter 69.5CUDA
- Start date

gomopar440
Livin' my life...one gas station at a time.
Keep an eye on your mail box in the next day or so...
gomopar440
Livin' my life...one gas station at a time.
So did it arrive yet?
gomopar440
Livin' my life...one gas station at a time.
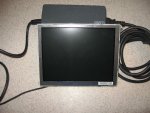
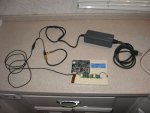
I think we had agreed to $20 for the LCD and $5 for shipping. You can either paypal it to my email gomopar440@hotmail.com or send a money order to the return address on the box it came in.
As far as a match? No idea. I got that one on Ebay used from an individual, not a store.
The connector you probably need is a BNC to RCA adaptor. They are available either at Radio Shack or a bunch of other places onlne. Just look up video cables/supplies and you're bound to find one.
As far as a match? No idea. I got that one on Ebay used from an individual, not a store.
The connector you probably need is a BNC to RCA adaptor. They are available either at Radio Shack or a bunch of other places onlne. Just look up video cables/supplies and you're bound to find one.
MOPAR MARV
Manic Mechanic
Hi Big Guy,
Just popped in to check on your progress and must say it is looking better every time I see it.
Awesome work !!!! Wish I could see it in person! But I guess I'll have to wait for the pics from the show.
I'm betting the little critter will attract a lot of attention.
And just in case I'm not around in time, Happy Anniversary!!!
Have a great time at the beach!
Just popped in to check on your progress and must say it is looking better every time I see it.
Awesome work !!!! Wish I could see it in person! But I guess I'll have to wait for the pics from the show.
I'm betting the little critter will attract a lot of attention.
And just in case I'm not around in time, Happy Anniversary!!!
Have a great time at the beach!

69.5CUDA
Blah Blah Blah
gomo i keep forgetting to paypal you some funds..
crap marv i thought i posted show pic's..hmm ill have to grab a few to toss in here
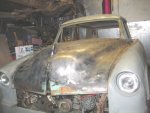
heres a few shots a grabbed a min ago...doing a little test fit with the new hood ornement..oooo soooo SEXY!!!
crap marv i thought i posted show pic's..hmm ill have to grab a few to toss in here
heres a few shots a grabbed a min ago...doing a little test fit with the new hood ornement..oooo soooo SEXY!!!
Attachments


69.5CUDA
Blah Blah Blah
heres the pics of my lloyd and the 1 and only other running local lloyd...if you call vancouver BC "local"


http://i420.photobucket.com/albums/pp290/sh0rtlife2/11-Picture2390.jpg
http://i420.photobucket.com/albums/pp290/sh0rtlife2/11-Picture2390.jpg
69.5CUDA
Blah Blah Blah
well almost 2 years .....pissed at the world i needed some fun so i cleared some crap in the shop and attacked the old girl.....the show is in 2 months? so i want to get a few things done.....stictched up the front pan, tweaked the hood sectioned in some bits sliced it up straight and level for grill prep, got the driver door cut and welded and installed the bearclaw latche and door post for the striker pin patched in the sectioning on the driver fender and re-adjusted some of the cowl also bent and tweeked the bend on the nose of the hood to mimic the front pan..im rather happy with the new look...also i "think" i may know how to solve some of my seat/pedal issues


restoman
The paint fumes have cleared so I'm
Man, every time I read one of your posts on projects like this, I can't help buy feel you've missed your calling.
To some, this car might look like another unfinished POS, but I can see the direction you're going and what the car should look like when done. I really like the way you're sorting through this car in your head, tying this and that, and not afraid to re-do something if it doesn't fit.
Too friggin' bad we're so far about, we'd make a Hell of a body work team.
:shifty:
Not that I want to go pick out curtains or anything like that. I just like the way you work. Even the tools spread across the floor - I do the same, like a pig surrounded by slop.
To some, this car might look like another unfinished POS, but I can see the direction you're going and what the car should look like when done. I really like the way you're sorting through this car in your head, tying this and that, and not afraid to re-do something if it doesn't fit.
Too friggin' bad we're so far about, we'd make a Hell of a body work team.
:shifty:
Not that I want to go pick out curtains or anything like that. I just like the way you work. Even the tools spread across the floor - I do the same, like a pig surrounded by slop.
69.5CUDA
Blah Blah Blah
oh i certainly missed my calling but theres no reason i cant build myself a callingcard lol
ive still gotta figure out what im going to do about that front rolled pan..i need to give the aperance that the front is atleast 3-4 inches lower and the car cannot be lowered ..and if i stretch the grill or bumper lines its going to make the nose look to fat...however the dash is comming together in my head nicely
is there any type of foam board i can use that filler or F-glass resin wont melt?....i need to carve that peice of artwork known as a dash and console out by hand
your right we would make a hell of a team..i just drop the tools where they are grab the next and just work back and forth..no point in a cart or anything fancy..half the time im sitting on the floor working anyway..the welder went back on the cart for the hell of it but to be honest its usualy on the floor being dragged around
ive still gotta figure out what im going to do about that front rolled pan..i need to give the aperance that the front is atleast 3-4 inches lower and the car cannot be lowered ..and if i stretch the grill or bumper lines its going to make the nose look to fat...however the dash is comming together in my head nicely
is there any type of foam board i can use that filler or F-glass resin wont melt?....i need to carve that peice of artwork known as a dash and console out by hand
your right we would make a hell of a team..i just drop the tools where they are grab the next and just work back and forth..no point in a cart or anything fancy..half the time im sitting on the floor working anyway..the welder went back on the cart for the hell of it but to be honest its usualy on the floor being dragged around
restoman
The paint fumes have cleared so I'm
Foam board? Something I've been thinking about is taking a piece of foam, painting it with latex paint and then try the fiberglass on top. Might have to experiment with the latex to find one that doesn't melt the foam. OR, painting the foam and then spraying it with a liquid spray mask to make a sort of mold. I know from insulating my basement walls that latex caulk doesn't stick well to foam board, but it also doesn't eat it.
My brother used to come into the shop I worked in down east, look at the mess surrounding me and just walk away, shaking his head. But, he doesn't know one end of a wrench from another so I never let it bother me.
My brother used to come into the shop I worked in down east, look at the mess surrounding me and just walk away, shaking his head. But, he doesn't know one end of a wrench from another so I never let it bother me.

68R/T
I got drunk and swallowed my teeth, now
is there any type of foam board i can use that filler or F-glass resin wont melt?....i need to carve that peice of artwork known as a dash and console out by hand
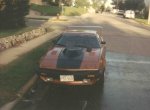
You might try the method that I used to fab the bubble on the TR7 hood below;
first you cut pieces of cardboard and tape them together to fab what you'll want. When you're happy with the results, cover it with masking tape. (F-glass doesn't stick to it) Cover the mold with 4 - 5 layers of f-glass cloth & resin. Let it cure good, remove cardboard and build it up for strength & shape with f-glass matting and Mar-glass. Build it up to at least 1/4" or more in critical areas. Start shaping and smoothening, stop to itch, sand some more, itch.
Attachments
69.5CUDA
Blah Blah Blah
thats a badass looking TR..but as for cardboard..no go..were talking ALOT of dash and console.....i know that there is some kind of foam out there that works..im just hoping that the spray in foam isnt the only one.......i know ive seen some kitcar guys build a body from foam first but dont remember the type
as for the mess surrounding you..its how you can tell someone who does the job right and likes what there doing ..scrap bits within reach tools in reach nothing you have to "get up and stop work" for
as for the mess surrounding you..its how you can tell someone who does the job right and likes what there doing ..scrap bits within reach tools in reach nothing you have to "get up and stop work" for

Something called REP foam... http://forums.bit-tech.net/showthread.php?t=164675
Can't seem to dig up a source for it though...
Can't seem to dig up a source for it though...
But I found this little nugget of info as well: " Porfoam and can be bought at Tap plastic and its tan in color and is unaffected by heat or resin from fiberglassing"
http://www.tapplastics.com/index.php?
They have stores in your neck of the woods too.
http://www.tapplastics.com/index.php?
They have stores in your neck of the woods too.
69.5CUDA
Blah Blah Blah
weird...i cant find a listing for it on there site but they are right down the road..ill have to check tommaro when there open
i have finaly come to the understanding of why leadsleds and high end customs end up with the front fenders and every other panel on the car WELDED to the body aside from those that REQUIRE being hinged..its cause you get to a point in the build where you realize..the amount of work required to replace the part would be just as easy if it was stucturaly built into the car vs unboltable..if its part of the car it actualy becomes EASIER to repair.....so...the front fenders are now slowly being built to the main structure
i have finaly come to the understanding of why leadsleds and high end customs end up with the front fenders and every other panel on the car WELDED to the body aside from those that REQUIRE being hinged..its cause you get to a point in the build where you realize..the amount of work required to replace the part would be just as easy if it was stucturaly built into the car vs unboltable..if its part of the car it actualy becomes EASIER to repair.....so...the front fenders are now slowly being built to the main structure

Dr.Jass
Pastor of Muppets
Wht not wireframe it with hardware cloth? It's easily worked into shape with bending and clipping wires where necessary, and if you get it fine enough (1/8" or less) it will hold the resin/cloth mix just fine, and as an added bonus you'd now have an extraordinarily-strong composite fiberglass/steel structure. One of my customers did this with a custom console for a Super Bee years ago, and it was buttah... easier than creating a mold with a wooden buck and no expanding foam, which is what the REP foam is (it's on the TAP site).. With that foam, you pour it, let it expand, carve it into shape, then lay your 'glass over it--usually to create only a mold which means you then have to make your part off the negative you made from the foam part. That's the usual process with REP foam, according to my sister's father-in-law who only recently quit forming custom hulls for racing powerboats.
Using the hardware-cloth method, just make it slightly smaller than it needs to be accounting for the thickness of the fiberglass. Once you have the outer done, resin it from the inside to lock the wireframe into place (mat it if you're anal), and you've got a part way stronger than just a fiberglass cast with probably less than half the effort.
Using the hardware-cloth method, just make it slightly smaller than it needs to be accounting for the thickness of the fiberglass. Once you have the outer done, resin it from the inside to lock the wireframe into place (mat it if you're anal), and you've got a part way stronger than just a fiberglass cast with probably less than half the effort.