restoman
The paint fumes have cleared so I'm
The ride we took in the Super Beetle back on May 27 didn't go the way we wanted it to, though the end result has been not-so-uncommon with this car.
Let's just say the Bug has a fetish for flatbed tow trucks...
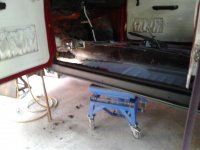
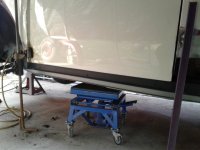
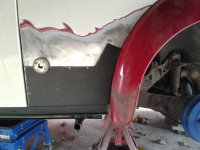
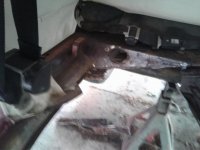
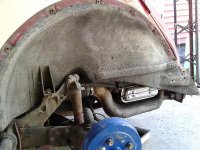
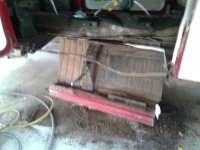
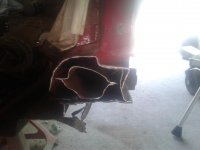
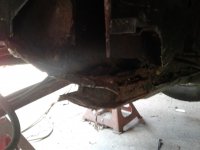
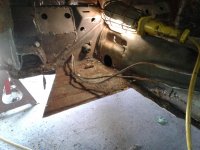
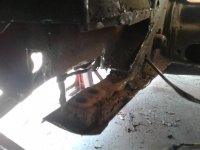
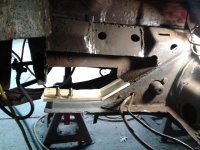
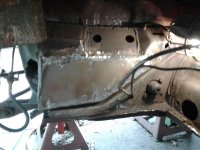
While the driver was unloading it in the driveway, I took quick peek underneath it.
My mobility isn't the greatest anymore, and getting down low enough to see a car's nether regions isn't as easy as it used to be. I took advantage of the chest-high opportunity.
!!!!!!!!
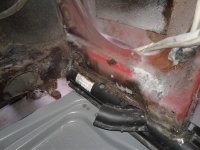
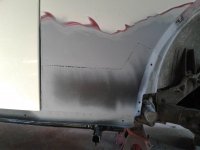
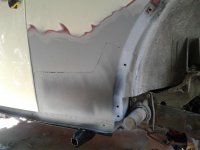
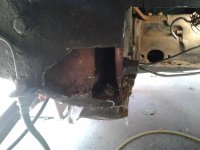
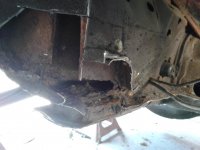
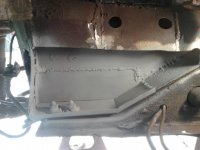
The old Girl wasn't quite as solid as it used to be. Back in '95/'96 when I re-did the car, the passenger side floor was serviceable, needing only a patch panel welded in under the battery. The driver's side floor had been swapped out sometime before we bought the beast. Even though the replacement pan half was thin steel and the wrong year, it was solid. Both left and right heater channels were good, needing only some running board- mounting nuts replaced. The front firewall was tough, as was the rear crossmember at the outer ends.
So, it was patched up, painted and we enjoyed the car since. Probably shouldn't have driven it through two winters, or let it sit outside through three more...
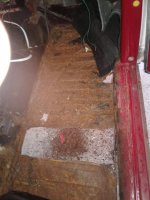
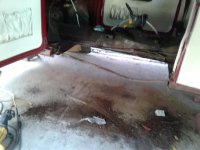
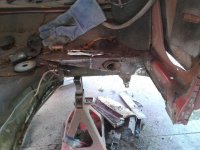
I started hacking, cutting, cursing, grinding and crying on June 15th-ish.
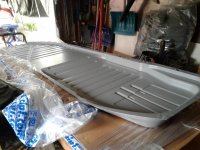
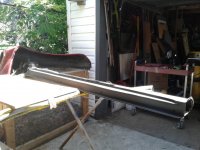
Bought some very nice, Danish-made floor pans, of the proper gauge, and year, left side Dansk (supposedly the best available) German-made heater channel, a roll of pan gasket rubber, lots of cutting discs, a new face shield and hearing protection, and away I went.
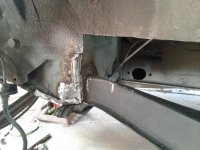
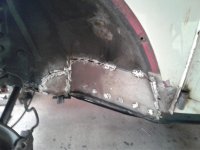
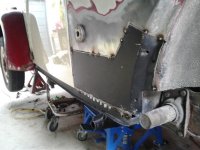
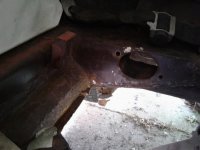
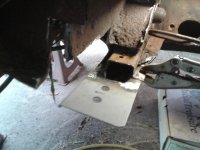
Surprisingly enough, the pan bolts on the right side all came out with little effort. Considering they were installed by Hans at the Wolfsburg Assembly Plant in 1974, I was impressed. The dunce who installed the left pan half thought it was a good idea to weld it to the heater channel, so no easy-out bolts to get excited about over there...
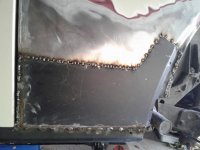
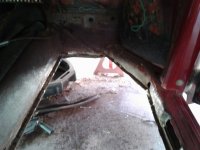
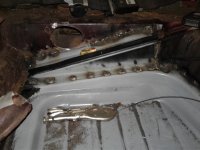
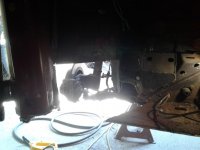
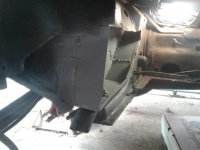
For anyone not familiar with VW Beetle construction, the floors are both bolted in, and welded in. Bolted to the heater channel and rear crossmember, and welded to the center tunnel and front frame head. A bit more complicated than our North American-built mo-chines... and a whole lot more cramped areas in which to work.
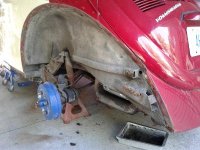
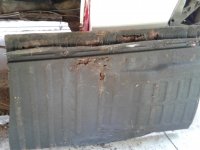
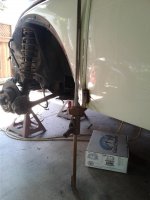
The first pic is a common one to some Beetle owners... waiting for the tow truck to arrive. As an aside, I haven't really investigated why the damn thing quit on the way home. Of course, as soon as the flat bed dropped it in the driveway, it fired back up. More on that later...
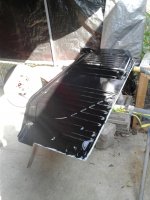
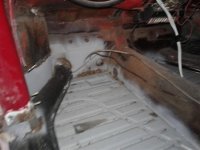
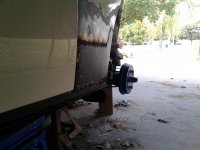
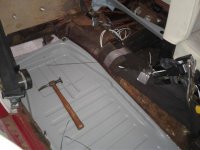
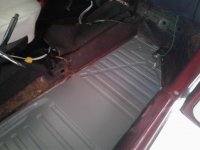
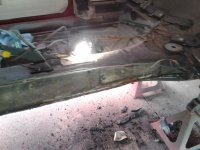
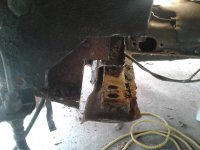
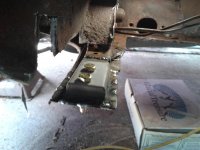
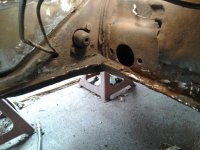
Once the new floor had it's seat rails, jack support, and battery hold-down bolt welded in place, it was scuffed, bare areas got a shot of etch primer and the whole underside got two coats of good 'ol Tremclad. The bare steel areas on the tunnel and frame head, once the factory welds were cleaned away (OEM floors were not spot-welded in place, they were wire welded), they were sandblasted and also got a shot of etch primer. I would have preferred weld-through primer but COVID has fucked up that, too.
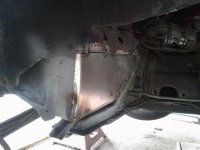
The underside of the right heater channel ended up needing a small patch at one of the captive nut areas, but I didn't think to get any pics of that, so you'll have to take my word that it was done properly. I did take the time to drill some half inch holes along the channel so that I can oil spray it all when it's finished. I am NOT going through this again.
Twenty years ago, a floor half in a Bug would be a two day job, + or - a couple hours. Not so today! I think I spent 3 weeks getting it done. Hey! I'm retired!")
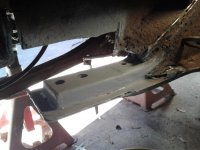
I can't find the pics of the completed right side, but trust me, it's completed save for a couple coats of paint next spring.
I'll get to the left side pics another day. Those are where the real fun was...
Let's just say the Bug has a fetish for flatbed tow trucks...
While the driver was unloading it in the driveway, I took quick peek underneath it.
My mobility isn't the greatest anymore, and getting down low enough to see a car's nether regions isn't as easy as it used to be. I took advantage of the chest-high opportunity.
!!!!!!!!
The old Girl wasn't quite as solid as it used to be. Back in '95/'96 when I re-did the car, the passenger side floor was serviceable, needing only a patch panel welded in under the battery. The driver's side floor had been swapped out sometime before we bought the beast. Even though the replacement pan half was thin steel and the wrong year, it was solid. Both left and right heater channels were good, needing only some running board- mounting nuts replaced. The front firewall was tough, as was the rear crossmember at the outer ends.
So, it was patched up, painted and we enjoyed the car since. Probably shouldn't have driven it through two winters, or let it sit outside through three more...
I started hacking, cutting, cursing, grinding and crying on June 15th-ish.
Bought some very nice, Danish-made floor pans, of the proper gauge, and year, left side Dansk (supposedly the best available) German-made heater channel, a roll of pan gasket rubber, lots of cutting discs, a new face shield and hearing protection, and away I went.
Surprisingly enough, the pan bolts on the right side all came out with little effort. Considering they were installed by Hans at the Wolfsburg Assembly Plant in 1974, I was impressed. The dunce who installed the left pan half thought it was a good idea to weld it to the heater channel, so no easy-out bolts to get excited about over there...
For anyone not familiar with VW Beetle construction, the floors are both bolted in, and welded in. Bolted to the heater channel and rear crossmember, and welded to the center tunnel and front frame head. A bit more complicated than our North American-built mo-chines... and a whole lot more cramped areas in which to work.
The first pic is a common one to some Beetle owners... waiting for the tow truck to arrive. As an aside, I haven't really investigated why the damn thing quit on the way home. Of course, as soon as the flat bed dropped it in the driveway, it fired back up. More on that later...
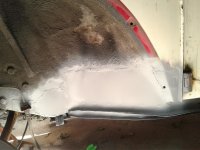
Once the new floor had it's seat rails, jack support, and battery hold-down bolt welded in place, it was scuffed, bare areas got a shot of etch primer and the whole underside got two coats of good 'ol Tremclad. The bare steel areas on the tunnel and frame head, once the factory welds were cleaned away (OEM floors were not spot-welded in place, they were wire welded), they were sandblasted and also got a shot of etch primer. I would have preferred weld-through primer but COVID has fucked up that, too.
The underside of the right heater channel ended up needing a small patch at one of the captive nut areas, but I didn't think to get any pics of that, so you'll have to take my word that it was done properly. I did take the time to drill some half inch holes along the channel so that I can oil spray it all when it's finished. I am NOT going through this again.
Twenty years ago, a floor half in a Bug would be a two day job, + or - a couple hours. Not so today! I think I spent 3 weeks getting it done. Hey! I'm retired!
I can't find the pics of the completed right side, but trust me, it's completed save for a couple coats of paint next spring.
I'll get to the left side pics another day. Those are where the real fun was...


")