You are using an out of date browser. It may not display this or other websites correctly.
You should upgrade or use an alternative browser.
You should upgrade or use an alternative browser.
Signet-ficant Other
- Thread starter Dr.Jass
- Start date
71ChargerRT
Well-known member
That's a whole lot of inspirational work.:clap:
I'm going to have to start on my when I get back from Carlisle.
I'm going to have to start on my when I get back from Carlisle.
Dr.Jass
Pastor of Muppets
"I used to be an ugly ol' automatic column for power steering, but since my Dr.Jass makeover I'm like a whole new component!"
Converted said auto/power-steering column to floor shift, manual steering. Many thanks to Stretch for the leftover A-body manual steering shaft, I couldn't have done it quite so easily without that piece (though it can still be done).
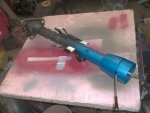
Converted said auto/power-steering column to floor shift, manual steering. Many thanks to Stretch for the leftover A-body manual steering shaft, I couldn't have done it quite so easily without that piece (though it can still be done).

thrashingcows
Drowning deep in my sea of loathing...so I'm
Some amazing work you two have been doing. The substructure needs to be strong so that the rest of the car will hold up. So many individuals want to make the outside look purdy, and skimp on the sub-structure, then pay for it later when bodies twist, sag and crack from the abuse.
Dr.Jass
Pastor of Muppets
The instrument cluster for the old girl was not only looking pretty sad, the fuel and temp gauges hadn't worked during my ownership of the car. While the column was out was the ideal time to bring the gauges up to snuff.
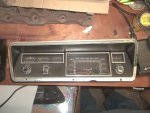
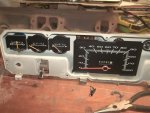
This is how it looked upon removal from the alleged hot rod. Notice the missing fuel indicator; I wasn't even sure there was a needle in there:
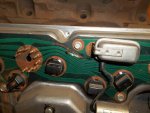
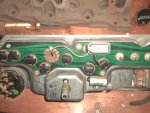
Flipping it over revealed why I couldn't get a temp reading either. The 12V+ trace to the 5V gauge limiter was burned right off the board. My guess? The bimetallic limiter stuck in the "full on" position and fried the trace--and probably the fuel gauge too. Stretch and I verified this today; the heating coil inside the regulator failed, leaving it in "forever 12V" mode.
Yep, there's a needle in there... and it was pulled out of position (away from the face) and jammed against the folded part of the gauge face. When I attempted to free the needle from this position, it fell right out of the gauge.
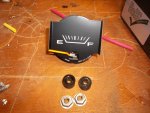
I'd already secured a replacement fuel gauge, expecting the worst and not being disappointed. Those faded needles really look like crap, though. I'll have to do something aboot that...
Simple cheapskate solution to the printed-circuit issue: Solder in a wire. Totally a class operation here, folks... no expense spared. No way was I paying for a new/replacement PC board.
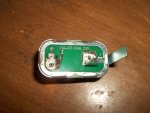
I won't have a voltage limiter issue again, what with my fancy solid-state regulator from RT Engineering. This actually outputs a steady 5V+, rather than the pulsed 12V+ the factory limiter uses to "average" 5V+. The pulsing is one of the reasons factory gauges react so slowly, and obviously that bimetallic strip can stick shut, frying parts of the cluster.
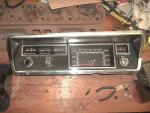
And, skip forward to the end because I forgot to break out the camera. :doh: This was after considerable work cleaning the lenses and chrome, as well as painting the needles with a fresh fluourescent red finish. Getting the dust out of those ribs is a real treat, make no mistake. Have some good glass cleaner and a fistful of Q-Tips. No, it's not perfect but it's perfectly functional and looks about right for the rest of the car. Total investment was less than $50 plus a couple of hours' time. The results, particularly in person, are more than worth both investments.
This is how it looked upon removal from the alleged hot rod. Notice the missing fuel indicator; I wasn't even sure there was a needle in there:

Flipping it over revealed why I couldn't get a temp reading either. The 12V+ trace to the 5V gauge limiter was burned right off the board. My guess? The bimetallic limiter stuck in the "full on" position and fried the trace--and probably the fuel gauge too. Stretch and I verified this today; the heating coil inside the regulator failed, leaving it in "forever 12V" mode.

Yep, there's a needle in there... and it was pulled out of position (away from the face) and jammed against the folded part of the gauge face. When I attempted to free the needle from this position, it fell right out of the gauge.

I'd already secured a replacement fuel gauge, expecting the worst and not being disappointed. Those faded needles really look like crap, though. I'll have to do something aboot that...

Simple cheapskate solution to the printed-circuit issue: Solder in a wire. Totally a class operation here, folks... no expense spared.

I won't have a voltage limiter issue again, what with my fancy solid-state regulator from RT Engineering. This actually outputs a steady 5V+, rather than the pulsed 12V+ the factory limiter uses to "average" 5V+. The pulsing is one of the reasons factory gauges react so slowly, and obviously that bimetallic strip can stick shut, frying parts of the cluster.

And, skip forward to the end because I forgot to break out the camera. :doh: This was after considerable work cleaning the lenses and chrome, as well as painting the needles with a fresh fluourescent red finish. Getting the dust out of those ribs is a real treat, make no mistake. Have some good glass cleaner and a fistful of Q-Tips. No, it's not perfect but it's perfectly functional and looks about right for the rest of the car. Total investment was less than $50 plus a couple of hours' time. The results, particularly in person, are more than worth both investments.

gomopar440
Livin' my life...one gas station at a time.
The last 5V gauge voltage reducer I used was one I converted to solid state myself. It's good to see that there are finally some ready made options out there now to bring these Flintstone era electronics into the slightly more modern era.
gomopar440
Livin' my life...one gas station at a time.
I checked out their website and see that they also offer tach kits to replace the original circuit boards. I'll have to ask them if their board kit will work on the factory tach that came in my truck. :hmmm:
71ChargerRT
Well-known member
Dash looks good! Nice job on the column too.
Dr.Jass
Pastor of Muppets
I'd kind of be surprised if it even fit, to be honest. Maybe I'm mistaken, but I think the truck tach case is a smaller diameter than the earlier stuff. I don't think the lower RPM scale would be an issue though, because the board is calibratable for different max readings, i.e. the E-body tach board works with both 7K and 8K tachs.I'll have to ask them if their board kit will work on the factory tach that came in my truck. :hmmm:
Thanks for the compliments on the cluster, guys. It's really not a lot of work to do what I did, but man is it ever worth the effort--especially in the car. Believe it or not, the first time I ever detailed a cluster was on my "case of beer" '81 Toyota Tercel--and that was done mostly as a joke--but the difference was so noticeable (in a car I didn't even like) that I've done it with nearly everything I've had since.
That looks great!!
Dr.Jass
Pastor of Muppets
I forgot to update a couple of times. Things are no longer fresh in my mind, so forgive me if I go astray... that being said, keep your eye on the yellow tape on the transmission tunnel. There will be a quiz later. 
The driver's inner fender came in for a little tweaking, due to a small punky spot where it had rusted in the area of the shock tower. There was good metal very nearby, so I decided to cut away the rust and do an overlap patch. This is where the panel flanger/pneumatic punch tool is worth its weight in gold. The repair is very strong, tied into both the inner fender and the shock tower.
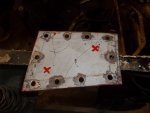
Ground and primed... a little skim of putty here and it'll virtually vanish from sight.
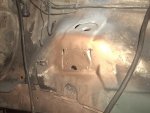
Stretch installing another of his beautifully-done patches, this one on the frame outrigger.
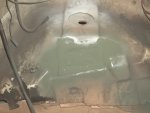
That patch fits like it was born there, but it looks terribly low from this angle. It's an optical illusion I noticed in person, and Stretch even said it looked horrible when I made him come around and look at it from here. :wtf:
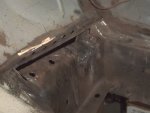
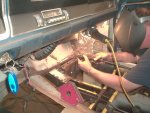
Stretch also patched the rusted seat mounting tabs, then tied both into the subframe connector as he did on the other side. That'll be the most solidly-mounted bench in Mopar history. Since those are anchored at the rocker, all this tying together can't hurt the structural rigidity either.
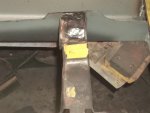

Prep, prep, prep. It all seems so quick on the internets, but covering every conceivable base eats up time like a fat kid with a Twinkie.
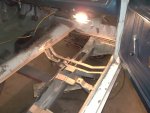
This was the final test-fit of the RH floor, with all the necessary holes punched/drilled and the EDP ground away. The fit wasn't quite as good as it had been, but I believe there was some tension in the driveshaft tunnel and it sprung a little when we final-cut and trimmed it. We also both forgot the kick-ass method we'd used to get the driver's side tunnel seam nearly perfect, so, well, we winged it. Amazingly, winging it worked out almost perfectly as well. Dare I say we may be acquiring some skill at this?
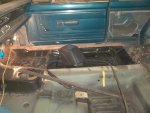
Of course, I didn't take any pictures of the tunnel seam, because A) that's the tight side of the garage, and B) I'm a pinhead. Moving right along, this is a photograph of relief. You can't see the actual relief, but the pan is fully welded into place and that generated a huge sigh. We could not seem to get the toeboard flange quite right during the last few test fittings, which we blamed on damage from the long-ago crash, but curiously enough when we started welding that area it pulled right into place with a bit of coercion. The final fit after welding was not just acceptable, it was downright good. We were both more than pleased with the result.
The driver's inner fender came in for a little tweaking, due to a small punky spot where it had rusted in the area of the shock tower. There was good metal very nearby, so I decided to cut away the rust and do an overlap patch. This is where the panel flanger/pneumatic punch tool is worth its weight in gold. The repair is very strong, tied into both the inner fender and the shock tower.


Ground and primed... a little skim of putty here and it'll virtually vanish from sight.

Stretch installing another of his beautifully-done patches, this one on the frame outrigger.

That patch fits like it was born there, but it looks terribly low from this angle. It's an optical illusion I noticed in person, and Stretch even said it looked horrible when I made him come around and look at it from here. :wtf:

Stretch also patched the rusted seat mounting tabs, then tied both into the subframe connector as he did on the other side. That'll be the most solidly-mounted bench in Mopar history. Since those are anchored at the rocker, all this tying together can't hurt the structural rigidity either.


Prep, prep, prep. It all seems so quick on the internets, but covering every conceivable base eats up time like a fat kid with a Twinkie.

This was the final test-fit of the RH floor, with all the necessary holes punched/drilled and the EDP ground away. The fit wasn't quite as good as it had been, but I believe there was some tension in the driveshaft tunnel and it sprung a little when we final-cut and trimmed it. We also both forgot the kick-ass method we'd used to get the driver's side tunnel seam nearly perfect, so, well, we winged it. Amazingly, winging it worked out almost perfectly as well. Dare I say we may be acquiring some skill at this?

Of course, I didn't take any pictures of the tunnel seam, because A) that's the tight side of the garage, and B) I'm a pinhead. Moving right along, this is a photograph of relief. You can't see the actual relief, but the pan is fully welded into place and that generated a huge sigh. We could not seem to get the toeboard flange quite right during the last few test fittings, which we blamed on damage from the long-ago crash, but curiously enough when we started welding that area it pulled right into place with a bit of coercion. The final fit after welding was not just acceptable, it was downright good. We were both more than pleased with the result.

Dr.Jass
Pastor of Muppets
Stretch had hooked up all the steering linkage, but only loosely. Welding the toeboard seam was going to require using the K-member as a backrest, and the steering linkage would've made it impossible to fit in there. Besides, the drag link needs to pass through not only one of the headers, but the oil pan as well (remember this, we'll come back to it). He was only disconnecting what was necessary, though--anything more would've felt like taking our eyes off the prize.
Passenger-side brake assembly mostly buttoned up and awaiting pads, lines, and fluid. Obviously the mechanical bits are familiar territory to both of us, but every step like this is visual evidence of real progress and kicks us in the ass to stay after it.
After very-carefully measuring when installing the other side, I had to then use the LH rear-seat bracket that I installed as a template for this one. This is one of those "If I blew the first one, the second one's fucked too" areas, and we won't know until we trial-fit the seat. Both brackets are nailed down so hard, if I blew the measurements I will cut the fucking seat to make it fit, I swear.
I finished up by reinstalling the driver's headlamp bezel, which never needed to come off in the first place. Of course, somewhere along the line I lost one of the screws for it. :doh:

So that gets you fine folks up to speed all the way through last Sunday night.

Passenger-side brake assembly mostly buttoned up and awaiting pads, lines, and fluid. Obviously the mechanical bits are familiar territory to both of us, but every step like this is visual evidence of real progress and kicks us in the ass to stay after it.

After very-carefully measuring when installing the other side, I had to then use the LH rear-seat bracket that I installed as a template for this one. This is one of those "If I blew the first one, the second one's fucked too" areas, and we won't know until we trial-fit the seat. Both brackets are nailed down so hard, if I blew the measurements I will cut the fucking seat to make it fit, I swear.

I finished up by reinstalling the driver's headlamp bezel, which never needed to come off in the first place. Of course, somewhere along the line I lost one of the screws for it. :doh:

So that gets you fine folks up to speed all the way through last Sunday night.
Dr.Jass
Pastor of Muppets
Another day's work toward Valiant victory today. You ever say to yourself, "Self, this is what we're going to get accomplished today!" completely forgetting all the little stuff that still needs finishing first? Today was that day (again). I told myself we'd roll the car out of Stretch's garage by day's end, having completely forgot other things that needed doing.
We were at 'er right away upon arrival at Stretch's Vintagewerks, with the man himself crawling into the engine bay with an angle die grinder equipped with a 36-grit disc. He knocked out the necessary grinding on the toeboard welds in pretty short order, while I hid some of my reinforcing trickery with paint and undercoating (though I did not photograph the latter).
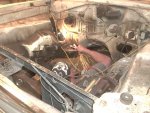
A little while later, after Stretch had been under the front with the torque wrench working on the steering linkage, this conversation happened:
Jass: "Stretch, did you torque all the stuff connected to the drag link?"
Stretch: "Yes!"
Jass: "Why?"
Stretch: *confused look while I just stared at him until it hit him* "Sonofa..."
Stretch (now making light of it): "Hey, we should've brought the oil pan!"
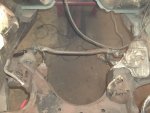
So we'll have to undo all his fancy cotter crimps and lovely torquing in order to install the engine. Oh well.
Soldiering on, we come to the "little things" that you forget need to be done. There's a lot to see in the next photo. In this case, the "little thing" was the fact that there was literally no way to install seat belts. Yes, we'd made the provision in the RH rocker for the weld nut anchor plate, but remember when I mentioned the yellow tape on the driveshaft tunnel? The back edge of that tape was the vertical center of the factory location for the inner seat-belt mounting hole/reinforcing plate/weld nut. Go back and look at it again, and you'll see where the AMD panel has the hole located in relation to the tape. I'm not certain if it's a year difference, or if it's got something to do with bucket seats v. bench, but they're about 3" forward of the original location on a bench-seat '69 Valiant. The seat belt receivers aren't long enough to make the journey from the AMD hole, around the back of the seat cushion and up between it and backrest, and still protrude through far enough to grab them. I didn't physically check this; it's obvious just eyeballing the receivers--they're maybe a foot long. So that hole needed to be moved, which I accomplished by cutting a new hole with a hole saw, then using the piece removed as a patch in the AMD hole. Clever, huh? If you look closely in the picture, you can see the location of the AMD-stamped hole a few inches forward of where I drilled. I drilled a few plug-weld holes around my new holes, and Stretch got under the car to position each reinforcement plate. I secured the plates in place for welding with a bolt and washer through the seat-belt threads to clamp it to the pan, and proceeded to plug weld them to the tunnel.
But wait! There's more!
On the rocker side of the pans, the AMD hole is well behind the factory location. Nearly a foot, in fact. This is where the attention to detail Stretch and I occasionally exhibit really paid off. We noticed this going in, and on the driver's side we measured the distance down to the bolt hole from the top of the rocker while the floor was out. We marked the vertical center of the hole in paint marker on the pinchweld for the door, and wrote "1-1/2" so we'd know how far down to drill. Since we had literally no reference on the RH side due to the massive rust damage, we transferred those measurements whilst making the patch panel with the reinforcing plate and weld nut to that side. Simple... but 'cept we measured the left side with no floorpan, and now there was a floorpan. Also, try as we might we did not perfectly locate the hole on the RH side A) because we didn't have a great reference from the top of the rocker, and B) the way we made the patch complicated things. The patch underlapped the top of the rocker so we could plug-weld it to the good metal still present there, which moved the hole down even further. Whoopsie-daisy.
The problem was, I didn't realize there was a problem until I started drilling. And at this point, I was flying solo--Stretch was off taking care of some non-Valiant concerns outside the garage. I didn't want to bother him, since he was doing the Lord's work by getting his Charger out of storage. :dance:
After center-punching what should've been the right spot, I drilled a 3/16" pilot hole on the RH side. When I got through the floorpan, there was no seat belt hole. Well, shit. I figured I'd better check the other side, so I went over there with the drill and centerpunched what should be the right location. I may or may not have been leaning on the drill harder than intended, but when the bit penetrated the floorpan it blew right through and the chuck hit the pan. No one was around to hear my loud, "Oh, for fuck's sake!" but I said it anyhow. I couldn't see anything through that hole, so I got the hole saw figuring I had to make room to fix whatever I'd just done anyhow. I piloted it off the hole I'd just made, and when it punched through--very, very slowly this time--the heavenly host sang a gloria. My first hole was right down the pipe, damned-near dead center through the seat-belt bolt hole. It wasn't perfectly centered, it was literally off by the thickness of the floorpan vertically, and less than half the distance of the paint marker line horizontally. Damned-near perfect, really--didn't even graze the threads. Of course, I immediately thought to myself, "Daz right... we bad."
Stretch returned, and with more light we were able to see what had gone wrong on the passenger's side with our fab work. Not much at all, actually. The first hole I drilled was actually off by very little. The bolt hole was visible behind it, so I re-punched the pan and hit it with the hole saw. Only God could've centered it better. We ended up being off by >3/16" in both the vertical and horizontal, as the two holes were almost exactly 1/4" apart. Chrysler's production tolerance on body dimensions was 1/4", so a couple of beginners making patches with a vise and hammer were at least as accurate as the typical drunken UAW Hamtramck employee in late 1968 with millions of dollars of equipment and no rust or fabrication work required of him. :dance:
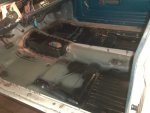
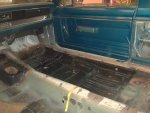
A wee bit of grinding (actually, an Imperial fuckton of grinding) later, vacuuming up the mess it caused, and a quick twice-over with wax & grease remover, and it was time to lay down the etching primer. This photo is, to me, a vision of major accomplishment. It still needs to be seam-sealed and painted, but by God the truly nasty work is done.

It's been a long road to get this far, and there's still plenty left to do on the car, but the frame replacement/floorpan ordeal was the major project. It's a red-letter, landmark kind of day for us... and to celebrate, we'll be right back at it in the morning.
We were at 'er right away upon arrival at Stretch's Vintagewerks, with the man himself crawling into the engine bay with an angle die grinder equipped with a 36-grit disc. He knocked out the necessary grinding on the toeboard welds in pretty short order, while I hid some of my reinforcing trickery with paint and undercoating (though I did not photograph the latter).

A little while later, after Stretch had been under the front with the torque wrench working on the steering linkage, this conversation happened:
Jass: "Stretch, did you torque all the stuff connected to the drag link?"
Stretch: "Yes!"
Jass: "Why?"
Stretch: *confused look while I just stared at him until it hit him* "Sonofa..."
Stretch (now making light of it): "Hey, we should've brought the oil pan!"

So we'll have to undo all his fancy cotter crimps and lovely torquing in order to install the engine. Oh well.
Soldiering on, we come to the "little things" that you forget need to be done. There's a lot to see in the next photo. In this case, the "little thing" was the fact that there was literally no way to install seat belts. Yes, we'd made the provision in the RH rocker for the weld nut anchor plate, but remember when I mentioned the yellow tape on the driveshaft tunnel? The back edge of that tape was the vertical center of the factory location for the inner seat-belt mounting hole/reinforcing plate/weld nut. Go back and look at it again, and you'll see where the AMD panel has the hole located in relation to the tape. I'm not certain if it's a year difference, or if it's got something to do with bucket seats v. bench, but they're about 3" forward of the original location on a bench-seat '69 Valiant. The seat belt receivers aren't long enough to make the journey from the AMD hole, around the back of the seat cushion and up between it and backrest, and still protrude through far enough to grab them. I didn't physically check this; it's obvious just eyeballing the receivers--they're maybe a foot long. So that hole needed to be moved, which I accomplished by cutting a new hole with a hole saw, then using the piece removed as a patch in the AMD hole. Clever, huh? If you look closely in the picture, you can see the location of the AMD-stamped hole a few inches forward of where I drilled. I drilled a few plug-weld holes around my new holes, and Stretch got under the car to position each reinforcement plate. I secured the plates in place for welding with a bolt and washer through the seat-belt threads to clamp it to the pan, and proceeded to plug weld them to the tunnel.
But wait! There's more!
On the rocker side of the pans, the AMD hole is well behind the factory location. Nearly a foot, in fact. This is where the attention to detail Stretch and I occasionally exhibit really paid off. We noticed this going in, and on the driver's side we measured the distance down to the bolt hole from the top of the rocker while the floor was out. We marked the vertical center of the hole in paint marker on the pinchweld for the door, and wrote "1-1/2" so we'd know how far down to drill. Since we had literally no reference on the RH side due to the massive rust damage, we transferred those measurements whilst making the patch panel with the reinforcing plate and weld nut to that side. Simple... but 'cept we measured the left side with no floorpan, and now there was a floorpan. Also, try as we might we did not perfectly locate the hole on the RH side A) because we didn't have a great reference from the top of the rocker, and B) the way we made the patch complicated things. The patch underlapped the top of the rocker so we could plug-weld it to the good metal still present there, which moved the hole down even further. Whoopsie-daisy.
The problem was, I didn't realize there was a problem until I started drilling. And at this point, I was flying solo--Stretch was off taking care of some non-Valiant concerns outside the garage. I didn't want to bother him, since he was doing the Lord's work by getting his Charger out of storage. :dance:
After center-punching what should've been the right spot, I drilled a 3/16" pilot hole on the RH side. When I got through the floorpan, there was no seat belt hole. Well, shit. I figured I'd better check the other side, so I went over there with the drill and centerpunched what should be the right location. I may or may not have been leaning on the drill harder than intended, but when the bit penetrated the floorpan it blew right through and the chuck hit the pan. No one was around to hear my loud, "Oh, for fuck's sake!" but I said it anyhow. I couldn't see anything through that hole, so I got the hole saw figuring I had to make room to fix whatever I'd just done anyhow. I piloted it off the hole I'd just made, and when it punched through--very, very slowly this time--the heavenly host sang a gloria. My first hole was right down the pipe, damned-near dead center through the seat-belt bolt hole. It wasn't perfectly centered, it was literally off by the thickness of the floorpan vertically, and less than half the distance of the paint marker line horizontally. Damned-near perfect, really--didn't even graze the threads. Of course, I immediately thought to myself, "Daz right... we bad."
Stretch returned, and with more light we were able to see what had gone wrong on the passenger's side with our fab work. Not much at all, actually. The first hole I drilled was actually off by very little. The bolt hole was visible behind it, so I re-punched the pan and hit it with the hole saw. Only God could've centered it better. We ended up being off by >3/16" in both the vertical and horizontal, as the two holes were almost exactly 1/4" apart. Chrysler's production tolerance on body dimensions was 1/4", so a couple of beginners making patches with a vise and hammer were at least as accurate as the typical drunken UAW Hamtramck employee in late 1968 with millions of dollars of equipment and no rust or fabrication work required of him. :dance:

A wee bit of grinding (actually, an Imperial fuckton of grinding) later, vacuuming up the mess it caused, and a quick twice-over with wax & grease remover, and it was time to lay down the etching primer. This photo is, to me, a vision of major accomplishment. It still needs to be seam-sealed and painted, but by God the truly nasty work is done.

It's been a long road to get this far, and there's still plenty left to do on the car, but the frame replacement/floorpan ordeal was the major project. It's a red-letter, landmark kind of day for us... and to celebrate, we'll be right back at it in the morning.
Dr.Jass
Pastor of Muppets
Just when you thought I was done for the night... there's still more!
While I didn't take any photos of the process, one of the other minor details I wanted to address today (or at least prior to the cluster being reinstalled) was that of the flaky hazard switch. This one has the ultra-cool toggle on the dash, but it worked only sporadically and most often didn't work period. I didn't want to buy a replacement, and since it was already messed up I decided to remove it, uncrimp the circuit board from the case, and see what was up inside. Couldn't make it any worse, really. I found burnt terminals on the board and a nearly-as-ugly copper sliding contact. A few quick strokes from a smoked 2" Scotch-Brite wheel netted me a lovely, clean set of contacts and a switch that works every time. These factory switches are pretty easy to uncrimp and disassemble, so if you've got a bad one it's absolutely worth the little bit of effort to take a peek inside. A good long needle-nose will usually get you both in and out. They're pretty robust designs, too, so it's usually something pretty simple. I fixed a wacky headlamp motor in the Black Bitch in a similar fashion, using an emery board borrowed from Mom on the fried contact points. It worked like a champ when I sold it, and that was after three additional years of use.
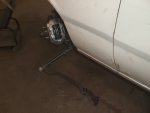
Say... what the heck are those black things dangling below the filler panel? Are those front tires?! Yes. Yes, they are--and they're torqued in place, too. Short of a column by which to steer it, the Valiant can be taken off Stretch's mini-lift and rolled out of his garage so his Charger can have its rightful nest. :dance:
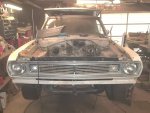
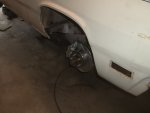
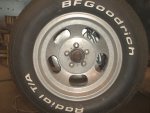
If you're into the "period correct" look, this is like an A-body wet dream: 14x7 aluminum slot mag shod with a Radial T/A, bolted to a 4" bolt pattern disc embraced by a Kelsey-Hayes 4-piston caliper. The brake hose and transfer lines are stainless, and I was lucky enough to get caliper castings that are plated, without paying extra.
We're a long way from burnt rubber, but damn if it doesn't look like a car again... if only from the outside, and in a rather shitty manner.

Stay tuned to this channel for further bamboozlery, silliness, and mechanical horsefuckery!
While I didn't take any photos of the process, one of the other minor details I wanted to address today (or at least prior to the cluster being reinstalled) was that of the flaky hazard switch. This one has the ultra-cool toggle on the dash, but it worked only sporadically and most often didn't work period. I didn't want to buy a replacement, and since it was already messed up I decided to remove it, uncrimp the circuit board from the case, and see what was up inside. Couldn't make it any worse, really. I found burnt terminals on the board and a nearly-as-ugly copper sliding contact. A few quick strokes from a smoked 2" Scotch-Brite wheel netted me a lovely, clean set of contacts and a switch that works every time. These factory switches are pretty easy to uncrimp and disassemble, so if you've got a bad one it's absolutely worth the little bit of effort to take a peek inside. A good long needle-nose will usually get you both in and out. They're pretty robust designs, too, so it's usually something pretty simple. I fixed a wacky headlamp motor in the Black Bitch in a similar fashion, using an emery board borrowed from Mom on the fried contact points. It worked like a champ when I sold it, and that was after three additional years of use.
Say... what the heck are those black things dangling below the filler panel? Are those front tires?! Yes. Yes, they are--and they're torqued in place, too. Short of a column by which to steer it, the Valiant can be taken off Stretch's mini-lift and rolled out of his garage so his Charger can have its rightful nest. :dance:

If you're into the "period correct" look, this is like an A-body wet dream: 14x7 aluminum slot mag shod with a Radial T/A, bolted to a 4" bolt pattern disc embraced by a Kelsey-Hayes 4-piston caliper. The brake hose and transfer lines are stainless, and I was lucky enough to get caliper castings that are plated, without paying extra.

We're a long way from burnt rubber, but damn if it doesn't look like a car again... if only from the outside, and in a rather shitty manner.

Stay tuned to this channel for further bamboozlery, silliness, and mechanical horsefuckery!
thrashingcows
Drowning deep in my sea of loathing...so I'm
Man that floor turned out nice!! Tons of work but worth it in the end, I can feel the satisfaction on my end as well....
Love the slots and RWL tires....perfect combo for the car. And that gauge cluster turned out sweet....I scrolled back and forth between the before and after several times to get the full effect of the detailing....nice work Doc!
Love the slots and RWL tires....perfect combo for the car. And that gauge cluster turned out sweet....I scrolled back and forth between the before and after several times to get the full effect of the detailing....nice work Doc!
