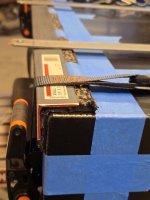
69 Barracuda FB. The next evolution

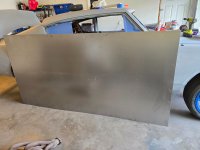
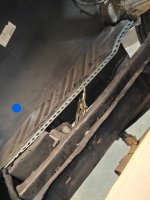
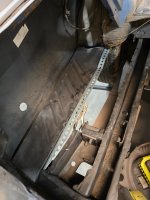
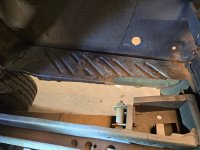
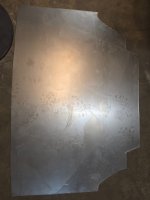
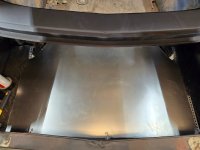
The firewall bulkhead connector showed up in the mail today. I also picked up a DIY trunk floor from a local steel supplier. It's a 4'x8' sheet of 18 ga steel. I tried to get 20 ga, but the distributor kicked back the order unless I wanted to order 5 sheets of it. The local shop had a 4'x8' sheet of 18 ga on hand, so I got that instead.

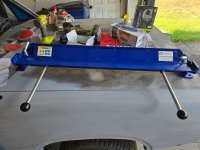
I originally wanted 20ga because that's the steel thickness limit of the 36" sheet metal brake I ordered. If the brake can't handle an 18ga test bend, I'll have to cut the material to shape and get the steel shop to make the bends for me.

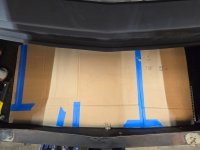
I'll go out to the garage tonight to make the trunk floor pattern out of cardboard. Its too hot out to do anything else during the day.

EDIT: The metal brake arrived today instead of tomorrow. I unboxed it, but it's still too hot out to do much else right now.
 

Attachments

  • 20260909_130034.jpg
    20260909_130034.jpg
    1.9 MB · Views: 3
  • 20260909_151417.jpg
    20260909_151417.jpg
    1.7 MB · Views: 3
  • 20260909_142649.jpg
    20260909_142649.jpg
    1.2 MB · Views: 3
  • 20260909_155440.jpg
    20260909_155440.jpg
    1.7 MB · Views: 3
Last edited:
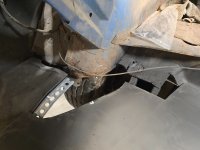
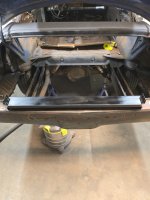
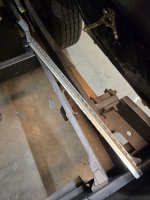
I went back out to the metal shop today and picked up a 6' piece of 1"x3" steel box tube. It's around 14ga wall thickness, so similar thickness as the rear subframes. It's going to be used to make two cross braces to go in front of, and behind, the fuel cell. Those new braces will also give me more options for fuel cell mounting points. I'll planning to just weld in the forward one first, and wait to weld in the rear one until I after have a fuel cell to fit it up.
 
Forward fuel cell cross member made. I also got about half of the trunk floor template made. I'll finish the other half this weekend.

The funeral for my friend is tomorrow, so it's unlikely that I'll have much motivation to go out in the garage on the same day.

EDIT: I wrote this post yesterday, but forgot to hit "save".
 

Attachments

  • 20260910_173209.jpg
    20260910_173209.jpg
    1.6 MB · Views: 2
  • 20260910_173913.jpg
    20260910_173913.jpg
    1.6 MB · Views: 2
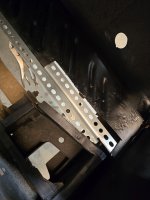
Although I ended up getting 18ga sheet metal for the trunk floor, the metal brake I had already bought only can bend up to 20ga. So, I asked the metal shop about bending the metal after I cut it to shape. They're willing to do it, but the want $25 per bend, so $100 for all four bends. After thinking about it, I decided to try a different method. I bought two 5' long pieces of 18ga hole punched angle. It was $25 each for the angle pieces, so $50 to get all the bends covered.

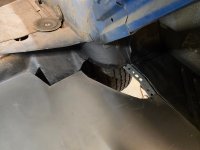
I trimmed up the piece for the driver side drop off edge, and it looks like it will work. The angle piece will be set down just enough to allow the top of the trunk floor to be level with the top of the drop off. The joint will be hidden with seam sealer and will look close to factory, minus the lack of a spare tire well and any dimples. Attaching the angles to the floor will be added by welding them together, but it's worth it to solve my metal bending issue.

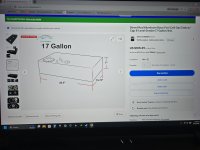
Today I also picked out a fuel cell to take advantage of the extra space under the floor gained by removing the spare tire well. I'll figure how to mount it and where to place the other trunk crossmember after it gets here.
 

Attachments

  • 20260912_194548.jpg
    20260912_194548.jpg
    1.7 MB · Views: 4
  • 20260912_194609.jpg
    20260912_194609.jpg
    1.1 MB · Views: 3
  • 20260912_194513.jpg
    20260912_194513.jpg
    1.7 MB · Views: 3
  • 87b4478b-378d-43c6-be09-d7d3ac4ee970.jpg
    87b4478b-378d-43c6-be09-d7d3ac4ee970.jpg
    646.6 KB · Views: 3
Last edited:
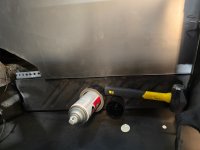
You can't imagine how many times I've looked at pieces of support angles like that and tried to find a way to use them for something.
 
I still have to drill the weld-thru holes on the downward flange side of the angle, because the existing ones got cut off. I did that to match it to the size of the drop off flange. The horizontal side facing the floor is being left as is, so no need to drill holes there. In the end, I'll have to fill twice as many holes, but I'm ok with that. I'm not going to leave any holes open so there will be fewer places for moisture to get trapped between the metal.
 
More pseudo flange work done today. I started out by cutting out the Swiss cheese edge of the pass side trunk drop off. I'll just need to cup out a small flat piece to patch the drop off. The angle material will also take care of the drop off bend. The pass side trunk floor bend piece was just a reversed copy of the driver side. Lastly the rear angle part was made. It was a bit trickier than it looked because the flat looking back panel was, in fact, not flat. Deceptively wavy would be a better description. A few well placed cuts along the horizontal surface allowed the angle to follow the back panel adequately.
 

Attachments

  • 20260914_193329.jpg
    20260914_193329.jpg
    2.3 MB · Views: 6
  • 20260914_195230.jpg
    20260914_195230.jpg
    1.6 MB · Views: 4
  • 20260914_195210.jpg
    20260914_195210.jpg
    1.6 MB · Views: 3
  • 20260914_200302.jpg
    20260914_200302.jpg
    1.3 MB · Views: 4
  • 20260914_201829.jpg
    20260914_201829.jpg
    1.6 MB · Views: 5
Last edited:
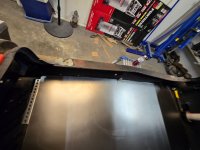
I'm glad I took my time to get the cardboard pattern fit just right. I was able to get the metal floor cut to fit very good on the first attempt. I won't weld it in yet since I want to get the new crossmembers welded in and the fuel cell fitted first.

I also still need to make the small contour sections around the wheel wells and the drop off patch. Those parts will be made piecemeal to fit as I go.

The only downside right now is that my back has filed a formal complaint. 😵‍💫
 

Attachments

  • 20260915_171328.jpg
    20260915_171328.jpg
    1.8 MB · Views: 4
  • 20260915_171341.jpg
    20260915_171341.jpg
    1.1 MB · Views: 3
  • 20260915_172133.jpg
    20260915_172133.jpg
    861.1 KB · Views: 3
  • 20260915_174405.jpg
    20260915_174405.jpg
    1.3 MB · Views: 3
  • 20260915_174608.jpg
    20260915_174608.jpg
    1.1 MB · Views: 3
  • 20260915_174626.jpg
    20260915_174626.jpg
    1.5 MB · Views: 3
  • 20260915_174630.jpg
    20260915_174630.jpg
    1.4 MB · Views: 3
  • 20260915_174637.jpg
    20260915_174637.jpg
    1.6 MB · Views: 3
  • 20260915_174649.jpg
    20260915_174649.jpg
    1.3 MB · Views: 3
  • 20260915_174706.jpg
    20260915_174706.jpg
    1.6 MB · Views: 5
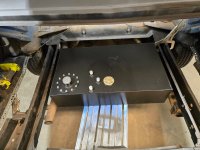
The fuel cell arrived today, so now I can continue the mockup. I set the fuel cell on a step stool to hold it in place while I figured out the placement. I've got it located, so now it's just a matter of making the second crossmember and the actual mounting pieces. I'll get to that soon.

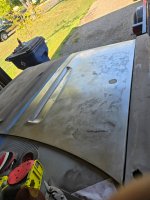
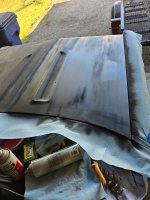
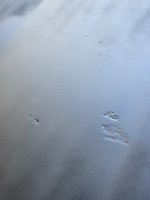
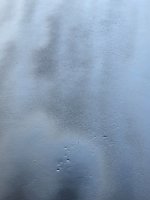
In the meantime, I finally had enough of what looked like the lunar surface on the steel hood. By the look of it, I thought someone had laid something on top of fresh paint, but that was only half true. If the paint was the lunar mountains, then the rust pits hidden under the paint was the craters. It took about two hours of sanding, heavy sanding, swearing and sweating.

The hood is only half done, but the other half will have to wait. My arms are now in talks with my back about unionizing and filing a hostile work environment complaint...
 

Attachments

  • 20260916_134902.jpg
    20260916_134902.jpg
    1.4 MB · Views: 9
  • 20260916_164346.jpg
    20260916_164346.jpg
    2 MB · Views: 9
  • 20260916_162216.jpg
    20260916_162216.jpg
    1.7 MB · Views: 6
  • 20260916_163701.jpg
    20260916_163701.jpg
    1.9 MB · Views: 4
  • 20260916_163806.jpg
    20260916_163806.jpg
    1.5 MB · Views: 5
  • 20260916_163814.jpg
    20260916_163814.jpg
    1.8 MB · Views: 5
  • 20260916_163833.jpg
    20260916_163833.jpg
    1.1 MB · Views: 9
Last edited:
Unfortunately that seems to be the case here. On the bright side, I had already planned to swap the steel hood for a fiberglass AAR one. The steel one, while ugly under the paint, is otherwise pretty solid. I'll just fill the pits and few minor dings with body filler for now.

That red fiberglass hood my friend gave me is now going to be used as a wall art memorial. He's the one that passed away recently and I want to preserve the history on it.
 
A friend stopped by today to lend a hand and help me figure out the welder.

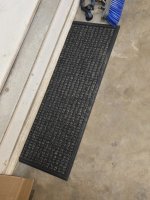
First thing we did was to cut the tank padding strips from the rubber floor mat I picked up. There was still enough material left over to use as a half-step mat in front of the garage interior door.

We taped the cut strips to the bottom edge of the tank to get the actual width for the lower brackets. Then I cut the two lower mounts from a piece of 1/8"x1.5" angle iron and used ratchet straps to temporarily secure them in place. I then cut two connector pieces from a piece of 1/8"x1-1/4" flat bar and drilled the ends for the all-thread mounting studs. My friend cut four 3" long pieces of black pipe that will sit over the all-thread, preventing any chance of the threads contacting the tank sides. The length of those pipe pieces will be cut back, if needed, once everything is welded and assembled. I'm also going to notch the bottom edges of the pipes, so any moisture that gets in from the top will have a way out. Next up, I made the second crossmember, identical to the first, except that it was 1/4" narrower where it sat between the subframes. Last pic shows where the tank will sit, side to side and front to back, but the tank top will be sitting 3" below the floor. That will allow the hose fittings and sender wiring room to sit on top of the tank and remain out of sight. I'm going to use an E-body filler neck floor gasket where the fill tube passes through the floor.

We didn't get to touch the welder at all before my friend had to leave, but there was still a ton of progress today, so... still a win.
 

Attachments

  • 20260918_130625.jpg
    20260918_130625.jpg
    1.9 MB · Views: 5
  • 20260918_130753.jpg
    20260918_130753.jpg
    1.1 MB · Views: 5
  • 20260918_130555.jpg
    20260918_130555.jpg
    2 MB · Views: 5
  • 20260918_130547.jpg
    20260918_130547.jpg
    2.3 MB · Views: 4
  • 20260918_140104.jpg
    20260918_140104.jpg
    1.8 MB · Views: 4
  • 20260918_140825.jpg
    20260918_140825.jpg
    2.1 MB · Views: 5
Those E-bodies are good for something!

Quite the project there, so glad all I had to do was stick in a new stock gas tank!
Way beyond my skill set!
 
I could have just tossed the factory tank back in if I had wanted to, since it's actually in like new condition. I mostly just wanted to take advantage of the space freed up by removing the spare tire well. Plus I like getting creative with fabricating custom stuff.
 

SiteLock

SiteLock
Back
Top