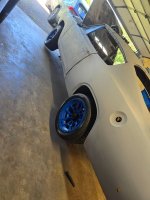
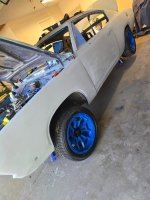
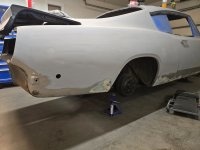
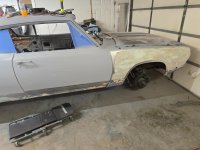
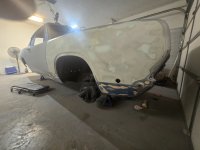
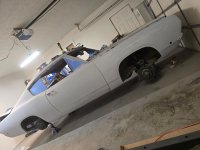
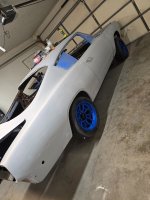
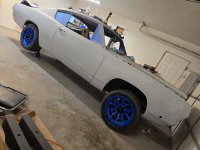
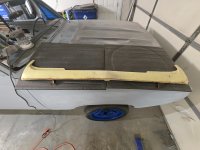
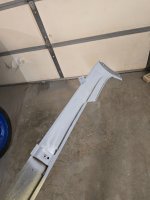
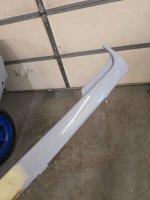
69 Barracuda FB. The next evolution

Not much left, and there's still more metal that needs to come out. The right side trunk drop off might be saveable with some patching, IF it's solid enough to weld to.

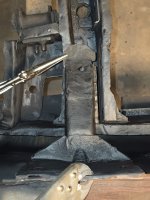
I haven't found any reproduction parts for those bumper mount support wedge pieces anywhere. I'm going to have to straighten and repair them before I put them back. The same goes with the trunk latch mount that got ripped out when we were unloading the car. At least the trunk mount isn't too big of a worry for me. I'm leaning towards using a pin-on style fiberglass trunk lid, so I might not need it at all.

I may just use some flat sheet metal for the floor, in order to omit the spare tire recess. If I do that I can use a larger EFI capable fuel cell in place of the 18-19 gallon factory tank. I'd like to figure out how to get the floor pieces bead rolled a little to prevent oil canning, and keep it looking sorta stockish to the untrained eye.

Although the driver quarter, driver trunk drop off and rear valance appear to be new-ish repops, they were NOT installed very well at all. At least seeing this level of welding carnage makes me feel better about my own admittedly crappy welding. lol

While I was out earlier, I picked up a battery box and a Group 24 battery (750 CCA). The battery is going to live in the trunk for better weight distribution. I'll need to add long battery cables to the shopping list before I can hook it up. And fix the trunk floor where it's going to stay of course.
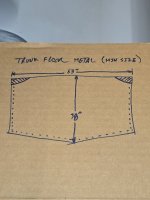
 
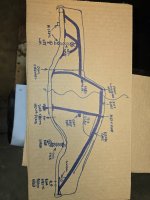
Just making plans. Measured out how big of a piece of sheet metal I'll need to re-make the trunk floor. Then I drew up a rough sketch of the roll cage layout. I still need to sort out the details, especially around the front and rear coil spring mounting points.

I also clamped the rear bumper support bracket back in place to see where it lays on the top of the sub frame rail.
 

Attachments

  • 20260803_174725.jpg
    20260803_174725.jpg
    1.5 MB · Views: 1
  • 20260803_175340.jpg
    20260803_175340.jpg
    2 MB · Views: 1
  • 20260803_174624.jpg
    20260803_174624.jpg
    1.7 MB · Views: 1
Today I talked to a local fab shop about getting them to come out and do the structural welding for the subframe connectors and roll cage. They also can sell me the sheet metal I'll need for the flat trunk floor. I just need to make a template pattern for the new floor. My friend with the race car has a large metal brake I can borrow to make the weld flanges for the floor piece. Since I'm thinking about possibly using a larger capacity fuel cell instead of the factory 18-19 gallon tank, I'm also planning to add a couple square tube cross braces around it. One in front of, and one behind the tank, welding them to the rear sub frame rails and the floor.

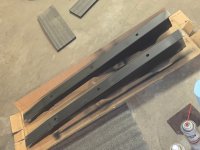
The subframe connectors were oily from the shipping preservative, and also had a tiny bit of surface rust where the pieces were saran wrapped together. After a quick wipe down with brake clean and a 3m scrubby pad, they got a coat of the rust converter paint to preserve the bare metal until they can be welded in place. After they're welded to the front and rear subframes, I'll be able to cut out the front floors.
 

Attachments

  • 20260804_140119.jpg
    20260804_140119.jpg
    1.5 MB · Views: 1
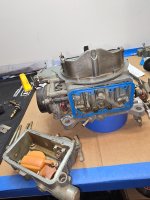
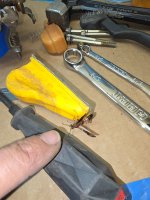
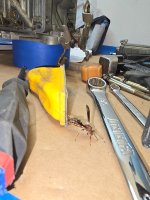
I went back to taking the Holly apart this evening. The front float bowl had a blue non-stick gasket in it this time, so that made it a lot easier to deal with. The gasket between the metering block and the main body appears to be one of the stubborn older type ones though. I stopped trying to pry the metering block off before something broke. I'll try soaking it in the parts washer tomorrow to see if that softens the gasket some.

I also had a little helper hanging around and watching me work for about an hour. 🐝
 

Attachments

  • 20260804_182347.jpg
    20260804_182347.jpg
    1.5 MB · Views: 2
  • 20260804_194645.jpg
    20260804_194645.jpg
    1.6 MB · Views: 2
  • 20260804_194707.jpg
    20260804_194707.jpg
    1.4 MB · Views: 2
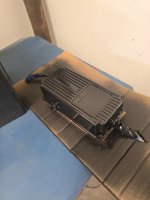
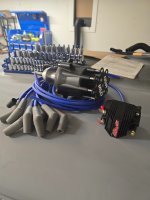
Since I'm going for a mostly blacked out engine, I gave the used MSD 6AL box a respray with black paint to get rid of the MSD red. I also picked up a new black MSD cap and rotor kit, black MSD Blaster SS coil and a set of DIY blue spark plug wires. The air cleaner I ordered is also blue, but it probably won't get here till next week. That's fine since I still have to finish the Holly rebuild and install before it has anywhere to sit.
 

Attachments

  • 20260806_134632.jpg
    20260806_134632.jpg
    1.3 MB · Views: 1
  • 20260806_134734.jpg
    20260806_134734.jpg
    1.7 MB · Views: 1
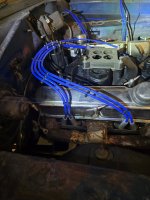
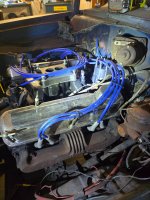
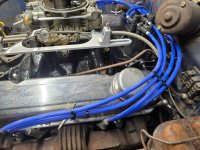
I need to go pick up a large socket so I can roll the engine over to TDC before I set the distributor in for good. For now, I ran the spark plugs the way I wanted them to go, but left the distributor ends loose. They'll get clipped to length and booted later. At the spark plug ends, I labeled each wire with it's corresponding cylinder number. The other ends of the wires get labeled after those ends are done. I also used the cable tie trick to keep the wires separated and the routing neat.
 

Attachments

  • 20260806_144234.jpg
    20260806_144234.jpg
    1.8 MB · Views: 4
  • 20260806_145035.jpg
    20260806_145035.jpg
    2.4 MB · Views: 4
Go right ahead. 👍 I've been using the zip-tie trick for a long long time. I'm pretty sure I saw it on someone else's car and liked how it looked, so started using it on my cars.
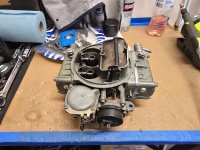
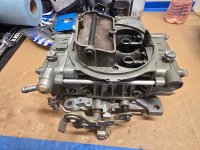
 
Lots of errands today, and had a few car club friends over for a cookout, so not much to report today. I did finally get the metering block off of the carb body after soaking it in mineral spirits for a couple days. It still fought me tooth and nail though. When it pulled apart, the gasket was soaked completely through, so even wet, it was still a royal pain to deal with. The gasket remnants even fought me and held on to the metal with every molecule it had.

Ok, that's enough of the whining, so back to the actual progress now.

With the gaskets gone, I went over the sealing surfaces with a 3M pad to give them a final buff. Then I used a can of carb cleaner to blow out all the passages and confirm they were all clear. The O-rings on the fuel transfer tube were replaced with new ones made of viton. Next the rear metering plate and float bowl, and the front metering block and float bowl were reattached using the blue non-stick gaskets. All I have to do to the carb now is replace the body to throttle plate gasket.

Given the condition of the insides of the carb I found so far, I may just try to run it as-is at this point. It really looks like someone rebuilt this carb a while ago and then just shelved it. Even if I do use it like it is now, I'm still going to go through it to reset all the adjustments to base line settings first.
 

Attachments

  • 20260808_212215.jpg
    20260808_212215.jpg
    2 MB · Views: 1
  • 20260808_212240.jpg
    20260808_212240.jpg
    2.1 MB · Views: 1
I rounded up a few small parts today. Just some small nuts and bolts for the 360.

Then I installed the distributor, using the freshly repainted clamp I picked up from Ebay. I made sure to rotate the engine to TDC before stabbing the distributor home, and making sure to point the rotor to the #1 cylinder.

Next was building the spark plug wires. I trimmed each wire to the individual length required before terminating the distributor ends. They are routed so the wires follow a smooth, but direct, path from plug to distributor. I made sure the wires avoided the throttle cable and trans kickdown linkage paths.
 

Attachments

  • 20260812_181957.jpg
    20260812_181957.jpg
    2.8 MB · Views: 3
  • 20260812_185636.jpg
    20260812_185636.jpg
    2.3 MB · Views: 3
  • 20260812_185645.jpg
    20260812_185645.jpg
    2.9 MB · Views: 3
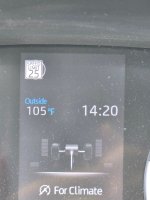
Kinda frustrating day in the garage this evening. Too hot out there to work even with the A/C, so I have to start well after sundown so the temps can drop into the tolerable range. Supposed to be getting hotter through Sunday, with the actual temps being over 100* all weekend. 🥵

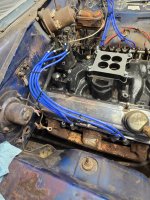
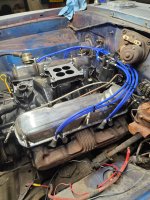
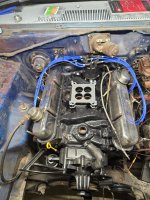
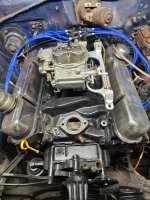
Anyway, first thing I did today was install the carb and the throttle cable/return spring bracket. The existing aftermarket throttle cable was kinda crusty, so I removed the carb attachment end to clean and paint it. There was also a bunch of excess length with the cable housing. To fix it, I pulled the center wire out so it wouldn't get damaged or cut too short. Next I taped, marked and cut the housing down to a better fitting length. There's still enough slack in it to allow for engine movement and maintenance.

Then came the fun part...

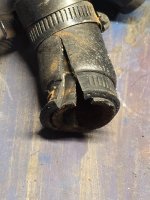
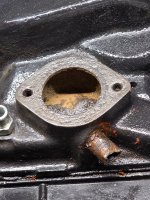
I went to replace the bypass hose between the intake and water pump. The existing hose had started to balloon out pretty bad. The hose clamps weren't too old, so they didn't give me any trouble. Since I wasn't reusing the old hose, I used a razor blade to slice the ends to remove them from the hose nipples. The water pump end looked normal, but the intake side made me do a double take. The hose nipple screwed in below the T-stat was the smaller (5/8"?) size, so rather than swap it out for the right one, someone had put a short piece of smaller hose on it first and then slid the larger hose over that. Once all that was removed, I found the hose nipple was rusted to about half it's original wall thickness and was solidly rust locked into the intake. To get at it to try to remove it, like I did with the other heater hose nipple, the water pump will have to be removed to allow access. I'm not going to reinstall the old water pump if I have to remove it, so add a new pump to the shopping list.

Next up, the thermostat had a bunch of crusty rust flakes down inside it that I couldn't get out with the shop vac. I unbolted the T-stat housing and surprisingly, the housing, T-stat and gasket came off with hardly any resistance. The sealing surface on the intake looked like it had some previous gasket residue under the gasket attached to the housing. When I cleaned the intake surface, there was around 1/16" deep pitting all over the surface. While cleaning up the rust dust from the gasket surface, I noticed a wisker of orange RTV poking out between the intake and engine block right above the timing cover. I trimmed it back, but I was concerned at how much was sticking out. I checked the intake to block gap with a feeler gauge and the gauge slid all the way in with zero resistance. So, now I'm also going to need to pull the intake to reseal it. Given the condition of the T-stat gasket surface, I'm leaning towards replacing the intake now. 🤦‍♂

And on that note, I'm calling it a night... 🙄
 

Attachments

  • 20260814_000945.jpg
    20260814_000945.jpg
    2.4 MB · Views: 3
  • 20260814_000137.jpg
    20260814_000137.jpg
    1.4 MB · Views: 5
  • 20260814_000116.jpg
    20260814_000116.jpg
    2.3 MB · Views: 2
  • 20260814_000108.jpg
    20260814_000108.jpg
    2.8 MB · Views: 2
Yep, it's been getting very creepy lately. :rolleyes:

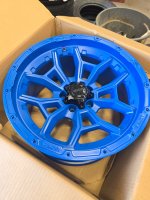
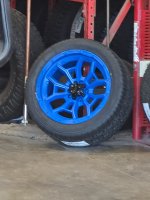
On a lighter note, the wheels will be out of powder coating today. From there they're going straight to the tire shop to get the tires mounted and balanced.
 

SiteLock

SiteLock
Back
Top