69 Barracuda FB. The next evolution

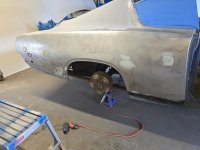
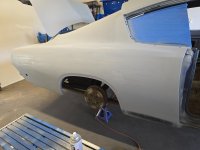
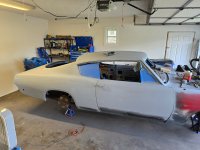
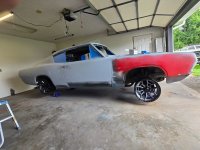
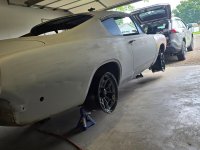
More sanding, priming and sweating out in the garage today. Not necessarily in that order. 😅

I'll go back and hit the lower edges all at the same time. For now they'll have to wait till the store can get more primer sealer in stock. This quarter panel got the last can I had here.

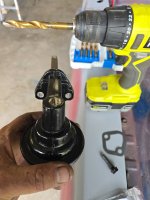
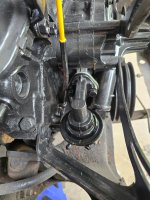
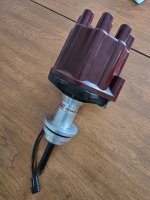
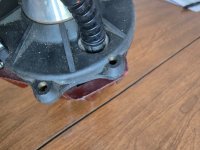
The MSD Pro Billet distributor arrived in the mail today. Apparently the cap on it is from some other distributor as there is an open gap between the cap and distributor body. Sooo... Guess I'll add a new cap and rotor kit as well as a set of HEI style plug wires to the shopping list. 🙄

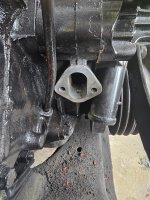
Edit: Looks like I'll also need to pick up a distributor hold down clamp and bolt. The 360 doesn't have one on it.
 

Attachments

  • 20260727_131840.jpg
    20260727_131840.jpg
    1.8 MB · Views: 10
  • 20260727_132504.jpg
    20260727_132504.jpg
    1.4 MB · Views: 9
  • 20260727_132720.jpg
    20260727_132720.jpg
    1.7 MB · Views: 9
  • 20260727_133348.jpg
    20260727_133348.jpg
    1.8 MB · Views: 7
  • 20260727_133404.jpg
    20260727_133404.jpg
    1.7 MB · Views: 8
The dripping of sweat onto the paint was one of the reasons I stopped. 🥵

I can't fit a window unit in the tiny window in the garage. It's only about 12" wide x 18" high. Since I'm renting this place I can't add a mini-split either. I'm seriously thinking about at least getting a stand up portable A/C this payday.
Look for an AC unit intended for a "slideby" window. I have one leftover from my previous house in one of my garages.
 
Look for an AC unit intended for a "slideby" window. I have one leftover from my previous house in one of my garages.
Thanks for the tip. I've never heard of those kind. I'll look into it.

@RUSTY Cuda So far so good. I'm going to lay on the creeper and go around the entire bottom all at one time. Gotta get more primer first though.

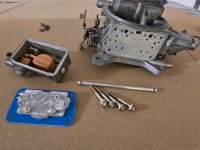
Spent a little time this evening out there working on the Holly. It's cooled down enough that it's manageable in the garage with the fan.

First impression is that I probably could have bolted this carb on and ran it as is. So far I've just pulled the rear bowl down to the metering plate surface. Unfortunately it had the old style gaskets, so it took a while to, piece by itty bitty piece, remove all of the gasket. That's all for tonight, so I'll get back onto the carb rebuild tomorrow.
 

Attachments

  • 20260727_224507.jpg
    20260727_224507.jpg
    1.4 MB · Views: 3
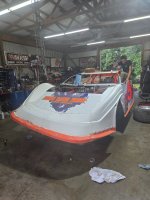
I didn't get anything done on the car today, but I was out helping a friend with his race cars. He's prepping the main car to drop in a freshly rebuilt 6.4L Hemi into his late model circle track car. His backup car currently has a 700+hp alcohol burning 360LA motor in it. :oops:

When he heard about the parts I'm looking for for my 360, he let me have a few of his old parts he wasn't running anymore. A MSD 6AL and a Mallory coil. We were also spitballing ideas for the Barracuda and I may have a few other new ideas for my car now... :cool:

Oh yea, he said the dark red/brownish cap I have on my distributor IS an actual MSD part. We found it listed in his race car parts catalog as a Chevy style female terminal v8 cap. I don't like the gap between the cap and dist body, so it's still getting swapped out for a male HEI terminal style cap. That's primarilly because of the plug wire retainer on the normal MSD male HEI style cap. When I take this thing on rough roads, that wire holder cap will prevent the wires from being able to shake loose.

EDIT: I got a call from the tire shop today. My tires and wheels arrived, so I'll head over there tomorrow and pick up the wheels. I'm going to head to a local powder coating place and drop them off for a little make over. ;)
When they get back from powdercoating, they go back to the tire shop to get the new tires mounted and balanced.
 

Attachments

  • 20260714_184633.jpg
    20260714_184633.jpg
    1.9 MB · Views: 4
Last edited:
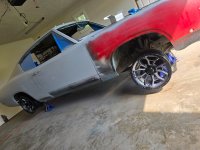
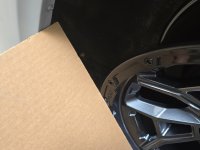
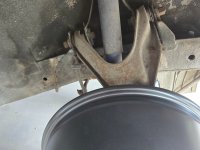
The tires are being held for my at the tire shop while I get the wheels powder coated. Before I dropped them off at the powder coaters, I put the wheels on the car to verify fitment. Looks like the outer wheelhouse clears fine in the rear, as well as the upper A-arm and caliper clearing the rim up front.

Once the tires are on I'll be able get the full picture on the tire to wheel arch clearance.
 

Attachments

  • 20260729_094126.jpg
    20260729_094126.jpg
    1.9 MB · Views: 8
  • 20260729_094207.jpg
    20260729_094207.jpg
    1.7 MB · Views: 4
  • 20260729_094225.jpg
    20260729_094225.jpg
    1.6 MB · Views: 5
  • 20260729_094305.jpg
    20260729_094305.jpg
    1.2 MB · Views: 4
  • 20260729_094322.jpg
    20260729_094322.jpg
    1.8 MB · Views: 7
Last edited:
This morning I headed out to the garage with the intent to pull the gas tank out of the car. Before that I wanted to close an open hole in the 360 by installing the new fuel pump I got last week. Unfortunately the two mounting holes in the fuel pump were too small to fit the original 3/8" diameter bolts. I had to drill the holes out to 3/8" before the bolts would pass through. When I tried to bolt the pump to the engine, the holes were too close together to all the pump bolts to align to the threaded holes. I had to elongate the pump holes, wallowing them out slightly with the 3/8" drill bit. The bolts finally bit the threads in the engine, but they still have a bit of binding, making tightening them down a tedious back and forth process to pull the pump all the way down to the engine. It's done now at least, even if it was a bit of a struggle because of the error in the size of the holes on the brand new fuel pump.

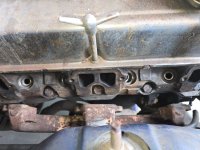
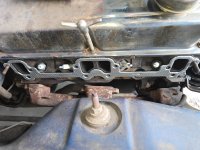
The shipping UPS truck showing up said the gas tank was going to wait a bit longer. The box had general tune up parts (spark plugs, coolant hoses, fan belt) in it from Rockauto. Since the Spark plugs would close up another 8 holes in the block, I wanted to install those next. First, I had to clean up the spark plug holes, and the area around the holes. The heads and exhaust gasket surface areas were gone over as well. After the area was prepped, the plugs were installed without issues. Looking at the spark plug alignment, I've decided to get spark plug wires with 135* boots at the plug ends, and male HEI ends at the distributor.

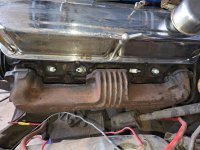
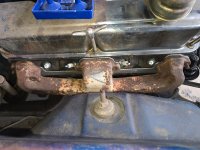
I have new exhaust gaskets, but they,ll have to wait until I pick up a set of exhaust mounting studs/bolts/nuts. In the mean time, I just cleaned the burnt oil and surface rust off of the exhaust manifolds. I'll paint the manifolds after I pick up some high temp exhaust paint.

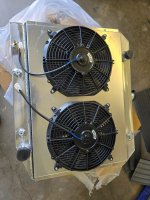
While I was cleaning the engine for the spark plugs, the FedEx truck showed up with the dual fan radiatior I bought from Ebay. I opened the box and inspected the radiator, and everything looked good, with one (not defective) issue though. The fans were mounted with the wires coming out of the top of the fan motors. I prefer them coming out of the bottom, so any moisture that gets on the motor will run off, instead of inside of it. It just took a few minutes to flip the fans 180*. Now I just need some zip-ties to secure the wires so they can flop into the fan belt on the engine.

Definitely not getting to the gas tank now. I'm already way overheated and need to get into the A/C and take some Tylenol for this headache.
 

Attachments

  • 20260730_115321.jpg
    20260730_115321.jpg
    1.3 MB · Views: 2
  • 20260730_120438.jpg
    20260730_120438.jpg
    2 MB · Views: 1
  • 20260730_121802.jpg
    20260730_121802.jpg
    2.3 MB · Views: 2
  • 20260730_123121.jpg
    20260730_123121.jpg
    2.2 MB · Views: 2
  • 20260730_124053.jpg
    20260730_124053.jpg
    2.3 MB · Views: 2
  • 20260730_130050.jpg
    20260730_130050.jpg
    2.4 MB · Views: 1
  • 20260730_130458.jpg
    20260730_130458.jpg
    2.2 MB · Views: 2
  • 20260730_133857.jpg
    20260730_133857.jpg
    1.9 MB · Views: 4
Last edited:
Hmmm, not sure I would have done that to the fuel pump, just return for the proper one.
Just too fishy (yea pun intended) to me!
 

SiteLock

SiteLock
Back
Top