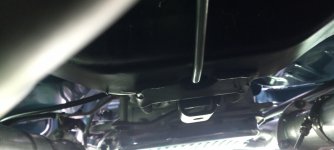
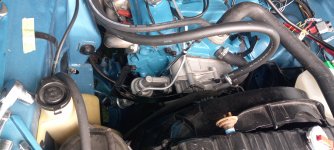
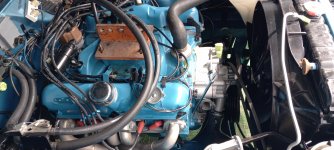
Rusty's not very quiet cuda progress

cars not very high hard to get any leverage under there
It's easy to get leverage when it's raised up a bit, but it's hard to find a place to pry the dumb thing. It's all round so it wants to just slip. And then there's the chasing it back and forth - loads of fun.

Last night I was able to push/pull the thing back and forth with my hands, no crowbar needed. My motor mounts are loose though; not sure how much difference that makes.
 
Doesn’t the insulator have to be peened over in the bracket?

Not sure 74, it moved in & out pretty easy on both old & new mounts?


So after many hours of wailing & gnashing of teeth (Hey Jass!) It's pretty close to where I started, only gain was I got the car up in the front, maybe 1/4 too much, see if it settles again & get it on level ground before I mess with that again.

Did manage to loosen up most of the bolts on the engine mounts, with everything in there it was NOT easy.
The tail moved pretty easy, now I wonder if I even had to loosen them. Anyway at least it's close to straight now! 20240511_131836.jpg20240511_151956.jpgSo after the mount I went back to twisting that angled pipe that goes into the X pipe20240511_141355.jpg
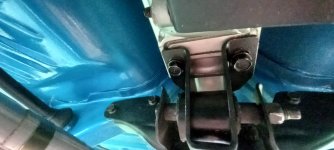
20240511_141411.jpgWith that twist it looked like it would bring it up nice, but they would not line up with the headers! 20240511_143459.jpgquite an angle between the two.
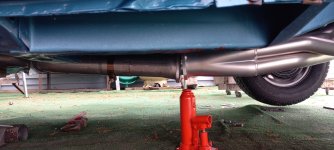
So I got them lined up & ended up back to where I started with the mark! 20240511_152906.jpgDropped it back on the ground have 4" to the header flange & 3 3/4" to the clamp on the low pipe?20240511_152033.jpgStill looks fairly straight? 20240511_153047.jpg
So that leaves the motor mounts, I got a decent pic of the passenger side, does seem to have some wear? 20240511_124035.jpg
drivers side all I could get, can't see much. 20240511_124120.jpg
Could they let the engine tilt like that? Here's the old bushing, it is off center, how much it helped is not even noticeable!
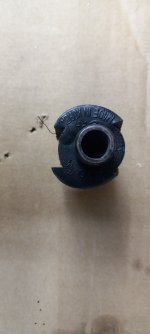
20240511_161816.jpg
 
Doesn’t the insulator have to be peened over in the bracket?
Pretty sure that is for biscuit mounts. If you give up too easily you can end up bending the crossmember to get the mount out, then you have to peen the part you bent back where it came from.

That's like 1/4" steel, it sure seemed like it would be harder to bend than working the mount out without bending it. I was right.
 
Gonna call TTI again this week & see if they have any ideas?

when I jack up the exhaust system to where it all looks perfect you can see it lifting the headers up to a more level position.

I hope it's not the mounts, that's gonna be a truly nasty job with everything in there now.
 
OK, looks like things are coming apart again.
Talked to Jerry Stein about the carb, gotta bring it back up to him, he may have a thermoguad, if so I will see if I can get that? If not try & fix the problems with the carb he rebuilt . He thinks he will have an air cleaner, so that helps a bit!
So with the carb off I have a place to hook up the hoist again, so I will order the motor mounts,
since it looks like some stuff has to come off the engine to change those I might as well start on the A/C kit, since all the brackets have to be changed.
Now since that's all off I will redo the intake manifold to see if I can eliminate the vacuum leak.

???

So I'll order new gaskets, now I need to know what kind of silicone to buy for the front & rear I do not want to do this again EVER!!!!!
 
Your best advice on any gasket or thread sealer is to know what fluids you're going to be in contact with and read the manufacturer's web site to determine compatibility. After that it's mostly a beauty contest.

Also, buy more than you think you will need. Having half a tube left over is better than coming up half a tube short.
 
Started with removing the carb, just for kicks & giggles I put a level on the carb base & it's right on!

called TTI they suggested a spacer between the mount & tranny? He was not sure how much the motor mounts would affect it?

So I'm ordering the intake gaskets, the motor mounts ( lakewood 24096LKW "muscle" motor mounts) & some silicone, permatex 8219x gray RTV gasket maker? (added another tube! )

Going out now to remove the old A/C compressor & anything else that might hinder the mount install.

Parts bench will be filling up again!
 
Last edited:
K alt out & old A/C compressor removed, forgot how heavy that old on is, 20240513_162208.jpg
That gave me a pretty good view of the motor mount, kinda looks a little squshed?
Might be able to do this one from the top? 20240513_162040.jpg
Ordered the parts from summit, they are usually pretty quick on deliveries.

On that motor mount the same co had another option for half the price, I went for the pricier one, what could they make cheaper on it????
Hope I didn't waste another 8 bucks, it all adds up in the end!
 
Last edited:
So how do I get the antifreeze drained lower than the intake, will I get antifreeze in my oil when I pull the intake off? Do I need to pull the bottom hose & pretty much drain it all?
Will that drain from the rad petcock?
 
OK, dummy forgot about the bottom rad hose, so it should drain most of the block.

Parts due in tomorrow, gonna get on the line to jerry about the carb & see when he can take a look.
 
OK, dummy forgot about the bottom rad hose, so it should drain most of the block.

Most of it should drain below the intake if you drain the radiator.
science-thomas-dolby.gif
When you open that up it will drain from the highest point until the level gets to where it has to travel up to go down. Kind of like a P trap.

It won't hurt to pull the bottom hose.


On that motor mount the same co had another option for half the price, I went for the pricier one, what could they make cheaper on it????
I looked at that motor mount and maybe it's made of better rubber or is attached better but there doesn't seem to be anything special that would protect it from pulling apart - which is what mostly goes bad on them.
 
Engine bays going backwards at a furious rate, fuel pump also had to go to get to that mount bolt.
20240514_153454.jpgThe bolt started to round with a regular socket, got lucky & got the air gun socket & managed to get it to start loosening, whew, that would have been a disaster!
So all mount bolts are loosened a little, I'm hoping this can be done without moving the motor too much it looks like I have about 1 inch clearance to the fan shroud!
got the lift plate on but had to jack up the car for the stands on the side, the hoist wouldn't clear them in the front, even that turned into a project, won't get inro the gory details but she's up pretty high now.20240514_153503.jpg
Now I have to see how much of the stuff in the back has to go to do the manifold gasket?


Going hunting for mount bolts now, hope there around somewhere, summit would be great, they come quick.

Got about 1 3/4 gals out of the petcock, a little more dripped out when I removed the alternator bracket, that should be low enough I hope
 
Holy crap, my search abilities are non existant, I can't even find a bolt!

all I've seen come with a nut, mine has the nut welded in the bracket, I guess if I had one out & could measure the thread size & length I might have a chance.
 
Holy crap, my search abilities are non existant, I can't even find a bolt!

all I've seen come with a nut, mine has the nut welded in the bracket, I guess if I had one out & could measure the thread size & length I might have a chance.
The mount you linked to earlier looks like a b-body mount, probably uses the same bolt. Just figure out the thread size/pitch, measure what length you need, and hit the hardware store for a grade 8 bolt and a flat washer.
 
Yep I think that's where I will end up.

Mounts are due in tomorrow, I have a trip to Jerry Stiens tomorrow at noon to look over the carb, see how early I get back, once I get the engine on the hoist & pull a bolt I can go shopping!

Good thing I'm not in a rush, this crap has set me back about a month!
 

SiteLock

SiteLock
Back
Top